Customize toolbars and the components on them
This post is also available in:
![]()
![]()
![]()
![]()
![]()
![]()
![]()
![]()
![]()
![]()
![]()
![]()
Vivaldi is all about customization. Editing toolbars is one of the customization tools that allow you to tailor the browser to your needs.
Move or hide toolbars
Tab Bar
To change the Tab Bar’s location:
- Go to Settings > Tabs > Tab Bar Position.
- Choose your preferred location for the Tab Bar:
- Top,
- Left,
- Right,
- Bottom.
When you move the Tab Bar to the side or bottom of the browser window, buttons like the ![]() Vivaldi Menu, Minimize, Maximize and Close will be merged with the Address Bar as long as it’s at the top of the browser window. When the Address Bar is at the bottom, a title bar with the buttons will be displayed.
Vivaldi Menu, Minimize, Maximize and Close will be merged with the Address Bar as long as it’s at the top of the browser window. When the Address Bar is at the bottom, a title bar with the buttons will be displayed.
To always display the Title Bar when the Tab Bar isn’t at the top of the window:
- Go to Settings > Appearance > Window Appearance.
- Enable Show Title Bar.
To toggle the visibility of the Tab Bar:
- Go to Settings > Tabs and tick the box for Show Tab Bar.
- Go to the
 Vivaldi menu > View and select Show Tab Bar.
 - Type “Tab Bar” in Quick Commands.
- Create a Keyboard Shortcut or a Mouse Gesture for the action.
Address Bar
To change the Address Bar’s location:
- Go to Settings > Address Bar > Address Bar Position:
- Choose your preferred location for the Address Bar:
- Top,
- Bottom.
To toggle the visibility of the Address Bar:
- Go to Settings > Address Bar and tick the box for Show Address Bar.
- Type “Address Bar” in Quick Commands.
- Create a Keyboard Shortcut or a Mouse Gesture for the action.
Panel
To change the Panel’s location:
- Go to Settings > Panel > Panel Position.
- Choose your preferred location for the Panel:
- Left Side,
- Right Side.
To toggle the visibility of the Panel:
- Click on
 Hide/Show Panel button on the left side of the Status Bar.
 - Enable Show Panel Toggle in Settings > Panel > Panel Options and use the toggle to hide/show the Panel.
- Go to the
 Vivaldi menu > View and select Show Panel.
 - Type “Panel” in Quick Commands.
- Use the Keyboard Shortcut F4 / ⌥⌘P.
- Create a Mouse Gesture for the action.
Status Bar
It’s, unfortunately, not possible to change the location of the Status Bar.
To toggle the visibility of the Status Bar:
- Go to Settings > Appearance > Status Bar and select between:
- Show Status Bar,
- Status Info Overlay (for example, shows URLs at the bottom left corner of the window when hovering a mouse cursor over a link on the page),

- Hide Status Bar.
- Type “Status Bar” in Quick Commands.
- Use the Keyboard Shortcut Ctrl+Shift+S / ⌘/.
- Create a Mouse Gesture for the action.
Customize toolbars
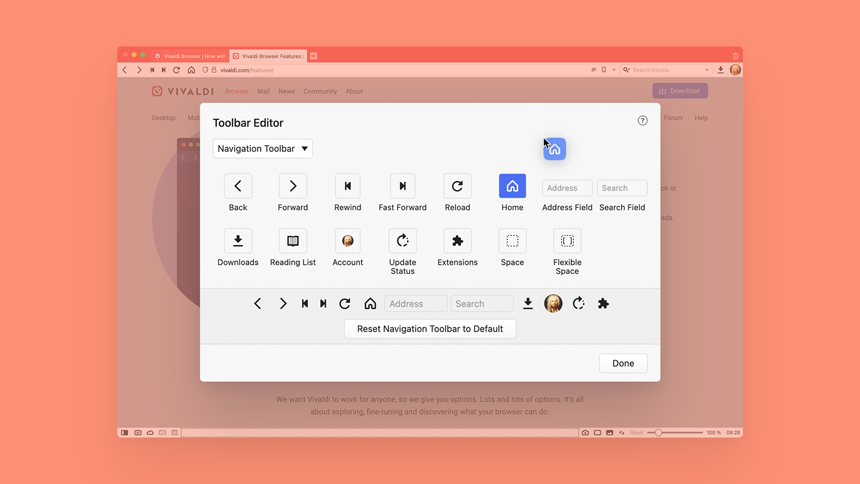
You can add, move and remove any of the components on the Tab Bar, Address Bar, Status Bar, Panels sidebar, Mail Toolbar, Mail Composer Toolbar and Mail Message Toolbar using the Toolbar Editor.
To open the Toolbar Editor, either:
- Right-click on one of the components and select Customize Toolbar.
- Go to the
 Vivaldi menu > View > Customize Toolbar.
 - Type “Customize Toolbar” in Quick Commands.
- Create a Keyboard Shortcut or a Mouse Gesture for opening the Toolbar Editor.

Add components
To add a new component to the toolbar:
- From the Toolbar Editor’s drop-down menu, select the toolbar where the component can be found by default.
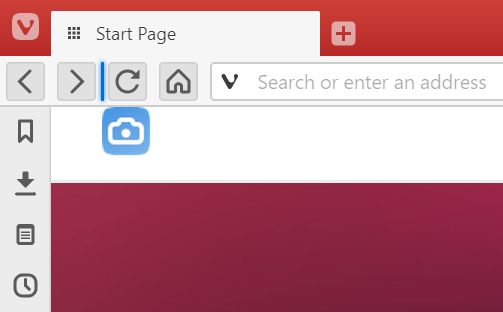
- Pick the component you want to add from the selection and drag it to its new place. A vertical line in your Theme’s highlight color will indicate where the component will be added.

To add components to Mail views, first open the Mail tab or the Mail composer and then open the Toolbar Editor.
Command Chains
In addition to components normally found on the toolbars, you can also add buttons for Command Chains.
To add a button for a chains:
- Create a new chain in Settings > Quick Commands > Command Chains.
- Open the Toolbar Editor.
- From the drop-down menu, select Command Chains.
- Select the chain you want to add as a button and drag it to one of the toolbars.
Move components
To move a component that’s already on the toolbar, hold down the Ctrl / ⌘* key and drag the component to the new location.
*On macOS, release the ⌘ key before you release the mouse button.
Remove components
Option 1
To hide a component from a toolbar, right-click on it > Remove from Toolbar.
Option 2
While you have the Toolbar Editor open, drag the component you want to remove to the area between the toolbar and Toolbar Editor window.
Reset Toolbars
Option 1
Right-click on a toolbar component and select Reset Toolbar To Default.
Option 2
Go to Settings > Appearance > Window Appearance > Toolbar customizations and click on Reset Navigation Toolbar / Reset Status Toolbar.
Option 3
Open the Toolbar Editor, select the toolbar you want to reset and click Reset [toolbar name] to Default at the bottom of the editor window.