Add and manage Calendar events
This post is also available in:
![]()
![]()
![]()
![]()
![]()
![]()
![]()
![]()
Add an event
To add a new event to the Vivaldi Calendar:
- Open the event editor in one of the following ways:
- In the main Calendar view, click on
 New Event in the top left corner of the tab.
 - In the main Calendar view or in the Calendar Panel, click anywhere in the calendar, for example, on the time slot when the event is happening.
If you’re using your keyboard to navigate in the Calendar, press Enter. - In the main Calendar view or in the Calendar Panel, click and drag to set the event’s time and length first. After releasing the mouse button the event editor will open.
- Type “New Calendar Event” in Quick Commands.
- Highlight some text on a web page and select Add as Calendar Event from the right-click context menu.
- Right-click on a message in the Mail list or on the open message itself, select Add to Calendar, and whether to add the message as an event, task, or invite.
- In the main Calendar view, click on
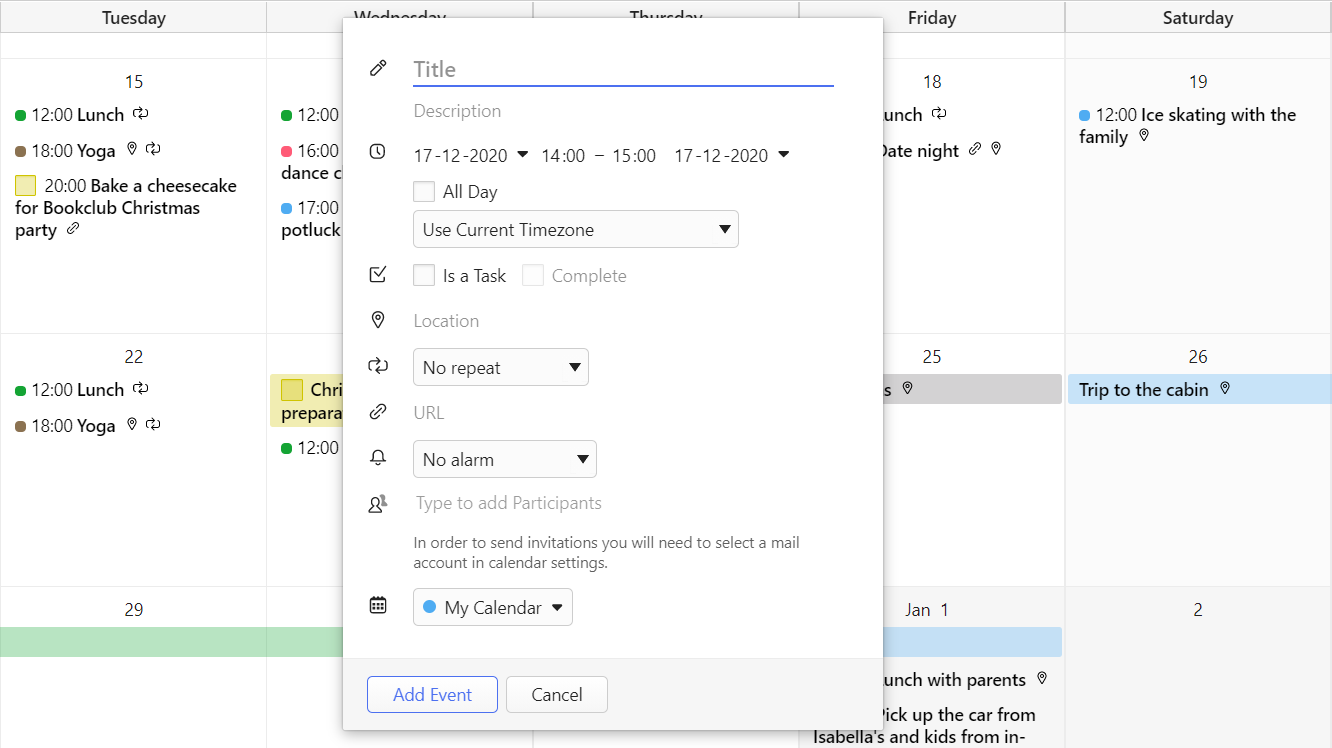
- In the event editor you can add the following information to events:
 Title, description and notes about the event.
 Start and end time and options to convert the event into an all day event and change time zone for the event.
 Option to convert the event into a task.
 Location of the event.
 Make the event recur at chosen intervals.
 Link to additional information about the event.
 Set browser alarms to notify you about the event at the event time and/or before.
 Invite participants to the event.
Invitations are sent via email and for that you need to have set up a mail account in the mail client. Change, to which calendar the event belongs to.
- When you’re finished filling in the information about the event, click Done or press Enter.
Edit mode
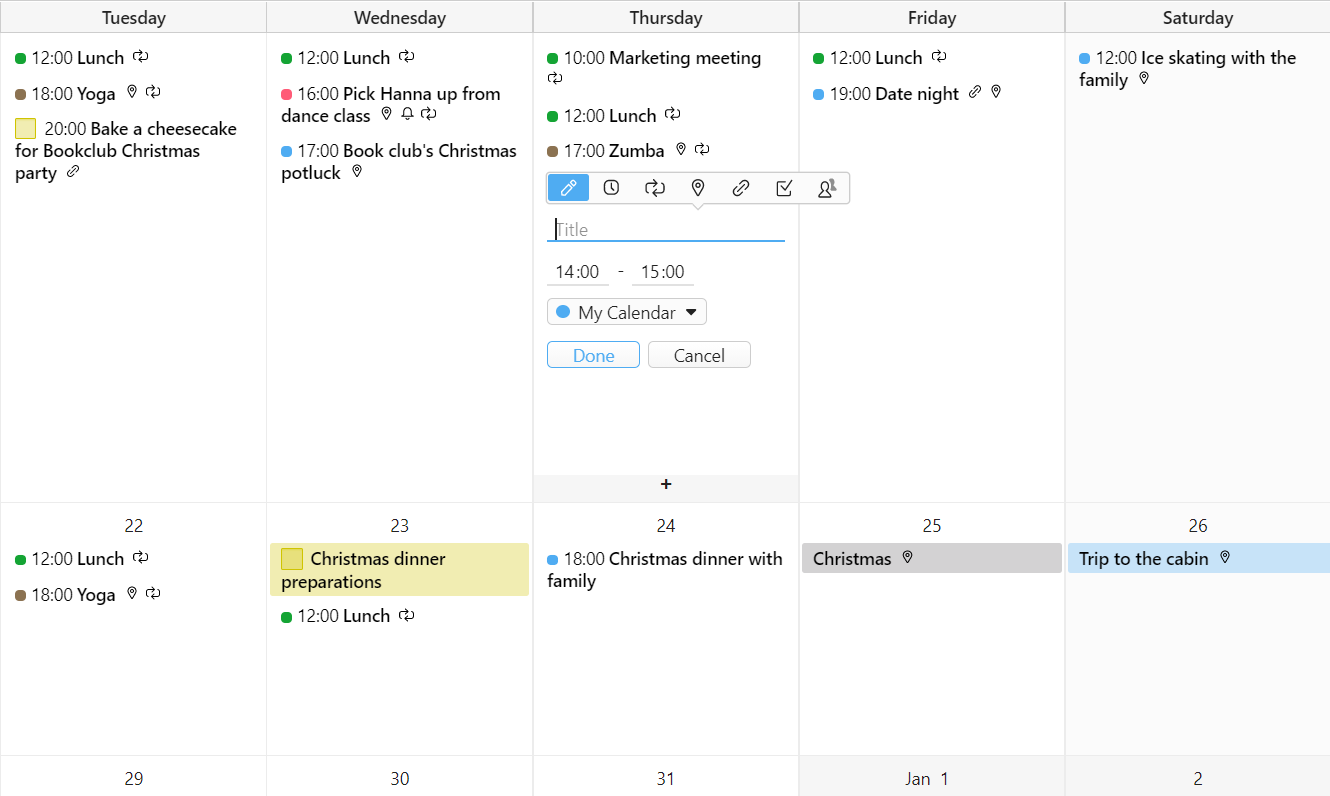
In Settings > Calendar > Calendar Display > Edit mode you can select whether you want to edit events inside the calendar view (inline) with event information divided into tabs, but all surrounding events visible or in a popup dialog with all information about the new event visible simultaneously, but surrounding events hidden by the popup dialog.


For additional customization options check Calendar Settings.
Edit an event
To edit an event:
- Find the event in your calendar.
- Click on it to open the event editor.
If you’re using your keyboard to navigate in the Calendar, press Enter. - Make the changes.
- Click Done or press Enter.
In Calendar Display settings, you can also set clicking outside the event editor to save any changes you made.
Event templates
If you frequently add the same event, but it doesn’t occur regularly, meaning you can’t set recurrence to it, you can use event templates instead.
To create a template:
- Go to Settings > Calendar > Event Templates.
- Click on
 Add Template below the list of existing templates.
 - Fill out the event details.
- Click Save.
Alternatively, you can create a template from the event editor > Templates > Create New Event Template.
To edit an event template:
- Go to Settings > Calendar > Event Templates.
- Select the template you want to edit.
- Click Edit.
- Make the changes
- Click Save.
To delete an event template:
- Go to Settings > Calendar > Event Templates.
- Select the template you want to delete.
- Click on
 Delete Template below the list of existing templates.
First, make sure you’ve set a mail account for Calendar in Settings > Calendar > Calendar Integration > Calendar Mail Account, which will be used to send event invitation emails.
To invite participants to an event, in the event editor:
- Add the invitees’ email addresses to
 Participants.
 - Click Done or press Enter to save the event.
- Choose whether you want to send the participants an email about the event. It’s also possible to include a message to the email.
- If you choose to send a message to the participants, the invitee will then get an email, where they can accept or decline the invitation.
- If they choose to share their attendance status with you, you’ll get a reply email. In the email message, click on Update Event in Calendar to update the participant’s status.
In Settings > Calendar > Calendar integration > Send Invite Email Message, you can choose whether to:
- Always send a message to participants.
- Never send a message to participants.
- Or ask you every time.
Open links from events
Web links in the description or URL field of the event are visible in Compact and Full displays, where more than a title of the event is shown. Learn more about event layout options here. The links will open in a new tab.
When you’re editing the event, you need to copy the URL to the Address field.
Delete an event
To delete an event:
- Open the event and click Delete at the bottom of the event editor;
- Right-click on an event and select Delete event.
- Navigate to the event using your keyboard’s arrow keys, press Delete.
To permanently delete trashed events:
- Open the main Calendar view.
- Click on
 Trashed Events in the top right corner of the tab.
 - Click Clear All at the end of the list.
Restore a deleted event
If you accidentally deleted an event or just want to restore a recently deleted event:
- Open the main Calendar view.
- Click on
 Trashed Events in the top right corner of the tab.
 - Click on the event you want to restore.
To restore the most recently deleted event, right-click on any of the timeslots in the Calendar and select Restore Event From Trash.