Clock on the Toolbar
This post is also available in:
![]()
![]()
![]()
![]()
![]()
![]()
![]()
![]()
![]()
![]()
![]()
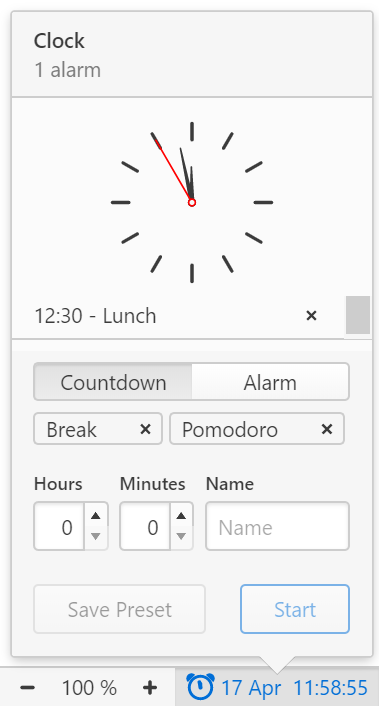
Using the clock, you can set alarms and countdowns or just keep an eye on the time.
Add the clock to a toolbar
Using the Toolbar Editor, you can add a clock to any of the browser’s toolbars.
- Right-click on, for example, the Status Bar and select Edit > Customize Toolbar.
- If needed, select Status Toolbar from the dropdown menu above the buttons.
- Locate the
 Clock in the selection of toolbar buttons.
 - Drag it to a toolbar you want to display the clock on.
- Click Done.
Customizing the clock
To change the look of the clock, right-click on the clock button and select whether you want to:
- Display the date.
- Display seconds, in addition to hours and minutes.
- Change the button style to show either:
- Image and text,
- Image only, or
- Text only.
- Change the label style to show either:
- the Name, or
- Time only.
- Play a notification sound.

To change the location of the clock, hold down the Ctrl / ⌘ key and drag the clock to your desired location.
Setting an Alarm
To set a new alarm:
- Click on the clock.
- Select Alarm.
- Choose from preset alarms or create a new one by setting the time and giving it a name.
- Click Start.
Starting a Countdown
To start a new countdown:
- Click on the clock.
- Select Countdown.
- Choose from preset timers or create a new one by setting the time and giving it a name.
- Click Start.
Creating presets
To create a preset alarm or countdown that you can reuse:
- Create a new alarm or countdown by setting the time and giving it a name.
- Click Save Preset.
If you want to also start the same alarm/countdown, make sure to click Save Preset before clicking Start.
Deleting timers
To delete either a preset, an ongoing timer or a past timer, click on the ![]() button on the right side of the timer’s name. In case you accidentally deleted a preset, you’ll need to set it up again.
button on the right side of the timer’s name. In case you accidentally deleted a preset, you’ll need to set it up again.