Customize the blog
This post is also available in:
![]()
![]()
![]()
![]()
![]()
![]()
![]()
![]()
You can make your Vivaldi blog truly personal by customising it. The Customise page gives you a live preview of all the changes you make to the look and feel of your blog.
To access the personalisation options, go to the blog’s Dashboard > Appearance > Customise. When you’re viewing your own blog, you can go to the Customisation page directly from the top menu as well. Themes, Widgets, and Menus can also be customised on their respective pages.

In addition to the desktop view, you can also get a preview of what the blog will look like on smaller screens – on tablets and smart phones. For a better preview, you can temporarily hide the controls.
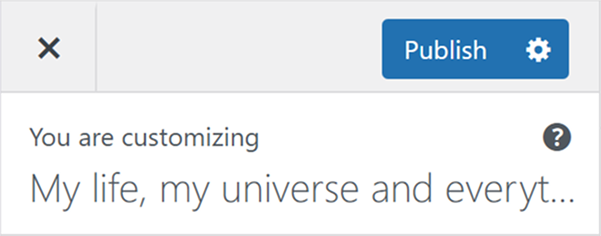
Make sure to click (Activate and) Publish to save all the changes that you made, or X to cancel.
Customisation options
Themes
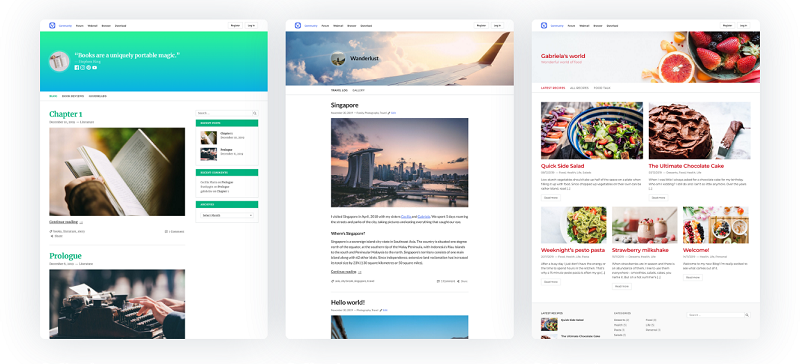
Choose between 3 different layouts for your blog:
- Classic (on the left) – A classic single column blog layout with a sidebar on the right. Add buttons for social media profiles. Choose from a selection of fonts and colour schemes.
- Simple (in the middle) – A straightforward, single-column layout with the option to add widgets to the footer. Add buttons for social media profiles. Choose from a selection of fonts and colour schemes.
- Magazine (on the right) – A straightforward, single-column layout with the option to add widgets to the footer. Add buttons for social media profiles. Choose from a selection of fonts and colour schemes.
Site Identity
Blog title is required when first creating the blog, but here you can change it. You can also add a logo and a tagline or hide everything altogether.
Link Style
You can choose whether you want links in your content to be underlined or not.
Fonts
There are 9 different fonts available to choose from. Different fonts can be used for text and headlines.
Social links
Let readers know on which Social Media platforms they can find you. Social links can be displayed in the blog header or together with the widgets.
Colours
Once you’ve picked a theme for your blog, you can customise it further by changing the colour scheme. You can choose between light, dark and colourful themes.
In addition, you can change the blog title’s colour here, as well as in the Header Image section.
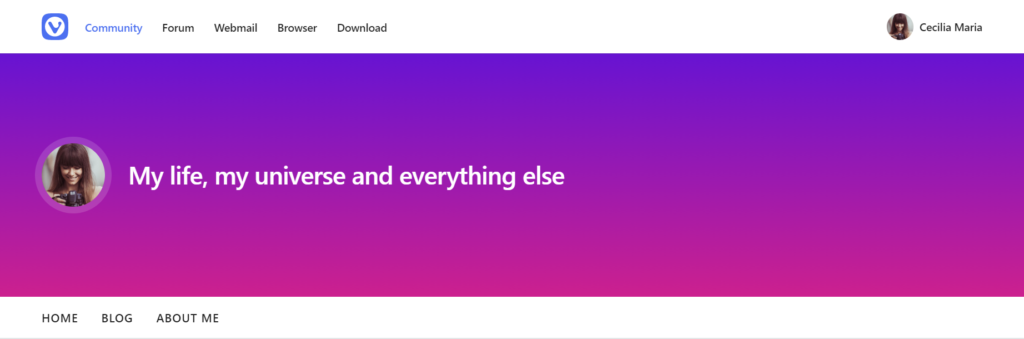
Header Image
You can add an image to the top of the blog as a background image for the title, logo, tagline and social media links, if you’ve chosen to display them.
Pick from the selection of soft gradients or upload your own image.
Menus
To directly link to pages, posts, categories, tags, and URLs add a menu to your blog. The menu will be displayed between the page title/header image and blog content.
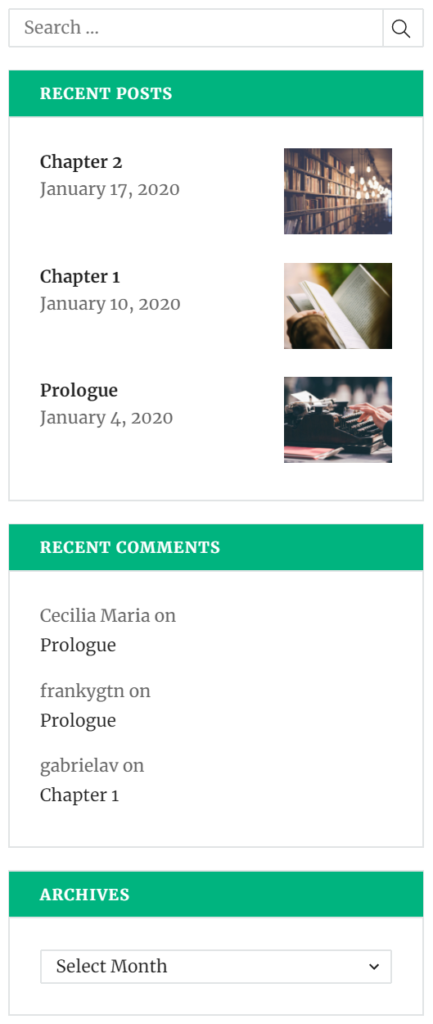
Widgets
Customise your blog by adding widgets that add content and features to your blog. With the Classic theme, widgets will be displayed on the side (see image below). With the Simple and Magazine themes, widgets will be at the bottom of the page.