Capture a Screenshot
This post is also available in:
![]() 日本語
日本語 ![]() Русский
Русский ![]() Français
Français ![]() Español
Español ![]() Deutsch
Deutsch ![]() Nederlands
Nederlands ![]() Српски
Српски ![]() Български
Български ![]() 简体中文
简体中文
Vivaldi’s built-in Capture tool lets you capture either a Full Page screenshot, or a Selection of the screen that you define. It can be accessed in a number of ways through the Vivaldi UI to give you flexibility in how you implement the tool.
Types of Capture
Full Page
A Full Page capture is a screenshot of the full length of a website (max 30 000 pixels). Whether you’re giving feedback on a design, gathering inspiration, or just want to share an interesting site with a friend, this is a great way to get a bird’s eye view in a single image.
Selection
Capturing a Selection lets you focus in on a particular piece of your screen for more precision. After doing an initial selection, you can resize the capture area, before taking the screenshot.
Output of Capture
Whether capturing a Full Page or a Selection, you can choose to save the new snap to your disk for later use, or copy it to your clipboard to share it instantly.
Save to Disk
In the Capture tool you are given options to “Save as JPEG” or “Save as PNG“. When choosing these options, your new screenshot will be saved immediately to your local disk.
Copy to Clipboard
A newly captured screenshot can be copied as an image to your system’s clipboard. This makes it easy to share your new screenshot in other applications and documents immediately; once a screenshot is copied to your clipboard, simply Paste in place to insert the image into the desired location.
Create a new note from the capture
When you save the capture as a note, the screenshot will be saved with the capture date and page URL. The note won’t have a title or any text content, so go to the Notes Panel or Notes Manager to add it.
Access the Capture tool
Vivaldi lets you choose how to use its features, giving you several ways to get something done. Capturing screenshots is no exception. Below we describe the ways which you can access the Capture functionality in your browser.
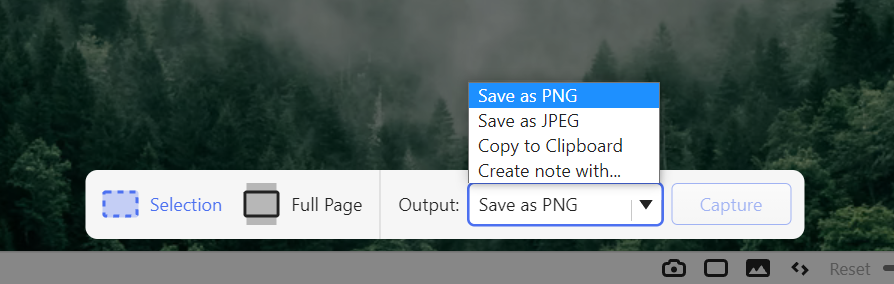
Status Bar
Capture can be accessed in your Status Bar via the camera icon. Clicking on the icon will bring up your options for capturing a new screenshot: Full Page vs Selection, “Save as…” and “Copy to Clipboard“.
Keyboard Shortcuts
Capture functionality can be activated using Keyboard Shortcuts in Vivaldi. This means that pressing a pre-defined combination of keys will fire the associated action (e.g. capturing a Selection screenshot).
To map a custom keyboard shortcut to your preferred Capture method open your Settings and search for “Capture”. The available actions that can be mapped to a keyboard shortcut will display in the search results.
Click into the action you’d like to work with, and type your custom shortcut. The command is available immediately.
- Read more about adding or editing Keyboard Shortcuts
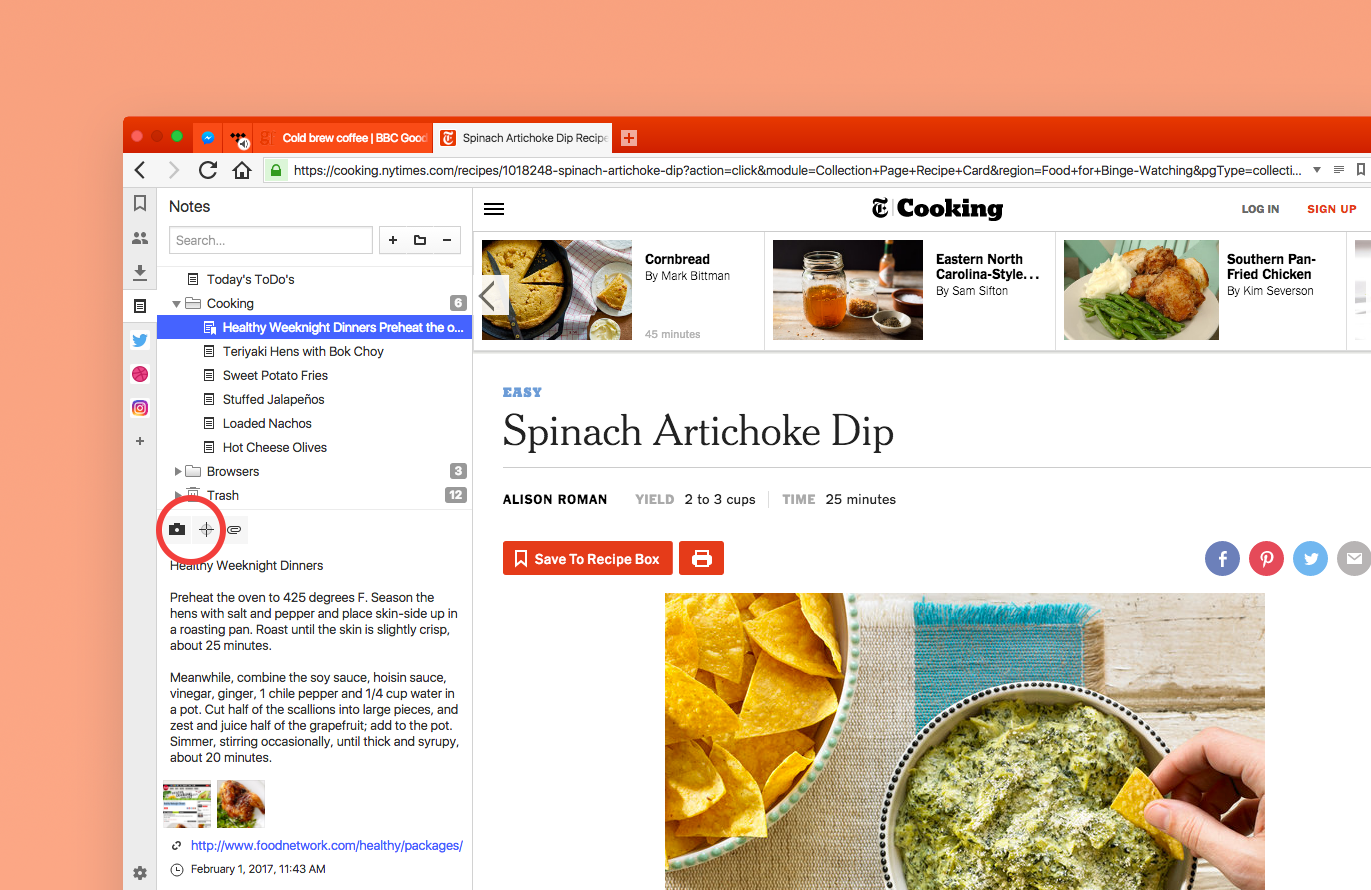
Notes
Vivaldi has a built-in Notes tool which allows you to capture thoughts and ideas while you browse. The Capture tool is integrated directly in the Notes Panel, allowing you to attach screenshots to your notes.
Quick Commands
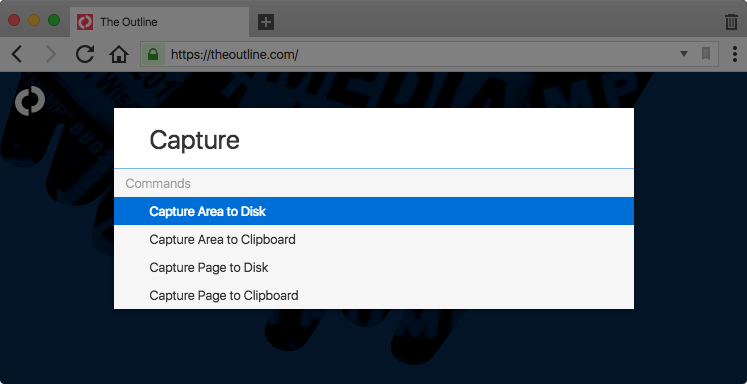
Quick Commands is a tool for users that like to keep their hands on the keyboard. To access the Capture tool via Quick Commands:
- Open Quick Commands by pressing F2 / ⌘ E.
- Enter “Capture” to filter the list of available commands.
- Use ↓ ↑ arrow keys to navigate the list of Capture commands.
- Press Enter to issue selected command, or
- Close Quick Commands by pressing Escape key.
Change the location of saved captures
When you select the option to “Save as PNG” or “Save as JPG“, your capture will be stored at the directory specified in Settings. The location where your captures will be saved can be edited in Settings > Webpages > Image Capture > Capture Storage Folder.
Naming the Capture
Captures will be named automatically, but you can define the format in Settings > Webpages > Image Capture > Capture File Name Template.