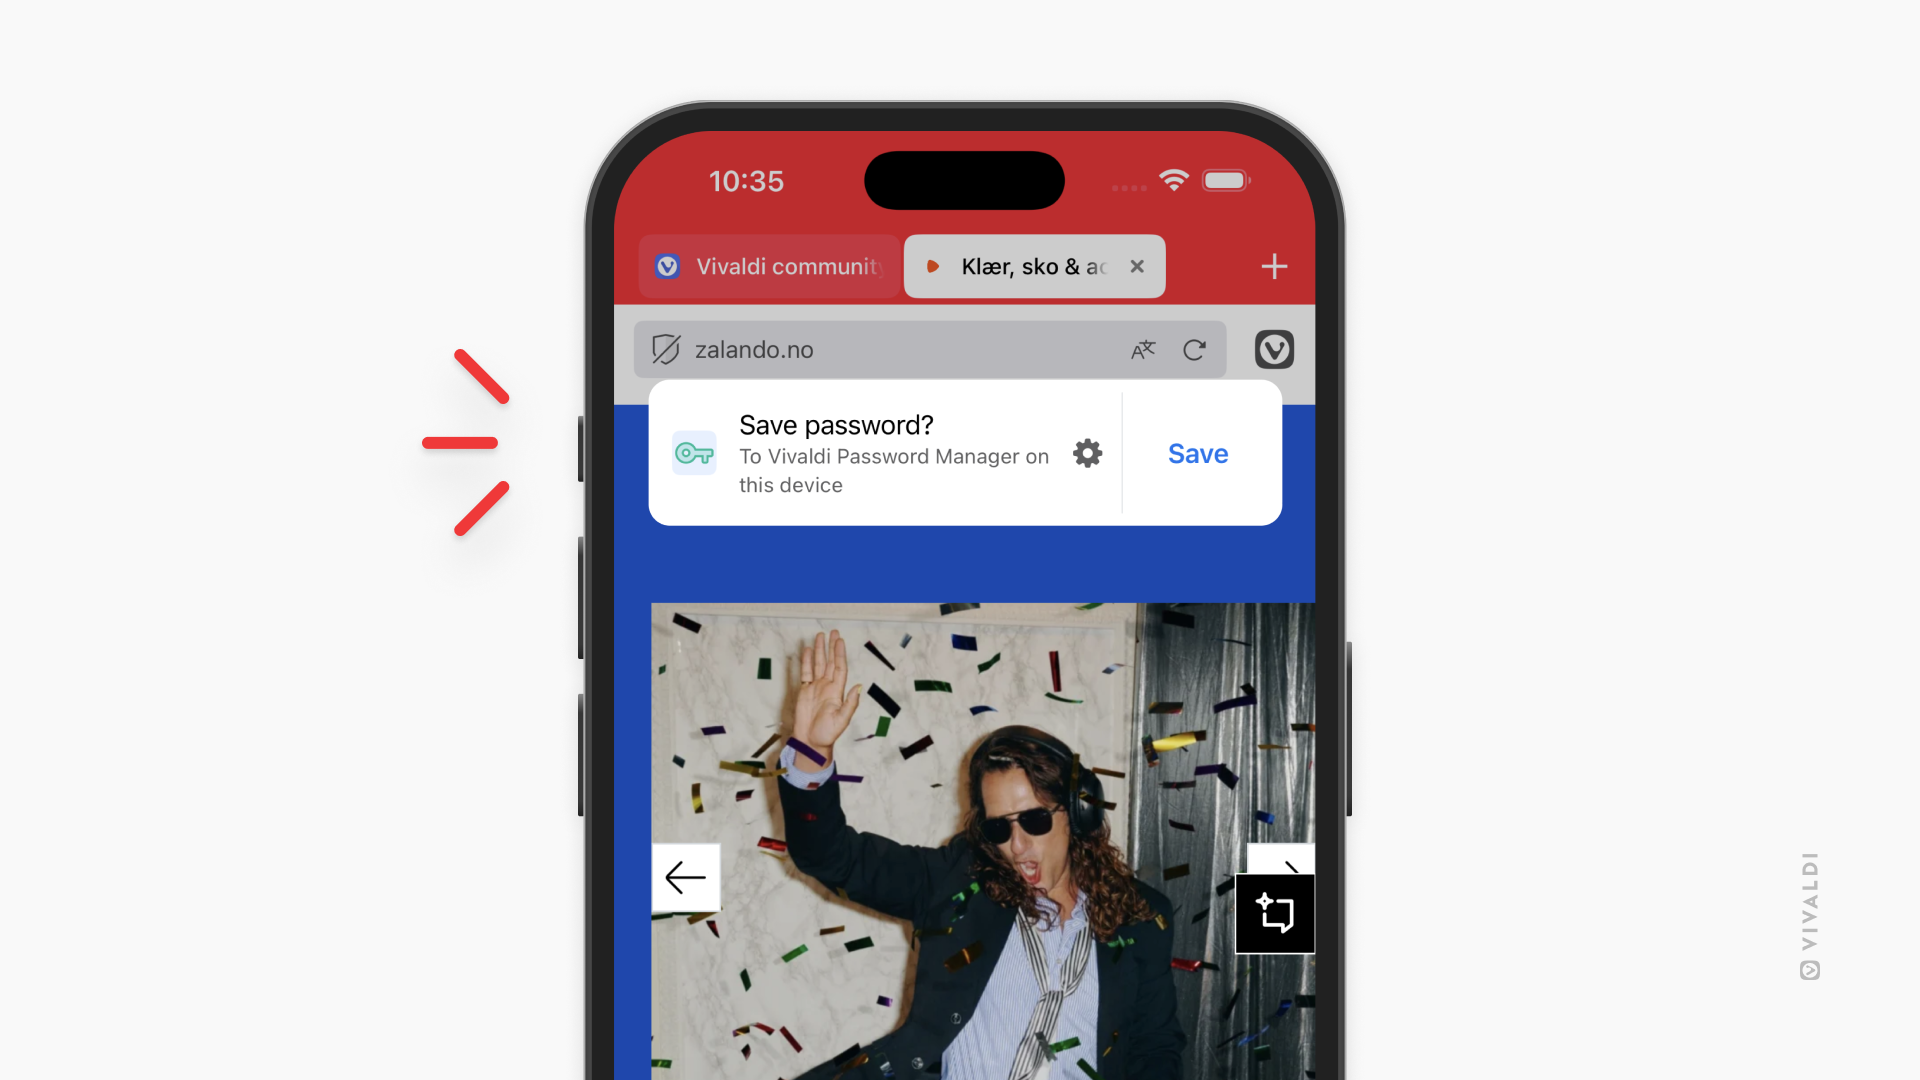
Pop-out Video, aka Picture-in-Picture, is a popular feature on desktop, but did you know it’s also available on Android and iOS? The main difference is that, on your mobile device, you can’t browse other tabs in Vivaldi while Pop-out Video is enabled, but you can use most other apps.
Enable Pop-out Video on iOS
While browsing with Vivaldi, find a video you want to watch.
Press play and enable full-screen view of the video.
Go to your phone’s home screen.
The video will continue playing in a small rectangle on your home screen. You can move the video by dragging it around and use the two-finger zoom gesture to change the size of the video.
Tap on the rectangle to see video controls. Pop-out Video includes controls for:
Pausing the video.
Fast forwarding or rewinding the video by 10 seconds.
Closing the popped-out video.
Returning to the main window.
Due to restrictions set by Google, the feature may unfortunately not work on YouTube’s website.
Vivaldi offers several options to customize your browsing flow in the iOS app. Continue reading to learn about a few of them.
Desktop view
To display a desktop version of the website, instead of the mobile version commonly displayed on smaller screens, open the Vivaldi Menu and select Request Desktop Site.
To permanently display desktop versions of all websites:
Go to Vivaldi Menu > Settings > Content settings > Default site view.
Select Desktop.
Homepage
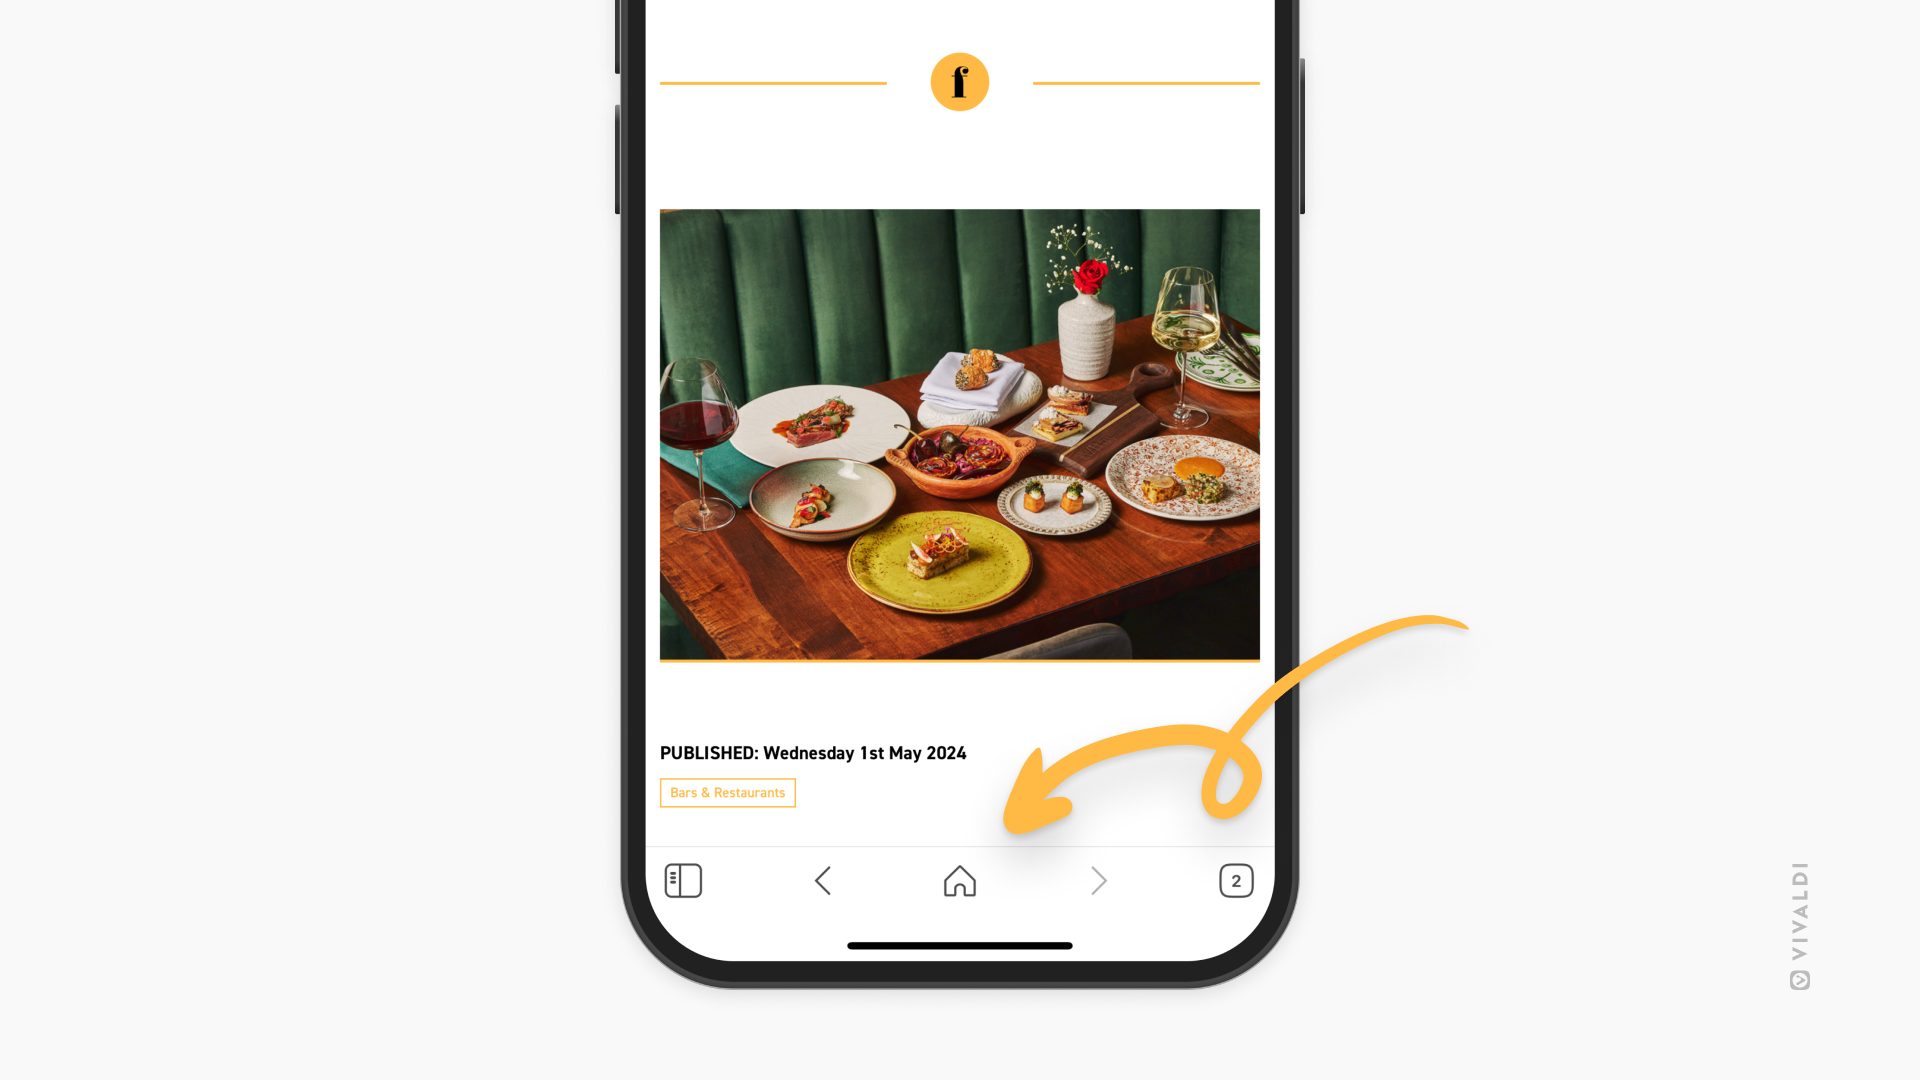
On the bottom toolbar (when Tab and Address Bar are at the top of the screen), you have a choice between two buttons for the middle button. By default, it’s a search button, which will focus on the Address Field, so you can type in the next link or search keyword. The other option is to have a Home button, which will take you to either the Start Page or a website of your choice.
The main Vivaldi Menu in Vivaldi on iOS gives you access to most of Vivaldi’s key features and tools.
Access the Main Menu
Whether you’re using the browser on a small phone screen or a large tablet screen, the menu can always be accessed from the right side of the Address Bar. Just tap on the Vivaldi logo to open it. The options available in the menu depend on whether you have open a web page or the browser’s Start Page.
To close the menu, tap on the feature you want to use or on an area outside the menu.
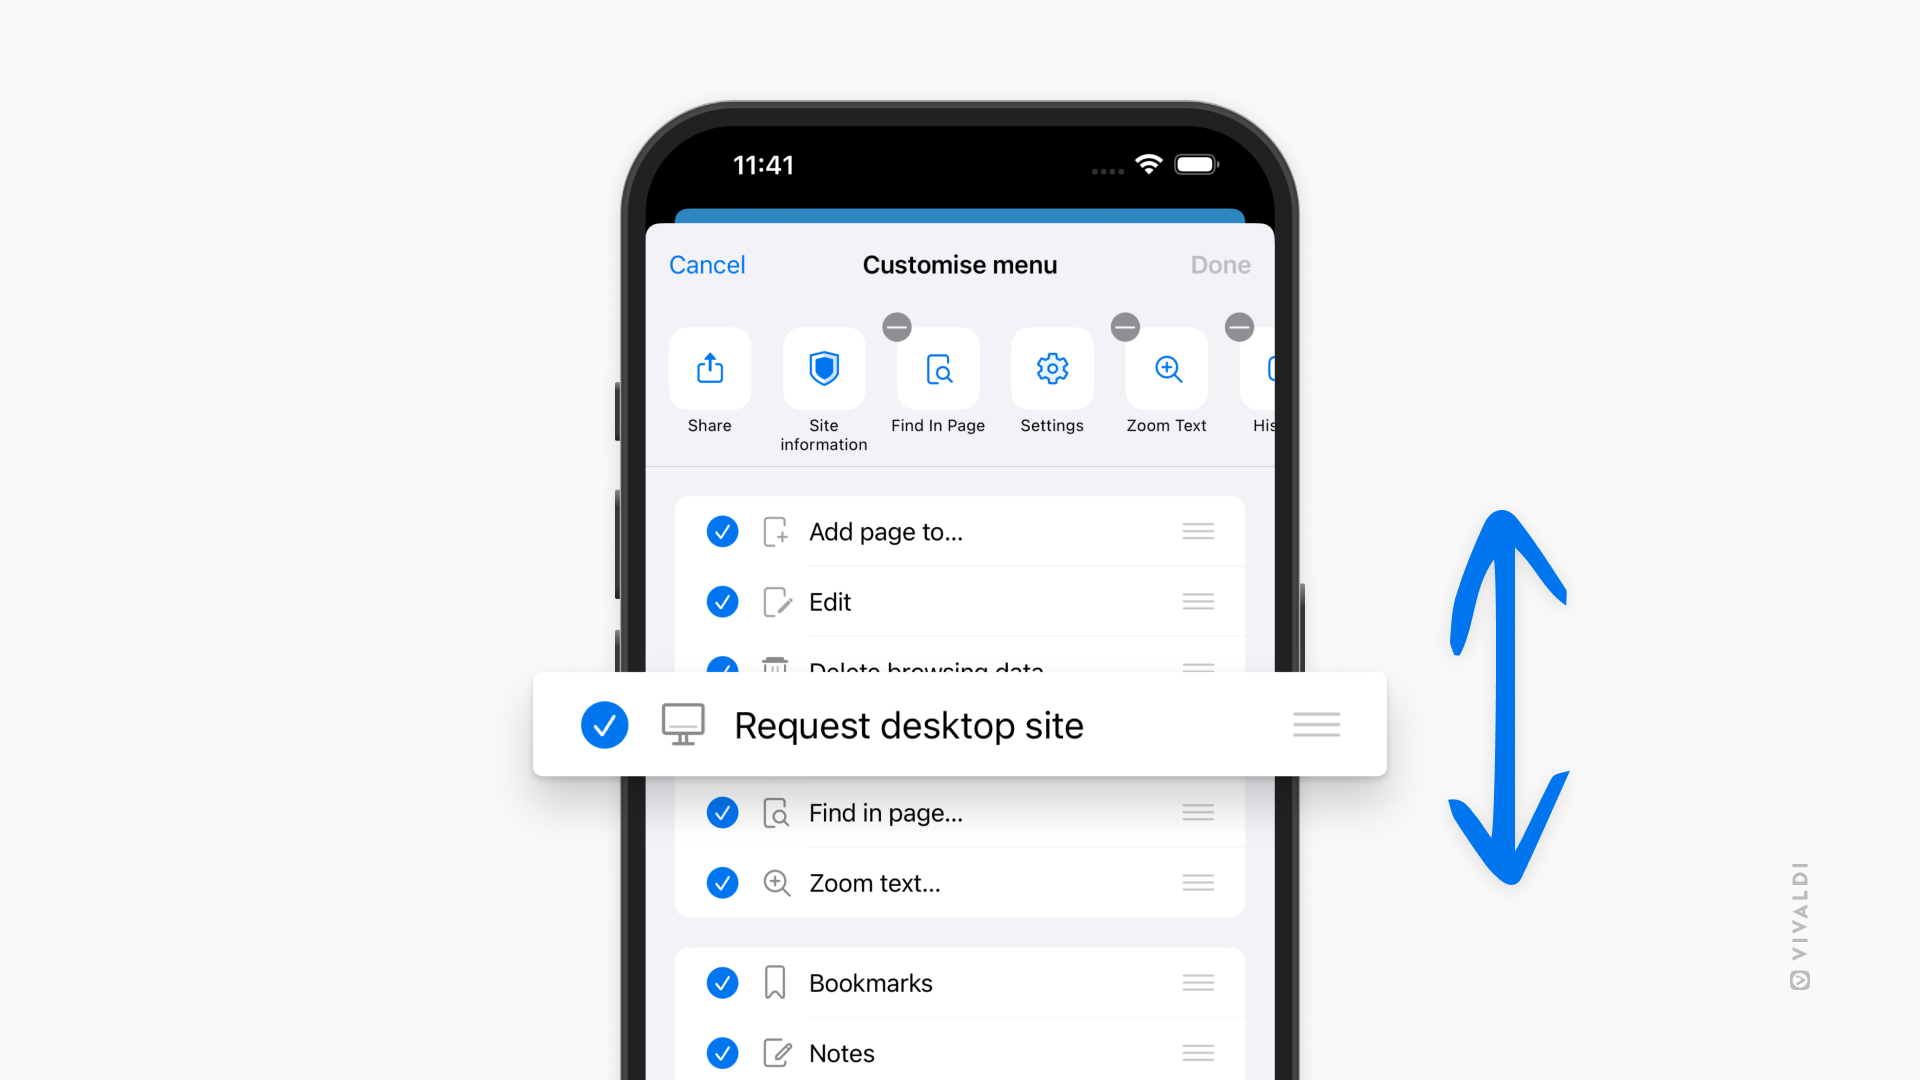
Customize the menu
You can customize the order and visibility of the menu to make sure that the options you use most are always within easy reach.
To customize the menu:
Open the Vivaldi menu.
Long-press on one of the menu options in the top row to open a context menu.
Select Customize menu.
To reorder menu entries:
Long-press on the menu item you want to move. With items in the list, long-press on the three lines on the right side.
Drag and drop it to its new location.
To hide menu items:
On the top row of menu items, tap on the Hide button in the top left corner.
In the list, tap on the checkmark in front of the menu item.
The Webpage widget on the Dashboard loads a normal but slightly restricted webpage. You can make custom optimized widgets by creating a normal webpage.
Webpages loaded as Webpage widgets are loaded using a Mobile User-Agent.
The widget’s viewport is 394×380 pixels (an almost square 39∶38 aspect ratio).
All dialog interactions are disabled, including alert() and Permissions Prompts. The Webpage widget shares security-context and permissions across regular tabs. Your users can grant permissions, like geolocation, in a regular tab to grant that permission to your Webpage widget.
Ensuring Widget Performance
To make your widget performant, it’s important to deploy on-device caching using HTTP Caching. The stale-while-revalidate caching directive can help you achieve a compromise between an instantly-loading widget and up-to-date information.
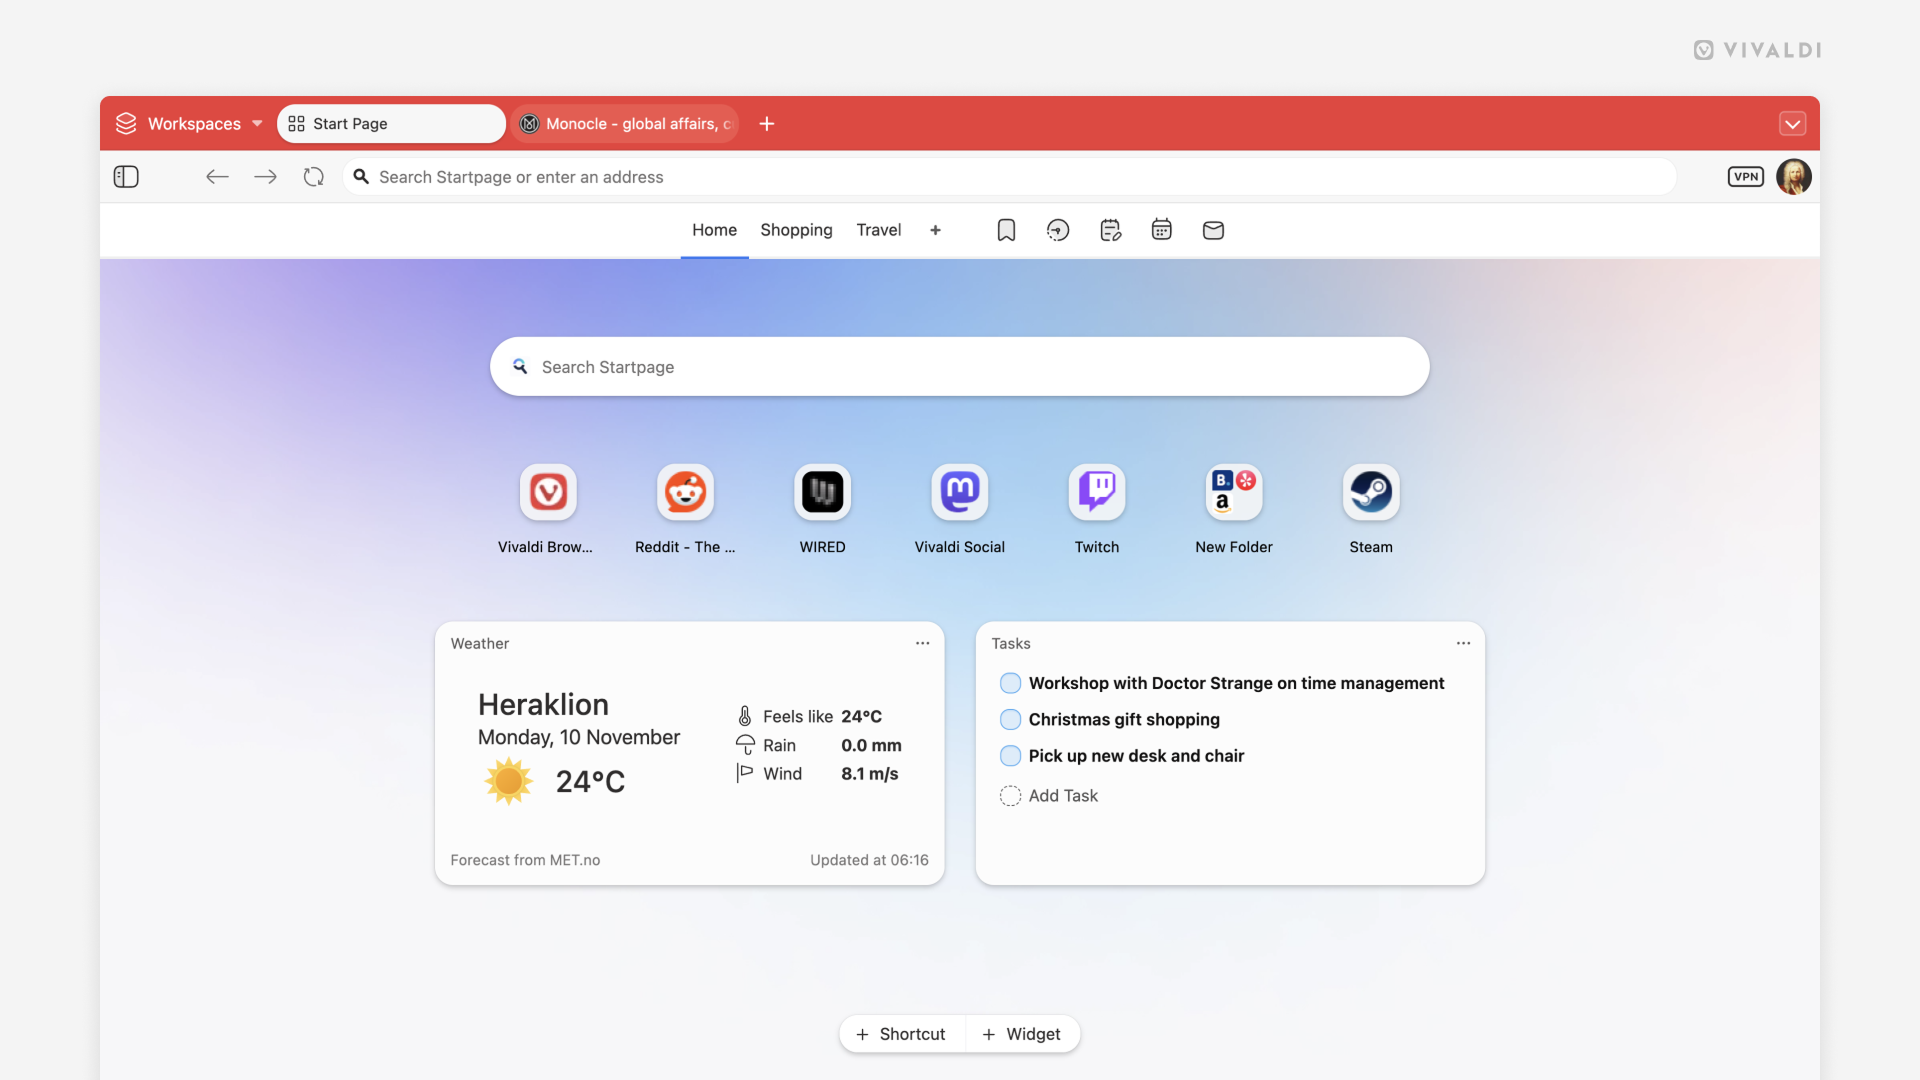
The Start Page is designed to give you full control of your digital life in one centralized space. Its flexibility allows you to create a unique dashboard personalized just for you. Continue reading to learn how to customize the Start Page with Widgets.
Widgets
To add a new widget:
Click on Widgets at the bottom of the Start Page.
Click on the widget you want to add.
If relevant, go through widget-specific options, such as selecting an account or a folder to display.
Some widgets, like Date and Tip of the Day, can be added once, but most can be added multiple times. This allows you to display different content in each widget, such as different email accounts, calendars, bookmark folders, etc.
Calendar Agenda
View, add, and manage your upcoming events from the Start Page.
You can display events and tasks from all calendars in a single widget or add multiple widgets for different calendars.
To change which calendar(s) events are shown from:
Click on Open menu button in the top right corner of the widget.
Select Select Calendar.
Choose the calendar(s) from the dropdown menu.
Click Done.
Latest Emails
Get a glimpse of your latest incoming emails and open them directly from the widget. You can display emails from all your mail accounts in a single widget or add a widget for each account you want to keep an eye on.
To select the mail account:
Click on Open menu button in the top right corner of the widget.
Select Change Folder.
Select All messages or one of your mail accounts.
Click Done.
Sticky Note
Sticky Notes are for quickly jotting down reminders, ideas, and more. You can add as many little notes as you like. Please note that, Sticky Notes are not saved to Notes by default.
To save a sticky note as a more permanent note:
Click on Open menu button in the top right corner of the widget.
Select Save to a Note.
Bookmarks
Keep your favorite bookmarks at easy reach with the Bookmarks widget. You can display bookmarks from a selected folder and add multiple widgets to display different bookmark folders.
To select the folder:
Click on Open menu button in the top right corner of the widget.
Select Select Folder.
Click on the folder name in the sub-menu.
You can also customize how bookmarks are displayed from the widget’s menu. Decide, whether to show the bookmarks’ titles or not, and whether to display the bookmarks’ favicons or thumbnails.
Tasks
Just like in the Calendar widget, you can view, add, and manage your tasks easily from the Dashboard.
Tip of the Day
To learn something new about Vivaldi every day, add the Tip of the Day widget that features desktop tips and tricks from vivaldi.com/blog/tips/. Click on the widget to see the full tip with step-by-step instructions.
Feeds
With the Feeds widget, you can see the latest posts from all the feeds you are subscribed to or display the newest posts from a selected feed.
To select the feed:
Click on Open menu button in the top right corner of the widget.
Select Select Feed.
Select All Recent Feeds or one of the feeds you follow.
Top Sites
The Top Sites widget displays the websites you visit most frequently.
Privacy Statistics
Keep an eye on how many trackers and ads Vivaldi’s built-in Tracker and Ad Blocker has blocked as you’ve browsed online. Click on the widget to see more detailed statistics and a list of blocked trackers.
Webpages
With the Webpage widget, you can view a webpage of your choice on the Dashboard.
To change the link:
Click on Open menu button in the top right corner of the widget.
Select Change Webpage URL.
Enter the link.
Click Done.
Date
From the Date widget, you can quickly see the day of the week, the full date, the week number, and the current time.
Weather
With the weather widget, you can keep an eye on the local weather in the next 24 hours as well as the forecast for the next 7 days.
To customize the Weather widget:
Click on Open menu button in the top right corner of the widget.
Select Change Location to change the locale.
In addition, make your choice for the units of measurement:
Temperature (Celsius or Fahrenheit).
Wind speed (meters per second, kilometers per hour, or miles per hour)
Precipitation (millimeters or inches).
Currency
The Currency widget makes it easy to convert one currency into another, as well as follow the changes in exchange rates over time.
Customize the Dashboard
Columns
The number of columns you see side by side depends on the size of your browser window. You can decide on the maximum number of columns that will be displayed when there’s plenty of space.
Customization is one of Vivaldi’s strong suits. There are many ways you can alter the appearance of the browser, so let’s take a look at what you can change to make Vivaldi look the way you want it.
Layout Presets
The sheer range of settings can be overwhelming, especially to brand new users, so Vivaldi offers 6 layout presets you can choose as a starting point in your customization journey.
You can pick a layout, either:
During onboarding when you’ve opened Vivaldi for the first time (revisit onboarding from the Vivaldi menu > Help > Vivaldi Welcome Tour).
People, who used Vivaldi before the introduction of layouts in Vivaldi 8.0, will see an Autosaved layout they had before upgrading. The Saved layout is your custom configuration, which gets updated with each restart.
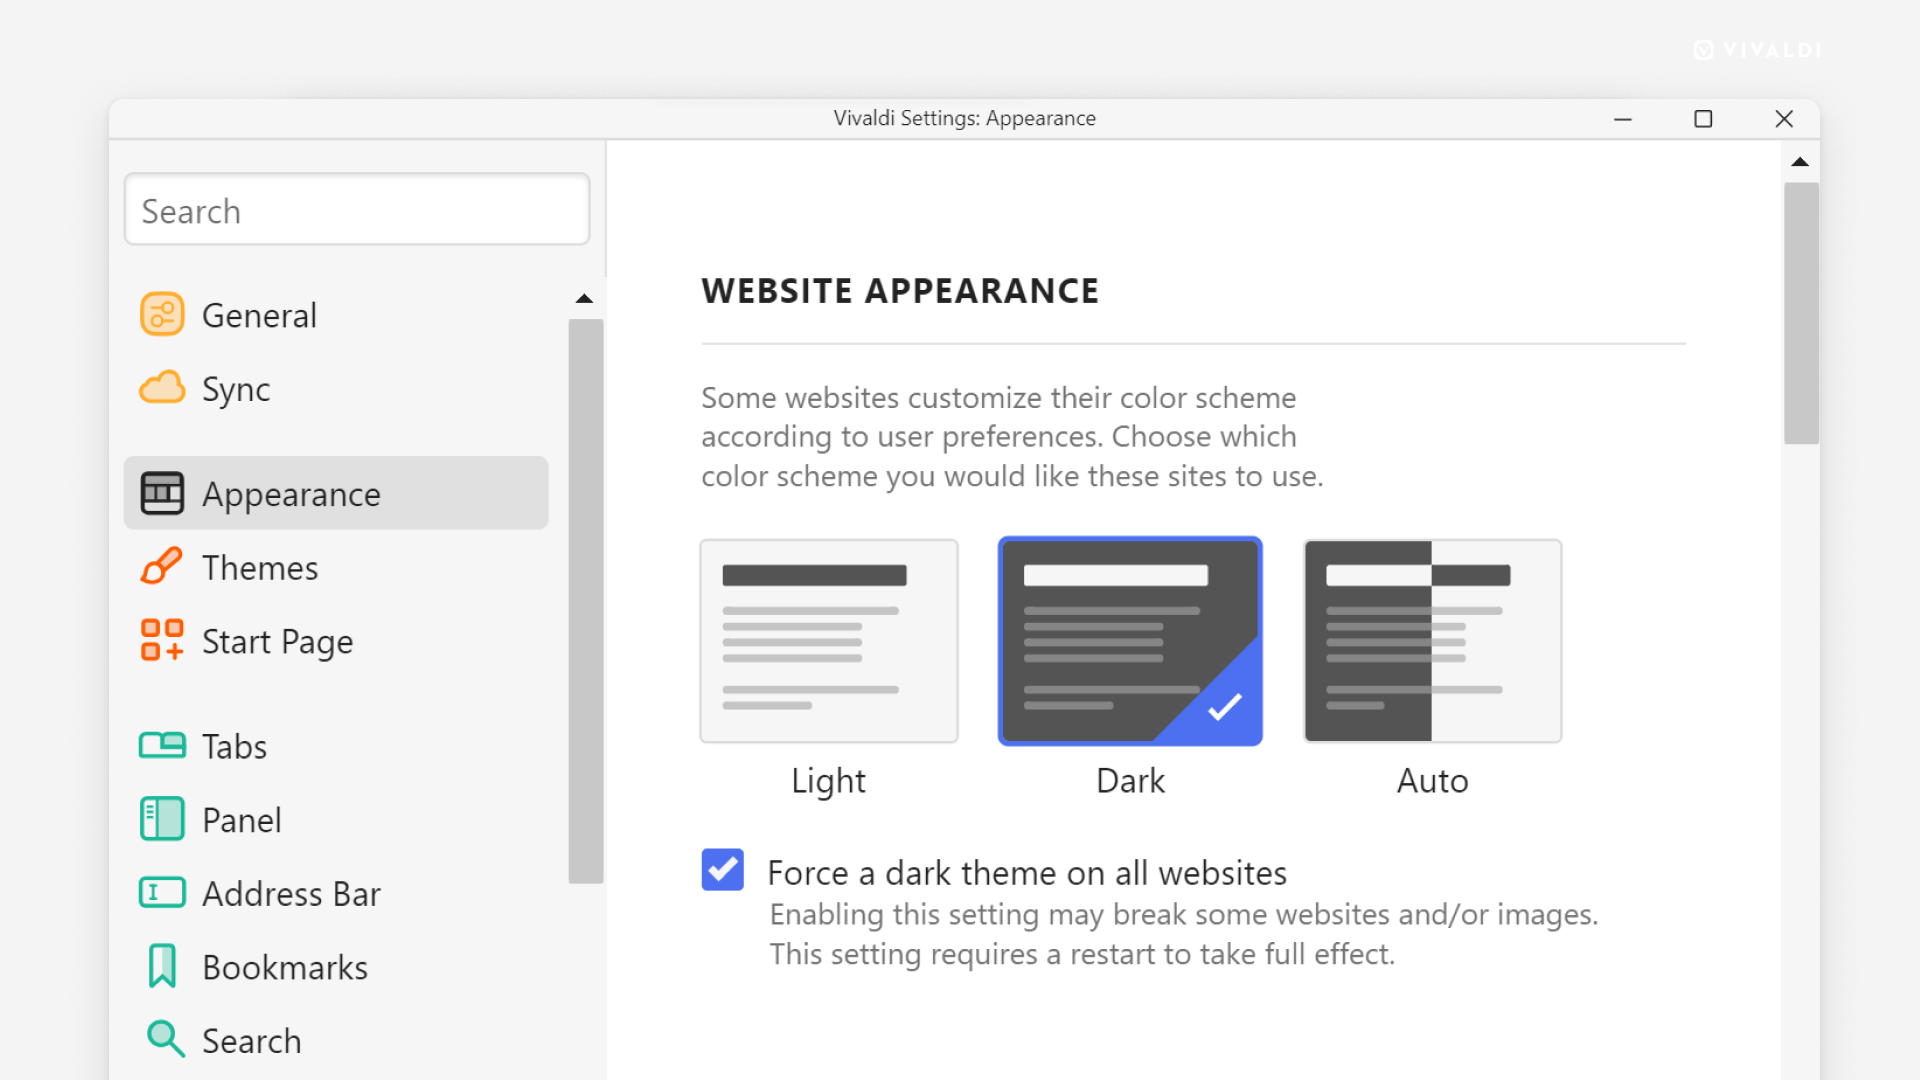
Website Appearance
If you prefer dark themes and want the web page content to match:
Some websites do not offer their site in dark mode. In that case, you can force dark mode, by selecting the “Dark” option and enabling Force a dark theme on all websites.
Window Appearance
To make small changes with a big impact take a look at the following settings.
Open Settings in a Tab
By default, Settings open in a little window of their own, but if you prefer to browse and change settings in a tab:
Go to Settings > Appearance > Window Appearance.
Enable Open Settings in a Tab.
Open Popups in Tabs
Pop-up windows in Vivaldi are blocked by default. If you’ve allowed them either globally or on select sites, you can decide whether to open popups in a new window or a new tab.
When using the Zoom feature or changing some settings, you can change the value using a slider. If you want to change the value step-by-step with more accuracy, you can replace sliders with button controls.
Integrate Vivaldi with the rest of your operating system’s user interface.
Use OS-based window controls.
Display the Active Tab’s full title.
Make use of macOS’ Split View feature.
Show Title Bar
When you have moved the Tab Bar to the left or right side of the browser window, you have the option to show the title of the active tab in a Title Bar, which will also include the Vivaldi Menu button as well as window controls for minimizing, maximizing and closing browser windows.
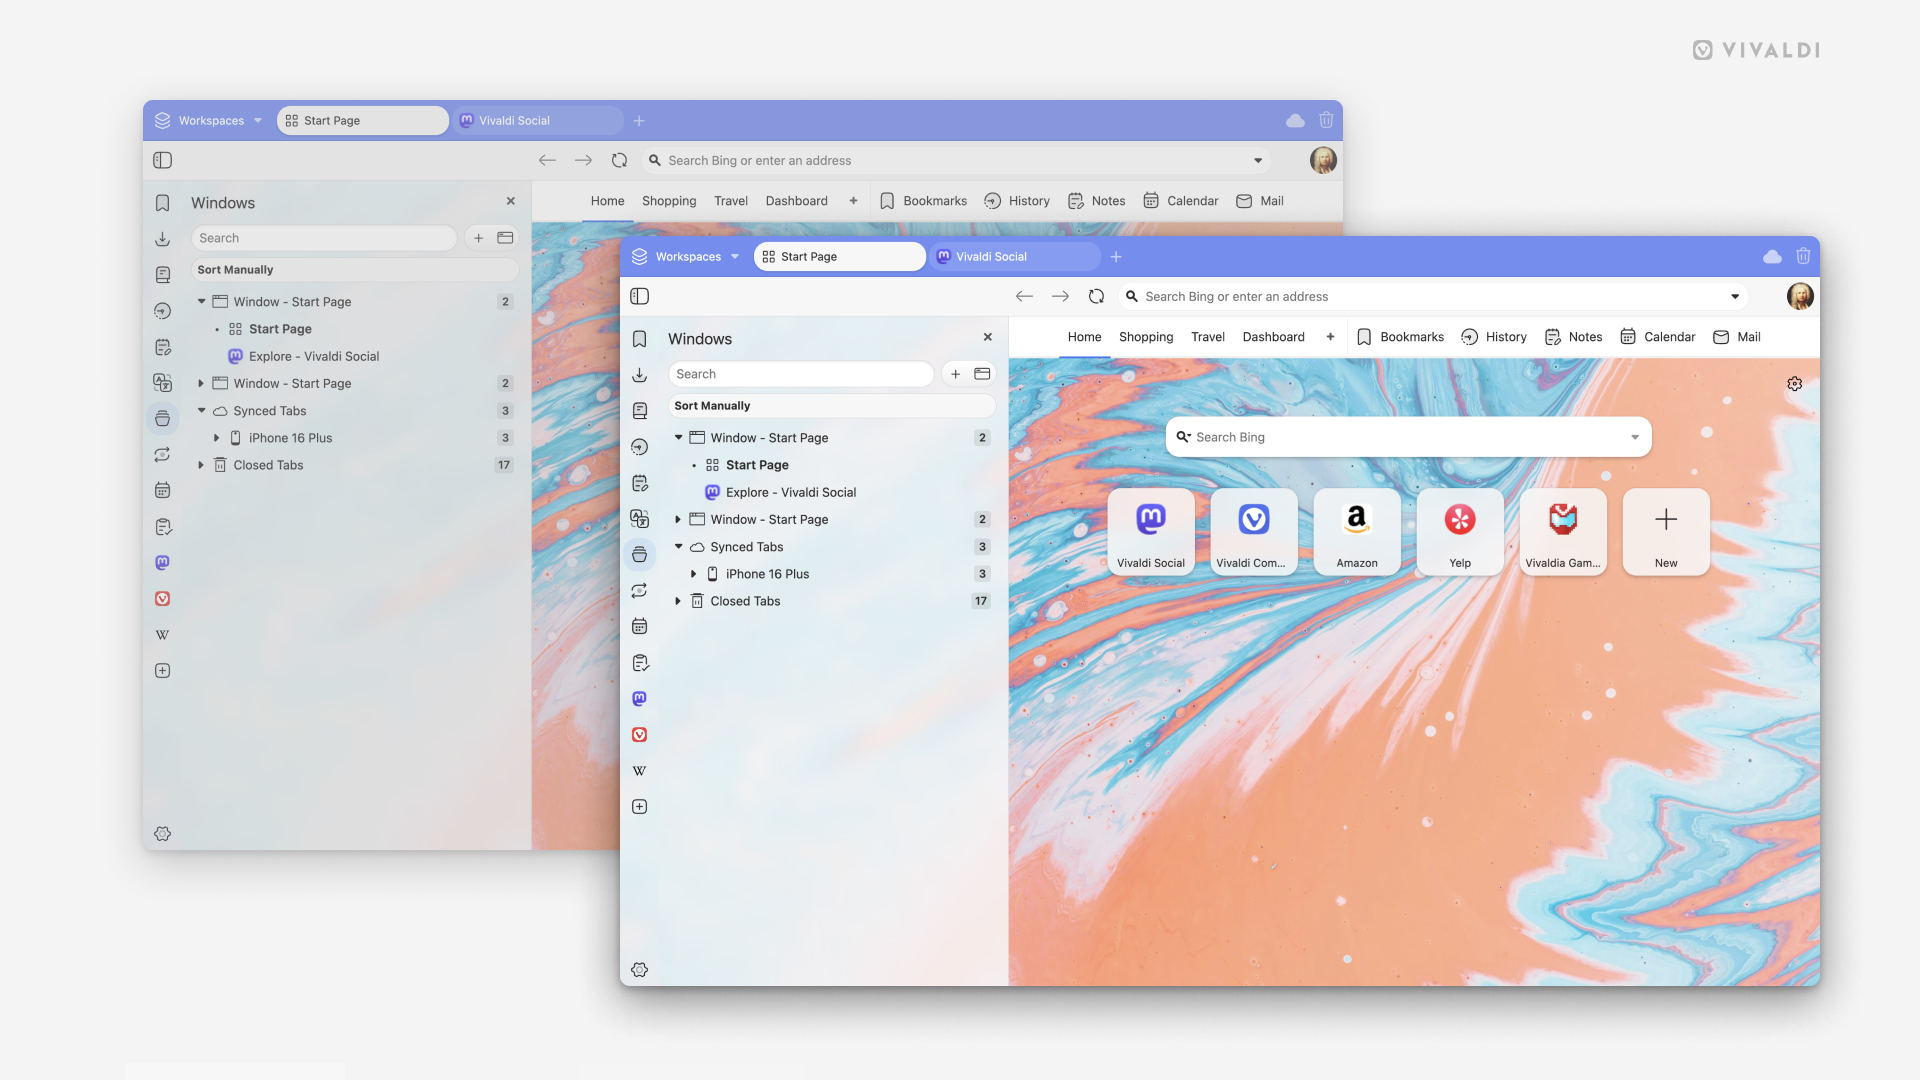
When you’re viewing browser windows side by side, it can be difficult to see, which one you’ve focused on. Fading colors of background windows helps to make it more obvious.
Depending on the window size and the amount of content, you may see scrollbars here and there in the Vivaldi user interface, for example, in Panels, Mail lists and emails, Calendar views, etc. By default, the scrollbars are thicker and have clickable arrows at both ends. To get slimmer and more minimalistic looking scrollbars:
Go to Settings > Appearance > Window Appearance > User Interface Density.
Choose between:
Regular i.e. the more spacious layout, and
Compact layout.
Compact Menu Layout
While you’re deciding on the density of the user interface, you can also make a call on the density of menus.
To switch from spacious menus to compact ones:
Go to Settings > Appearance > Window Appearance > User Interface Density.
Enable Compact Menu Layout.
Restart the browser.
User Interface Zoom
If you have plenty of screen real estate to spare on a large monitor or your vision requires to have larger buttons and texts for comfortable viewing, you can increase (or decrease) the user interface size.
To change the UI zoom level:
Go to Settings > Appearance > Window Appearance > User Interface Zoom.
Use the slider or range control buttons to find a suitable UI size for you.
If you click on the current zoom value, you can also enter the desired zoom value by typing the number.
To make online transactions faster and free of mistakes, you can store your bank card and address information in the browser.
Payment Methods
When entering card details on a web page, you’ll be asked whether to save the card information in the browser and autofill similar forms with the stored information in the future. If you don’t plan to save payment information in Vivaldi, you can disable these requests in Settings > Privacy and Security > Payment Methods. Furthermore, you can block websites from checking whether any payment methods are stored in the browser.
For an added layer of security, you can enable a verification requirement whenever using the saved payment methods. Go to Settings > Privacy and Security > Payment Methods and enable Always Verify when Using Autofill. When enabled, you’ll be asked to enter your operating system’s PIN/password/etc. before filling out the form on the web page.
As with Payment methods, you can also save your postal address, phone number, and email in the browser for ease of use. Requests to save this information is enabled by default, but you can disable it in Settings > Privacy and Security > Addresses and More.
Use the Keyboard ShortcutCtrl+T on Windows and Linux, or ⌘ T on macOS;
Perform the New TabMouse Gesture: Right-click + Swipe down.
With a vertically placed Tab Bar, double-click on an empty area on the Tab Bar.
To open links in new Tabs:
Hold down the Shift key, while clicking a link;
Select Open in New Tab from the right-click context menu;
Perform the Open Link in New Tab (Over a Link)Mouse Gesture: right-click + swipe down.
Hover the mouse cursor over a link on a web page, click and hold down the left mouse button and start dragging vertically. Then, while holding down the left mouse button, move the mouse to hover over Open a new tab button on the Tab Bar. On releasing the mouse, a new tab will open with the link. In case you’ve disabled Allow Text Selection in Links in Settings > Webpages, you can start dragging the link in any direction.
There are also several ways to open a link in a new Background Tab:
Hold down the Ctrl/⌘ key while clicking a link;
Right-click a link and select Open Link in Background Tab from the context menu;
Click a link with the middle mouse button;
Perform the Open Link in Background Tab (Over a Link)Mouse Gesture: Right-click + Swipe down and up.
If you enable New Tab from Link Opens in Background in Settings > Tabs > New Tab Position, links from Bookmarks and History will open in the background by default. Also, when enabled, selecting Open Link in New Tab from the right-click context menu or cloning a tab will open a new tab in the background instead of foreground.
To open links in new windows:
Right-click a link and select Open Link in (Private) Window from the context menu.
Hold down Ctrl + Shift keys while clicking a link.
Open previous/next page in a new Tab
To open the previously visited page or the page you’ve navigated back from in a new Tab, hold down the Ctrl/⌘ key and click on the Back button to open the previous link or the Forward button to open the next link.
To open a link further back/forward in the Tab history in a new Tab right-click on the Back or Forward button and while holding down the Ctrl/⌘ or Shift key click on an item on the list.
Closing Tabs
To close a Tab:
Click Close button that appears when hovering your mouse pointer over the Tab;
Double click on the Tab. Enable the option in Settings > Tabs > Tab Handling.
Middle mouse button click on the Tab.
Close multiple Tabs:
Select the Tabs you wish to close using the Shift or Ctrl/⌘ key and select Close # Tabs from the right-click context menu;
Alternatively, select the Tabs you want to keep open using the Shift or Ctrl/⌘ key and select Close Other (# Unselected Tabs) from the right-click context menu.
Or right-click a Tab and select, whether to:
Close Tabs to the right;
Close Tabs to the left;
Close all other Tabs (alternatively: Alt + click on active Tab’s close button).
Tab closing confirmation
To prevent accidental closing of multiple tabs, a confirmation dialog will be displayed when you try to close more tabs than specified in Settings > Tabs > Tab Handling > Confirm Closing Tabs over Maximum of #. The default value is set to 10, but you can set your own limit.
You can disable the confirmation dialog in Tab Settings or by clicking the box Do not ask again in the dialog.
Reopening recently closed Tabs
The Closed Tabs button, located at the far end of the Tab Bar and in the Window Panel, contains a list of previously closed Tabs and Windows within the latest session.
To reopen a Tab, open the Closed Tabs menu and click on the Tab or Window you want to reopen. To quickly open the latest tab you’ve closed, on the Tab Bar, middle mouse button click directly on the Closed Tabs button.
It’s also a good place to look for your Tabs and Windows if, for some reason, the browser didn’t open with your previous session (after a crash for example). Please note that multiple browser restarts will erase the Closed Tabs history.
For a complete overview of visited pages, visit History by:
Going to Vivaldi menu > Tools > History menu;
Clicking History on the top menu on the Start Page;