Bookmark Menu
In Vivaldi you can manage your Bookmarks from the Bookmark Panel, Bookmark Manager, Bookmark Bar and Bookmark Menu. In this article we’ll focus on the Bookmark Menu.
Accessing the Bookmark Menu
To access bookmarks from the Vivaldi Menu do one of the following:
- Go to
 Vivaldi menu > Bookmarks;
On macOS the horizontal Vivaldi menu is always visible. Just look for Bookmarks on the application menu. - Use the Keyboard Shortcut Alt + B (on Windows and Linux) to open the menu;
Managing bookmarks from the Bookmark Menu
Adding a new bookmark
To add a new bookmark in the Bookmark Menu:
- Go to Vivaldi menu > Bookmarks;
- Right-click somewhere in the menu and select New Bookmark.
To add the active Tab as new bookmark:
- Go to Vivaldi Menu and navigate to the Bookmark folder, where you want to add the active tab to. Then click Add Active Tab at the bottom of the list of bookmarks.
- Right-click somewhere in the menu and select Add Active Tab. The bookmark will be added below the bookmark or in the folder you clicked on.
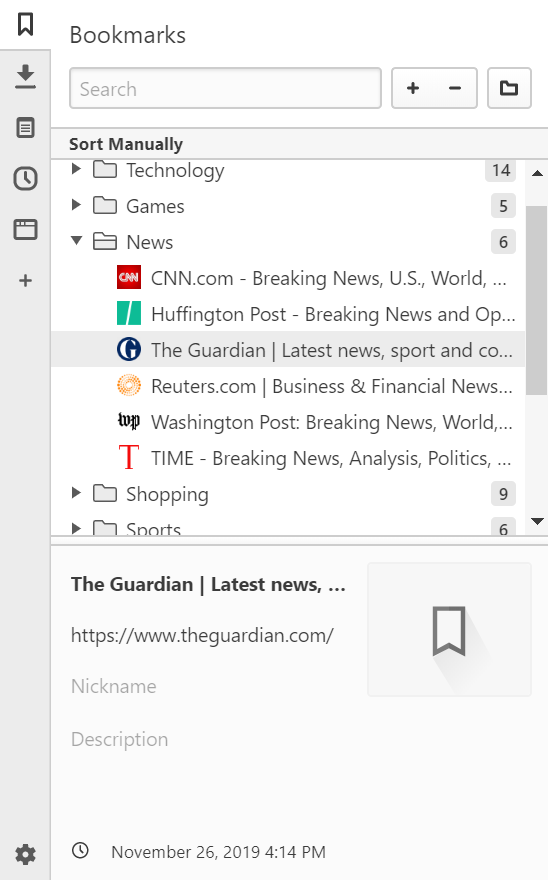
Opening a bookmark
To open a bookmark:
- Go to Vivaldi Menu > Bookmarks and locate the bookmark you want to open.
- Clicking on the bookmark will open the website in the Active Tab (unless changed in Settings > Bookmarks). From the right-click context menu you’ll find the following options for opening a bookmark:
- Open in New Tab;
- Open in Background Tab;
- Open (in Active Tab);
- Open in a New Window;
- Open in Private Window.
You can also hold down the Shift key while clicking on the bookmark to open it in a New Tab or Ctrl / ⌘ key to open the bookmark in a New Background Tab.
To open all bookmarks in a folder:
- Go to Vivaldi Menu > Bookmarks and locate the bookmark folder.
- Right-click on the folder and choose where to open the bookmarks (e.g. Open in a New Window).
Editing a bookmark
To edit a bookmark:
- Go to Vivaldi Menu;
- Right-click on the bookmark you want to change;
- Select Edit.
You can update the bookmarks title, link, folder, nickname, and description.
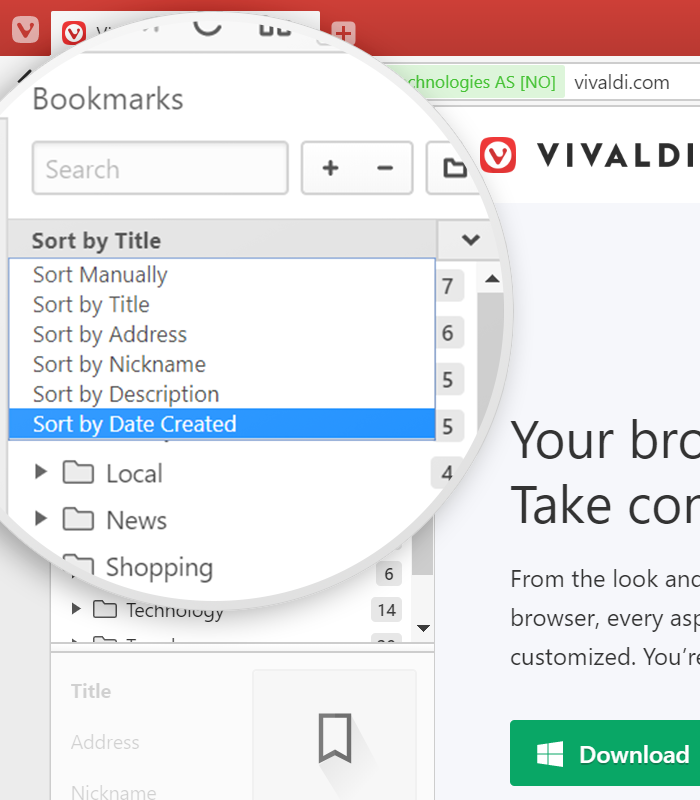
Sorting and moving bookmarks
To sort, reorder or move bookmarks in the Bookmark Menu, you need to do the sorting in the Bookmark Manager. The changes there will reflect in the Bookmark Menu. To learn how, check out the Help page about the Bookmark Manager.
Deleting a bookmark
To delete a bookmark:
- Go to Vivaldi Menu;
- Right-click on the bookmark you want to remove;
- Select Delete;
Importing and exporting bookmarks
To import bookmarks from another browser or HTML file, go to the ![]() Vivaldi menu > File > Import Bookmarks and Settings.
Vivaldi menu > File > Import Bookmarks and Settings.
To export bookmarks as an HTML file, go to the ![]() Vivaldi menu > File > Export Bookmarks.
Vivaldi menu > File > Export Bookmarks.
Syncing bookmarks
If you use Vivaldi on multiple devices, you can keep your bookmarks synchronized using Vivaldi’s Sync feature. Learn more on the Help page about Sync.