Search the web
Vivaldi browser lets you search the web any way you like. Here’s how.
Search in the Address Field
- Go to Settings> Search and make sure Search in Address Field is enabled.
- Type the search term in the Address Field and press Enter.
- Vivaldi will display the search results using the default search engine.
Use Search Engine nicknames to see results from other search engines.
In addition to searching for web content with a search engine, you can use the Address Field to search for Bookmarks, open Tabs, and History.
To search the subset:
- Type the nickname “@bookmarks“, “@tabs“, or “@history” followed by a space in the Address Field.
- Then start typing the web page’s title or URL to see relevant results.
- Click on the suggestion to go to the web page.
To edit the nicknames:
- Go to Settings > Search > Shortcuts Nicknames.
- Enter a new nickname.
Search in the Search Field
Another option is to search the web using the Search Field on the Address Bar.
- Go to Settings > Search and choose between:
- Showing the full search field on the Address Bar,
- Showing only a search button,
- Disabling the search field altogether;
- Type the search term in the Search Field on the Address Bar.
To switch between Search Engines, click on the ![]() Change Search Engine button on the left side of the Search Field and pick a different Search Engine from the dropdown menu.
Change Search Engine button on the left side of the Search Field and pick a different Search Engine from the dropdown menu.
When you search with different search engines from your default one in the Search Field, your last used Search Engine will revert back to the default one when you close the browser. To keep your last used search engine, go to Settings > Search and enable Keep Last Selected Search Engine.
To search for the same search term again, click on the ![]() Show Search History button on the right side of the Search Field to see a list of your latest searches.
Show Search History button on the right side of the Search Field to see a list of your latest searches.
To display the active Search Engine’s favicon instead of the magnifying glass, enable it in Settings > Search > Show Search Engine Icon.
The size of the search field on the Address Bar can be changed by placing the mouse cursor on the left edge of the Search field and dragging the mouse in preferred direction.
Search on the Speed Dial
- To search on the Start Page, go to Settings > Search and make sure the Show Search Field on Speed Dial is enabled.
- Type the search term in the Search Field on the Speed Dial.
To switch between Search Engines, click on the search engine favicon button on the left side of the Search Field and pick a different Search Engine from the dropdown menu.
To search for the same search term again, click on the ![]() Show Search History button on the right side of the Search Field to see a list of your latest searches.
Show Search History button on the right side of the Search Field to see a list of your latest searches.
Open search results in a New Tab
You can have your search results open in a new Tab, instead of the current one when you search in the Search Field. This feature could be particularly useful if you’re doing research or need to look up multiple search terms at once.
To enable it, go to Settings > Search and tick the box for Always Search in New Tab.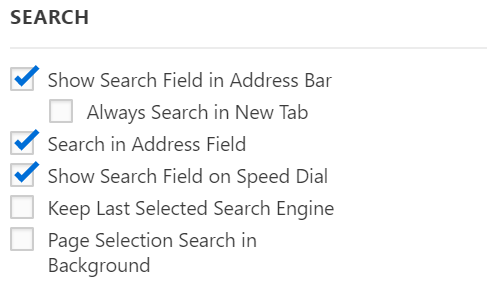
Alternatively, type the search term in the Address or Search Field and press ALT + Enter to open the results in a new tab.
Search images
You can do a reverse image search to find more information about it or to find similar images.
To do an image search:
- Open the web page with the image you want to search with.
- Right-click on the image to open the context menu.
- Select Search for Image. Select Image > Search for Image, if the image is also a link.
Search results will open in a new tab.
The search is done with your default Image Search Engine. To change the default search engine for images:
- Go to Settings > Search > Image Search Engine.
- Select your preferred search engine that offers image search.
Search with page selection
Instead of copying and pasting a search term from a web page to the Address or Search Field, right click on the highlighted text > hover over Search With > select a Search engine. To open the search results in a new background tab, go to Settings > Search and tick the box for Page Selection Search in Background (see the image above).
Search Suggestions
Among other options in Settings > Search > Allow Search Suggestions, you can decide whether to enable search suggestions in the Address and Search fields. When enabled, you’ll get search suggestions as soon as you start typing in a search query. It’s a convenient feature, but has privacy implications. You can read more on our Team Blog.
Even if you have enabled search engine suggestions, in Settings > Search > Allow Search Suggestions, you can limit it to allowing search suggestions only if you type a Search Engine nickname, which is a clear indication that this is intended to be a search, not a URL.
Alternatively, you can manually disable search suggestions for particular Search Engines, by going to Settings > Search > Search Engines > selecting the Search Engine > emptying the Suggest URL field. Or you can use another Search Engine’s Suggest URL. For example, get suggestions from a more privacy conscious DuckDuckGo, even if you search with Google.
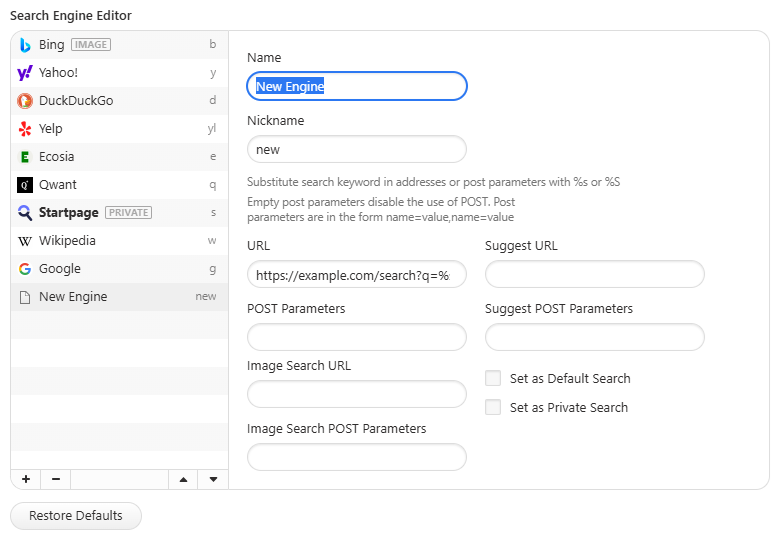
Available Search Engines
Vivaldi has several search engines available by default.
- Bing – for searching the web via Microsoft Bing.
- Yahoo – for searching the web via Yahoo.
- DuckDuckGo – a search engine that doesn’t track users.
- Yelp – for searching crowd-sourced reviews about businesses. Available by default in selected countries.
- Ecosia – a search engine that plants trees.
- Qwant – a privacy focused search engine. Available by default in selected countries.
- StartPage – a private way to search Google.
- Wikipedia – for searching the Wikipedia free online encyclopedia.
- Google – for searching the web via Google.
Change the default Search Engine
You can set any of the search engines listed in Settings > Search Engines as the default Search Engine.
Option 1
- Go to Settings > Search > Default Search Engine;
- Select your preferred Search Engine from the dropdown menu.
Option 2
- Go to Settings > Search > Search Engines;
- Select the Search Engine you want to set as default;
- Tick the box for Set as Default Search.
Search in Private Window
To make your private browsing more private, you can set a different default search engine for the Private Window.
Option 1
- Go to Settings > Search > Private Window Search Engine;
- Select your preferred Search Engine from the dropdown menu.
Option 2
- Go to Settings > Search > Search Engines;
- Select the Search Engine you want to set as default;
- Tick the box for Set as Private Search.
Some search engines allow users to use the POST method for search. The combination of POST and no-redirects, ensures that websites won’t know the search terms you use to find their site, nor will your search terms be stored in your local history. If you have enabled Use POST method, but search doesn’t come up with any results, this means that the search engine of your choice doesn’t support the POST method. If you still want to use this search engine, you should disable Use POST method.
Search Engine Nicknames
Using Search Engine Nicknames, you can quickly switch between one Search Engine to another just by typing the nickname at the front of your search term.
- Get to know the default Search Engine Nicknames in Settings > Search > Search Engines.
- Start the search with the Search Engine Nickname, followed by Space. For instance, the search term “d Vivaldi browser” will search for “Vivaldi browser” via DuckDuckGo.
You can change the default Search Engine nickname to anything you like by:
- Clicking on the search engine you would like to assign a new nickname to;
- Entering the new nickname in the Nickname field;
To hide search engine nicknames in drop-down menus, go to Settings > Search > Search Field Display and disable Show Search Engine Nickname in Drop-Down Menu.
Add a New Search Engine
Vivaldi lets you add your preferred search engines in a few simple steps.
Option 1
- Go to the page you want to add.
- Right-click on the search field of the page and select Add as Search Engine.

- If you wish, add a nickname and make the new Search Engine your Default Search.
- Click Add.
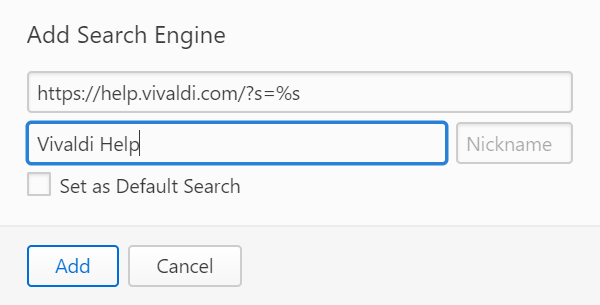
Option 2
- Do a search on the website you want to add as a Search Engine.
- Copy the URL of the search results page.
- Go to Vivaldi Browser Settings > Search > Search Engine Editor.
- Click on the
 Add Search Engine button to add a new Search Engine.
 - Paste the link to the URL field and substitute the used search term with %s
- Enter the Name and a Nickname for the Search Engine.
Delete a Search Engine
To remove a Search Engine:
- Open Settings > Search > Search Engines;
- Make sure the Search Engine you want to delete isn’t set as Default Search or Private Search;
- Click on the
 Delete search engine button.
 - Confirm your decision by clicking Delete in the pop up window.

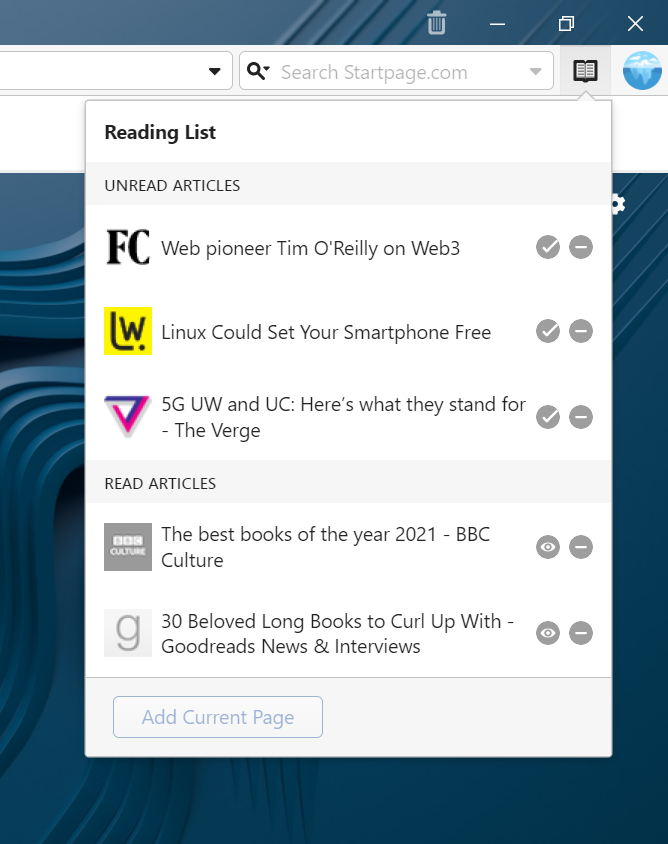
 Vivaldi menu and select Reading List.
 Trash button above the list of entries.
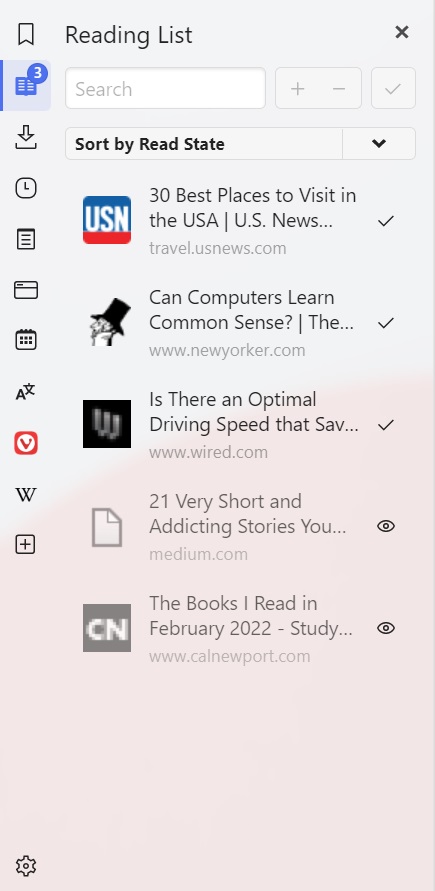
 Mark as read.
 Mark as unread.
 Show the Reading List on the