Sender Best Practices for Vivaldi Mail

Products: Vivaldi for desktop-only.

Vivaldi Mail is a fully-featured email client. Email deliverability and filtering of potentially unwanted messages is left to the user’s email server.

This document describes specifics for senders who want to ensure a good recipient experience and compatibility with Vivaldi Mail


Email Rendering

Vivaldi Mail renders emails using the Chromium Blink rendering engine.

Vivaldi Mail blocks external resources from loading by default. Users will be prompted to approve loading external resources per sender address.

Embed small and important images, like a logo or symbol, into the email itself to ensure it is loaded. Include text alternatives (alt properties) to serve as placeholders for other external images.

Vivaldi Mail will convert HTML-only emails to plain text when the user prefers reading plain text. The conversion process preserves links and renders images as their alt property text. You can suppress an image from being represented in the plain-text conversion by explicitly marking it as decorational (alt=“”).

For the best result, supply a more carefully crafted plain-text alternative version of your HTML message.


Dark Mode

Vivaldi Mail follows the user’s color scheme preferences and renders email messages accordingly.

You can style the light and dark mode variants of your message using the web standard prefers-color-scheme media query. Example:

<meta name="color-scheme" content="light dark">
<style>
@media(prefers-color-scheme: light) {
  body { background: white; color: black; }
}
@media(prefers-color-scheme: dark) {
  body { background: black; color: white; }
}
</style>

Opt-Out of Auto Dark Mode

Vivaldi Mail may automatically apply a dark color scheme if your email does not contain color scheme information.

You can disable Auto Dark Mode in an email message by explicitly declaring it as light mode only.

<meta name="color-scheme" content="only light">

Multipart Selection

Vivaldi Mail does not support combining multiple multipart/related parts or other complex and unusual multipart messages. It will choose the largest (in bytes) suitable part of the preferred type in a multipart/alternative set.


Phishing Warnings

Vivaldi Mail will display an impersonation/phishing warning if the name in the From or Reply-To fields resembles an email address different than the associated sender address. Send using a human-readable name or no name set instead.

Vivaldi Mail will display an impersonation/phishing warning if the email addresses in the From and Reply-To fields are at different domain names (including subdomains). Vivaldi Mail will always display an impersonation/phishing warning if either of the two addresses is at a common personal mailer domain (e.g., gmail.com and icloud.com).


Threading

Vivaldi Mail is designed around email threads. Threading ensures related emails are grouped and displayed together. Vivaldi Mail follows standard email threading conventions, as described in RFC 5322 section 3.6.4.

Please consider adopting email threading for your automated status updates to transactional emails. E.g., an order shipping confirmation should be a reply to the order confirmation email.


Calendar Invites

Vivaldi Mail will process calendar event attachments in the iCalendar (RFC 5545) file format and will prompt the user to respond to pending invitations (RSVP).

Alternatively, you can link to event files on a web server. See Integrating with Vivaldi Calendar for Web Developers.

Vivaldi Tab Notifications for Web Developers

Products: Vivaldi for desktop-only.

Tab Notifications let webpages communicate brief numeric status summaries to users. Examples include displaying new unread messages, emails, or news items; unprocessed tasks or bills; or the number of items added to a shopping cart.

Tab Notifications are displayed as numeric badges on top of the document’s favicon on the Tab Bar and Web Panels.

Vivaldi detects numeric counters at the beginning of the document title when they’re surrounded by parentheses (U+0028 LEFT PARENTHESIS and U+0029 RIGHT PARENTHES) and separated from the remainder of the title by a space (U+0020 SPACE) character. Example:

<title>(7) Webmail</title>

Tab Notifications is enabled by default, but users can disable it.

The badge is updated dynamically when the document’s title changes. For the best performance, update the document.title property or update the <title> element’s innerText property. Replacing the <title> element may cause badge updates to be delayed.

Numbers with two or more digits may be displayed as a plus-sign badge instead of a numeric badge due to space constraints.

The numeric counter is removed from the document title in user interfaces where the badge is displayed. The character sequence “(0) ” is removed from titles but does not generate a badge.

Tab Notifications are only detected from the top-frame document title (no frames).

Opt-Out of Tab Notifications

You can disable Tab Notifications in a document by prefixing the title with a zero-width space (U+200B ZERO WIDTH SPACE) character. Example:

<title>&#x200b;​(1195) Step Counter</title>

Vivaldi Link Drag and Select Behavior for Web Developers

Products: Vivaldi for desktop-only.

Vivaldi lets users either select text inside links or drag the links around. The behavior in Vivaldi differs from the default in other Blink (Chromium) browsers.

Users can select text inside links by clicking on a link and dragging left or right. The link element becomes draggable when they drag it up or down.

To explicitly make a link always draggable in any direction, set its draggable attribute to true. Example:

<a href="https://example.com/" draggable="true">
  Draggable and Not Selectable Link Text
</a>

To explicitly make a link’s text always selectable in any direction, set its draggable attribute to false. Example:

<a href="https://example.com/" draggable="false">
  Selectable and Not Draggable Link Text
</a>

When links are not explicitly draggable (the default), the CSS user-select property is ignored, and their cursor property may be ignored.

Themes in Vivaldi on iOS

Vivaldi on desktop is known for its many customization options and we’ve brought many of them over to Vivaldi on iOS as well.

To change the browser’s theme in Vivaldi on iOS:

  1. Go to the Vivaldi menu button Vivaldi menu > Settings > Appearance & Theme > Browser Theme
  2. Choose between:
    • following the system,
    • Light theme,
    • Dark theme.

If you choose the light theme, the browser toolbars will adapt its accent colors according to the website colors.

3 different websites with 3 different accent colors.

Accent Color

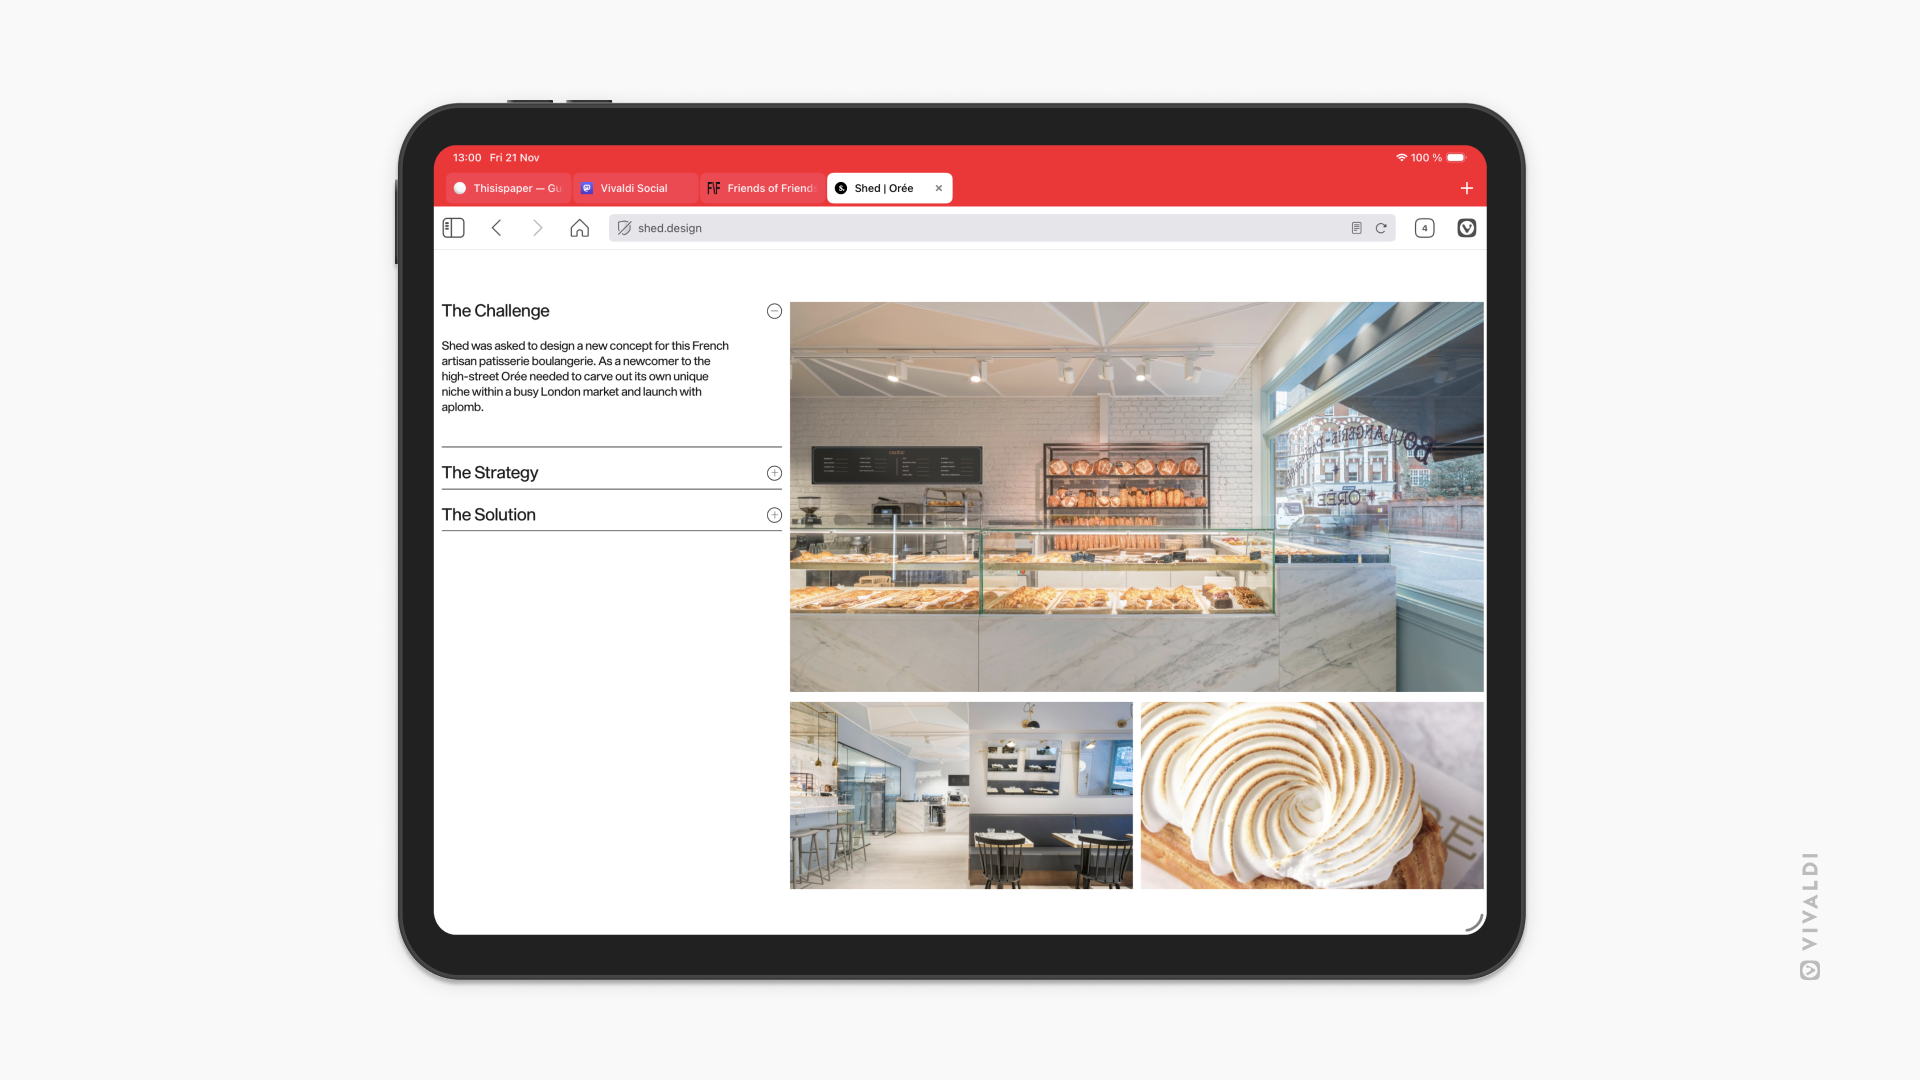
You can customize the theme further by choosing an accent color for the browser toolbars. When you have the Tab Bar enabled, it will be in your chosen accent color. When the Tab Bar is hidden, the Address Bar (and if it’s at the bottom of the screen, then also the bottom toolbar) will be in the accent color.

To choose an accent color:

  1. Go to the Vivaldi menu button Vivaldi menu > Settings > Appearance & Theme > Accent Color
  2. Choose between:
    • One of the preset colors,
    • Inherit Accent Color from page,
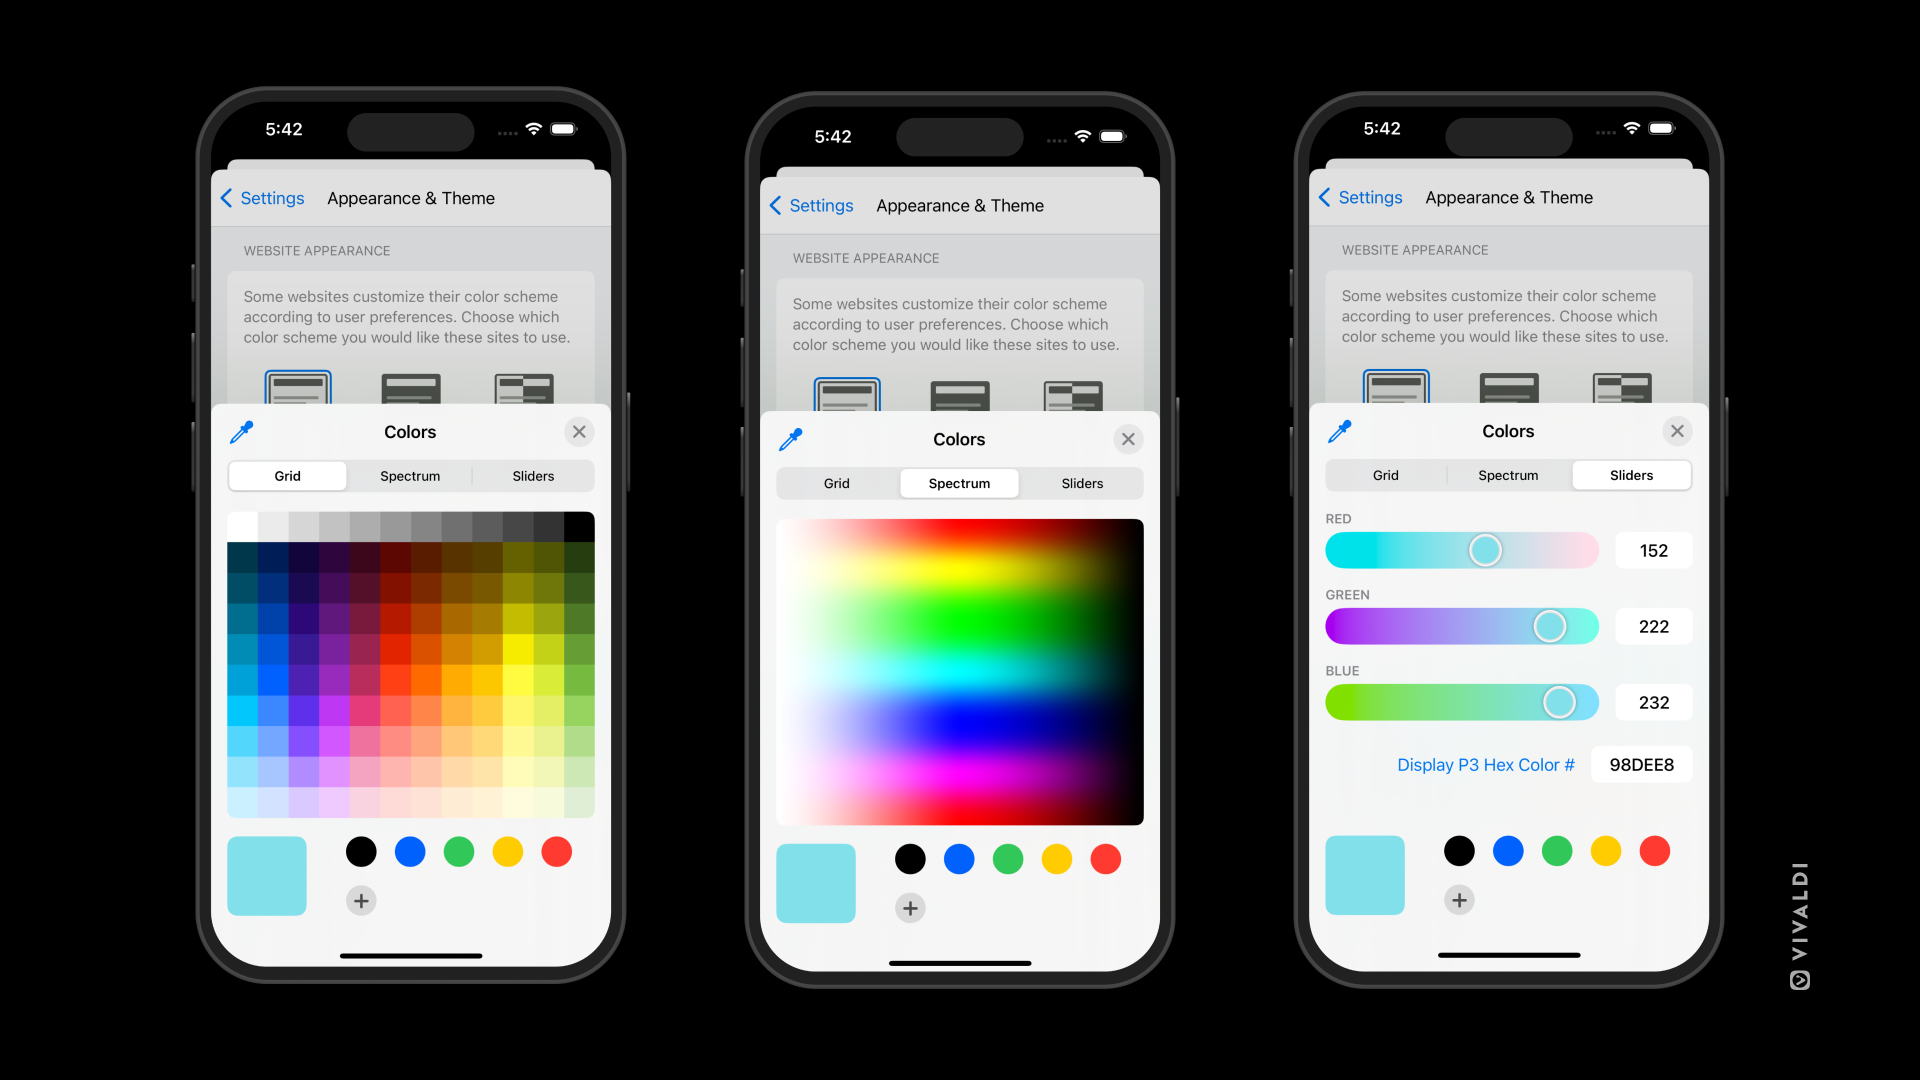
    • Custom color – insert the color’s HEX value or tap on the color wheel in front to use a grid, spectrum, or sliders to pick the color.
Grid, Spectrum and Slider settings for picking a theme's accent color in Vivaldi on iOS.

Custom Start Page Wallpapers

Just like on desktop, you can select a preloaded wallpaper to decorate the Start Page or use your own image.

To update the wallpaper:

  1. Go to the  Vivaldi menu > Settings > Appearance Start Page > Wallpapers
  2. Tap on the wallpaper of your choice or on the + button to select an image from your Photos.

Dark mode for web pages

If, in addition to the app’s user interface, you also wish to view websites in dark mode:

  1. Go to the Vivaldi menu button Vivaldi menu > Settings > Appearance & Theme > Website Appearance.
  2. Select between:
    • Light,
    • Dark, or
    • Auto.

Some websites do not offer their site in dark mode. In that case, you can force dark mode, by selecting the “Dark” option and enabling Force a dark theme on all websites.

Browser interface on iOS

Like the desktop browser, Vivaldi on iOS has a unique user interface.

Tab Bar

On the Tab Bar, you can see all your open Tabs, just like on desktop. If you have a lot of Tabs open, swipe left or right on the Tab Bar to see the rest of the tabs.

To enable/disable the Tab Bar:

  1. Go to Vivaldi menu button Vivaldi menu > Settings Tabs.
  2. Toggle on/off Show Tab Bar.

To move the Tab Bar to the bottom of the screen together with the Address Bar:

  1. Go to Vivaldi menu button Vivaldi menu > Settings Tabs.
  2. Select Bottom for Address Bar Position.

Address Bar

  • Site info – check your connection security and access Site Settings.
  • Address and Search field – type in the link you want to visit or a search term you want to look up.
  • Reload – if you’ve scrolled too far down and swiping down to reload isn’t reasonable, you can tap on the Reload button.
  •  Content blocker – change the tracker and ad blocking level for the website.
  •  Vivaldi menu – access options such as Bookmark PageSettings, and much more by tapping on the Vivaldi logo.

By default, the Address Field only displays the domain (e.g. vivaldi.com) you’re on and you have to tap on the Address Field to see the full URL (e.g. https://vivaldi.com/blog/ios). To see the full URL at all times:

  1. Go to Vivaldi menu button Vivaldi menu > Settings > Address Bar.
  2. Toggle on Show Full Address.

To move the Address Bar to the bottom of the screen:

  1. Go to Vivaldi menu button Vivaldi menu > Settings Tabs.
  2. Select Bottom for Address Bar Position.

When moving the Address Bar to the bottom it’s recommended to reverse the order in which search suggestions are displayed and keep the most relevant suggestion closest to the Address Bar.

To reverse the order of search suggestions:

  1. Go to  Vivaldi menu > Settings Tabs.
  2. Make sure Bottom is selected for the Address Bar Position.
  3. In Search Suggestions, enable Reverse search suggestion order.

Bottom Toolbar

  •  Panels – access your BookmarksHistoryNotes, and Downloads.
  •  History back – move back in history of visited pages.
  • Focus on the Address Field to start a search or enter a website address. You can also replace it with the Home button.
    In the Tab Switcher and on web pages, you’ll see a New Tab button in that place.
  •  History forward – move forward in history of visited pages.
  •  Tab switcher – view all open, private, synced, and recently closed tabs.

When you’ve moved the Address Bar to the bottom, there will be two toolbars at the bottom of the screen. In case you have the Tab Bar enabled, at the bottom of the screen, the Tab Bar will replace the bottom toolbar.

In landscape mode and on larger screens, such as on the iPad, all the icons from the bottom toolbar are moved to the Address Bar.

Vivaldi on iOS in landscape mode on an iPad.

Sessions Panel

Sessions are a way to store your open tabs for easy access later. It allows you to close some unused tabs or all of them – freeing up memory and resources on your computer. A Session can contain tabs from a single window, all your windows, and optionally your Workspaces. Learn how to manage your Sessions using the Sessions Panel.

Access the Sessions Panel

Before starting to use the Sessions Panel, you need to add its button to the Panels sidebar. To add the button:

  1. Go to the Vivaldi menu > View > Customize Toolbar.
  2. Select Panel from the drop-down menu.
  3. Drag the  Sessions button to the Panels sidebar.
  4. Click Done.

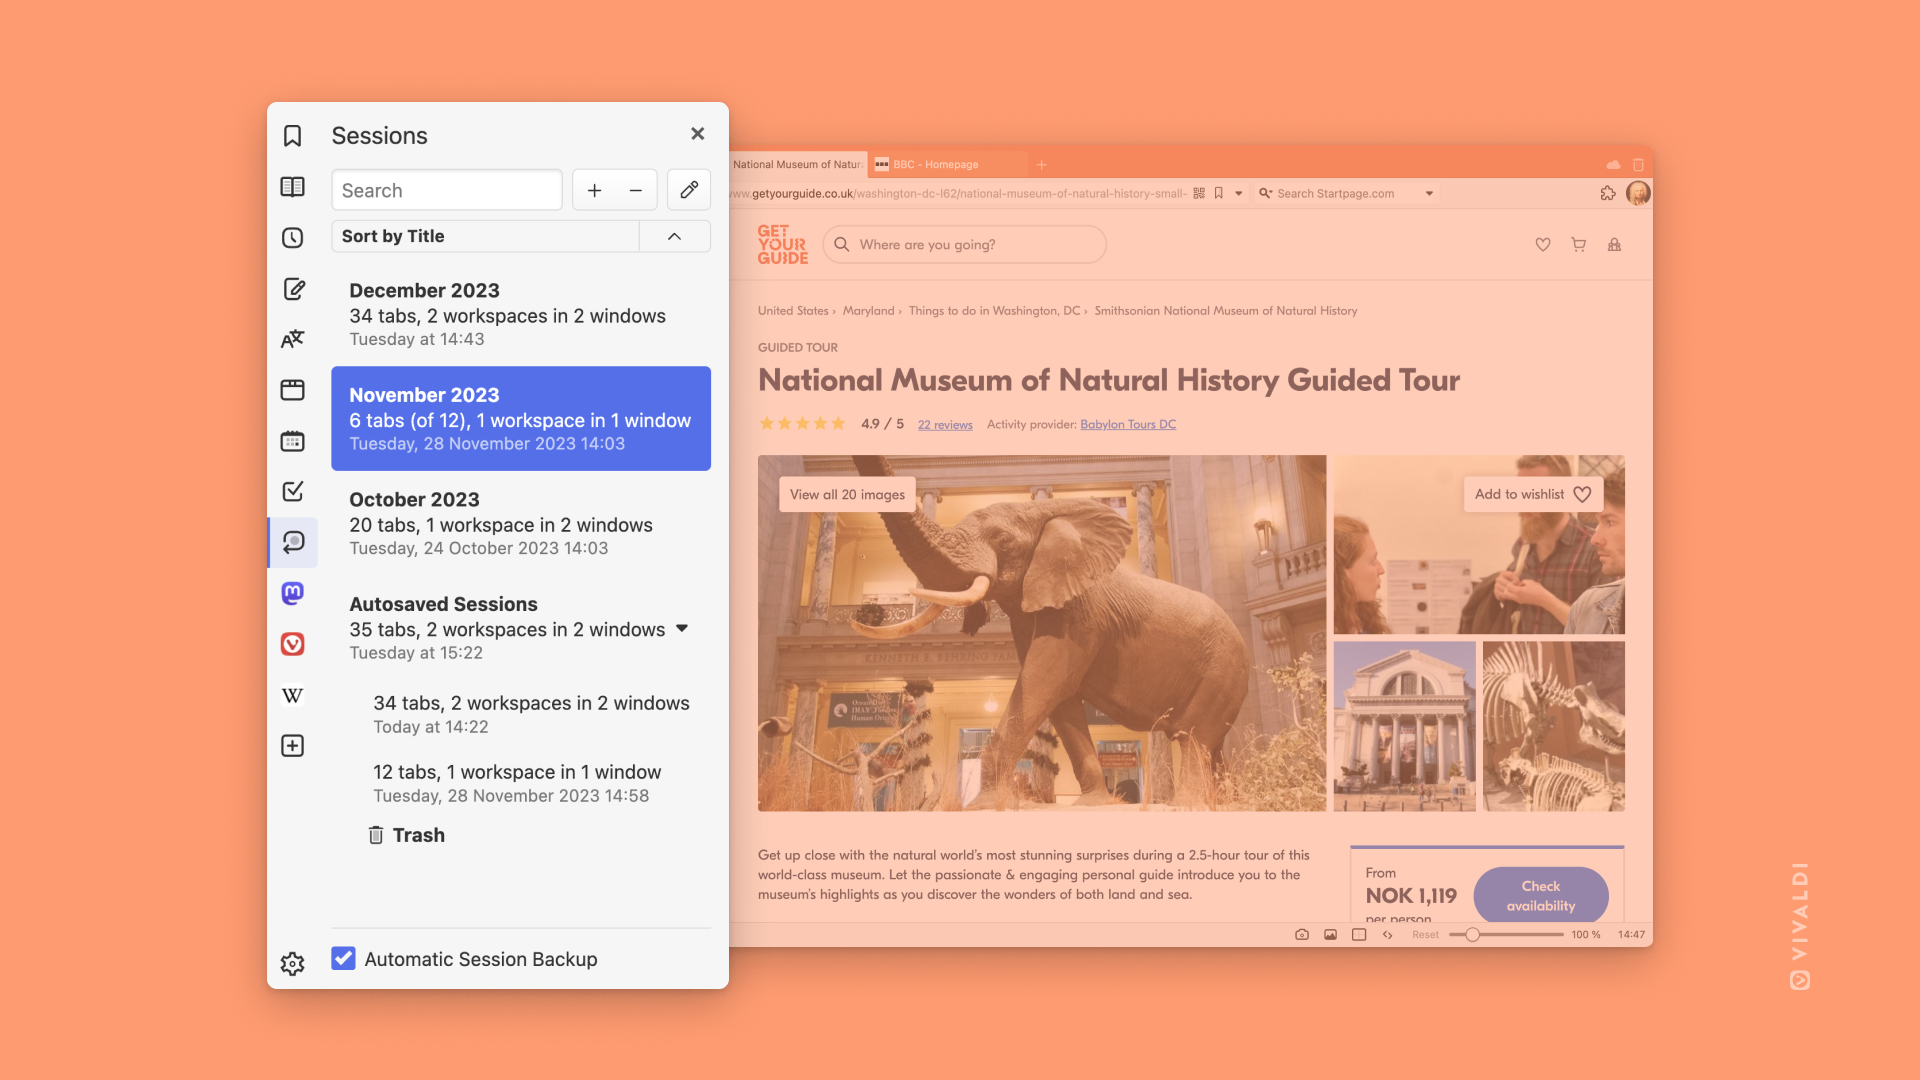
To open the Sessions Panel:

Vivaldi browser with Sessions Panel open and highlighted.

Add a New Saved Session

To save tabs as a session via the Sessions Panel:

  1. Open the Sessions Panel.
  2. Click on Save Tabs as Sessions near the top right corner of the panel.
  3. Give the session a name.
  4. Decide, whether to include tabs from all Workspaces in the session or not and whether to save tabs from all windows or only the current window.
  5. Click Save.

View and Edit Sessions

To see and edit the contents of a saved session:

  1. Open the Sessions Panel.
  2. Select a session.
  3. Click on Edit Session in the top right corner of the panel.

You can rearrange, rename, and remove tabs as you would with the active session in the Windows Panel.


Auto-save Sessions

To automatically back up all your open tabs as a session once every hour:

  1. At the bottom of the panel, click Automatic Session Backup.
  2. Select how many days worth of backups you want to keep:
    • Last day
    • Last 3 days
    • Last 5 days
    • Last 30 days

Delete a Saved Session

To delete a session:

  1. Open the Sessions Panel.
  2. Select a session you want to remove.
  3. Click on Delete Session near the top right corner of the panel.

Alternatively, right-click on the session and select Delete from the context menu.

Troubleshooting issues on iOS

When you encounter an issue and you’re trying to determine whether you can fix it yourself or need to report a bug, follow the steps below. Remember that in many cases it’s important to reload the web page or restart the app for any changes to take effect.

Restart the app

Sometimes the simplest things help, so exit the browser, and hopefully on restart the issue will be gone.

To exit Vivaldi on iOS, open your device’s app switcher and swipe up on Vivaldi to close the app.

If you’ve kept your mobile device on for a long time, restarting the device may help as well.


Update the app

In case you’ve turned off automatic updating of apps, check for updates manually from the App Store or from the app store you installed Vivaldi from.


Disable Tracker and Ad Blocker

Website functionality may depend on elements with trackers that are blocked by the Tracker and/or Ad blocker. Click on  Content Blocker on the left side of the address bar to disable blockers and test the website.

To change blocking settings globally, go to  Vivaldi menu > Settings > Tracker and Ad Blocking > Default blocking level.


Delete Browsing Data

Websites get updated all the time, but information about the old version of the site is still stored in cache files and Cookies. This may cause discrepancies in the displayed website and occasionally even break functionality.

In addition, storing old browsing data for a long time will use up your device’s memory space, so deleting it every now and then can have a positive effect on the browser’s speed as well.

To delete browsing data in Vivaldi on iOS:

  1. Go to  Vivaldi menu > Settings > Privacy and Security > Clear Browsing Data.
    Alternatively, go to Panels > History panel and tap on Clear Browsing Data at the bottom right corner of the screen.
  2. Select the data you want to delete and a time range.
  3. Tap on Clear data.

Reset flags

Experiments are a great way to test new features that are being developed. But these features are hidden behind flags for a reason – they can still be buggy. If you’ve experimented with flags and suddenly Vivaldi doesn’t work as it should or crashes altogether, go back to the default settings.

To reset flags:

  1. Go to vivaldi://flags;
  2. Tap on Reset all in the top right corner;
  3. Tap on Relaunch at the bottom of the window to restart the browser.

On rare occasions, the browser needs to be restarted twice for the experiments to be fully reset.


Check iOS settings

iOS operating system’s settings may affect, how Vivaldi functions. Check and change the settings that might affect Vivaldi and test the issue again.


Disable other apps

In case you’re using apps that can affect Vivaldi (e.g. VPN), try browsing with them disabled to see if the bug is still there.


Test the Snapshot version of Vivaldi

Sometimes the bug you’re encountering has already been fixed and is being tested in the Snapshot version of the browser. In that case, you just need a little patience until the fix is released in the Stable version.

On iOS, you can install the Snapshot version of the app from TestFlight.


Found a bug?

When you’ve followed the steps listed above and you can consistently reproduce the issue, please discuss it on our Forum. There, our Community members can test on their devices and either confirm the bug or suggest a fix for the issue. Some of them can also tell you whether the devs are already aware of the bug or a new bug report should be created.

To report a bug first check our bug reporting guidelines and then go to vivaldi.com/bugreport to file it.

Panels on iOS

Panels offer a quick way to access useful tools like Bookmarks, History, Notes, and Downloads.

Accessing Panels

To open Panels, tap on the Panels button on the left side of the toolbar at the bottom of the screen.

In Vivaldi on iOS, there are 4 panels:

To switch between panels tap on their respective icons at the top of the panels view.

Tap on the Search field to search through the active panel’s content.

Panel specific actions can be found at the bottom of the screen.

To close Panels, tap on the Done in the top right corner.


Panels on tablets

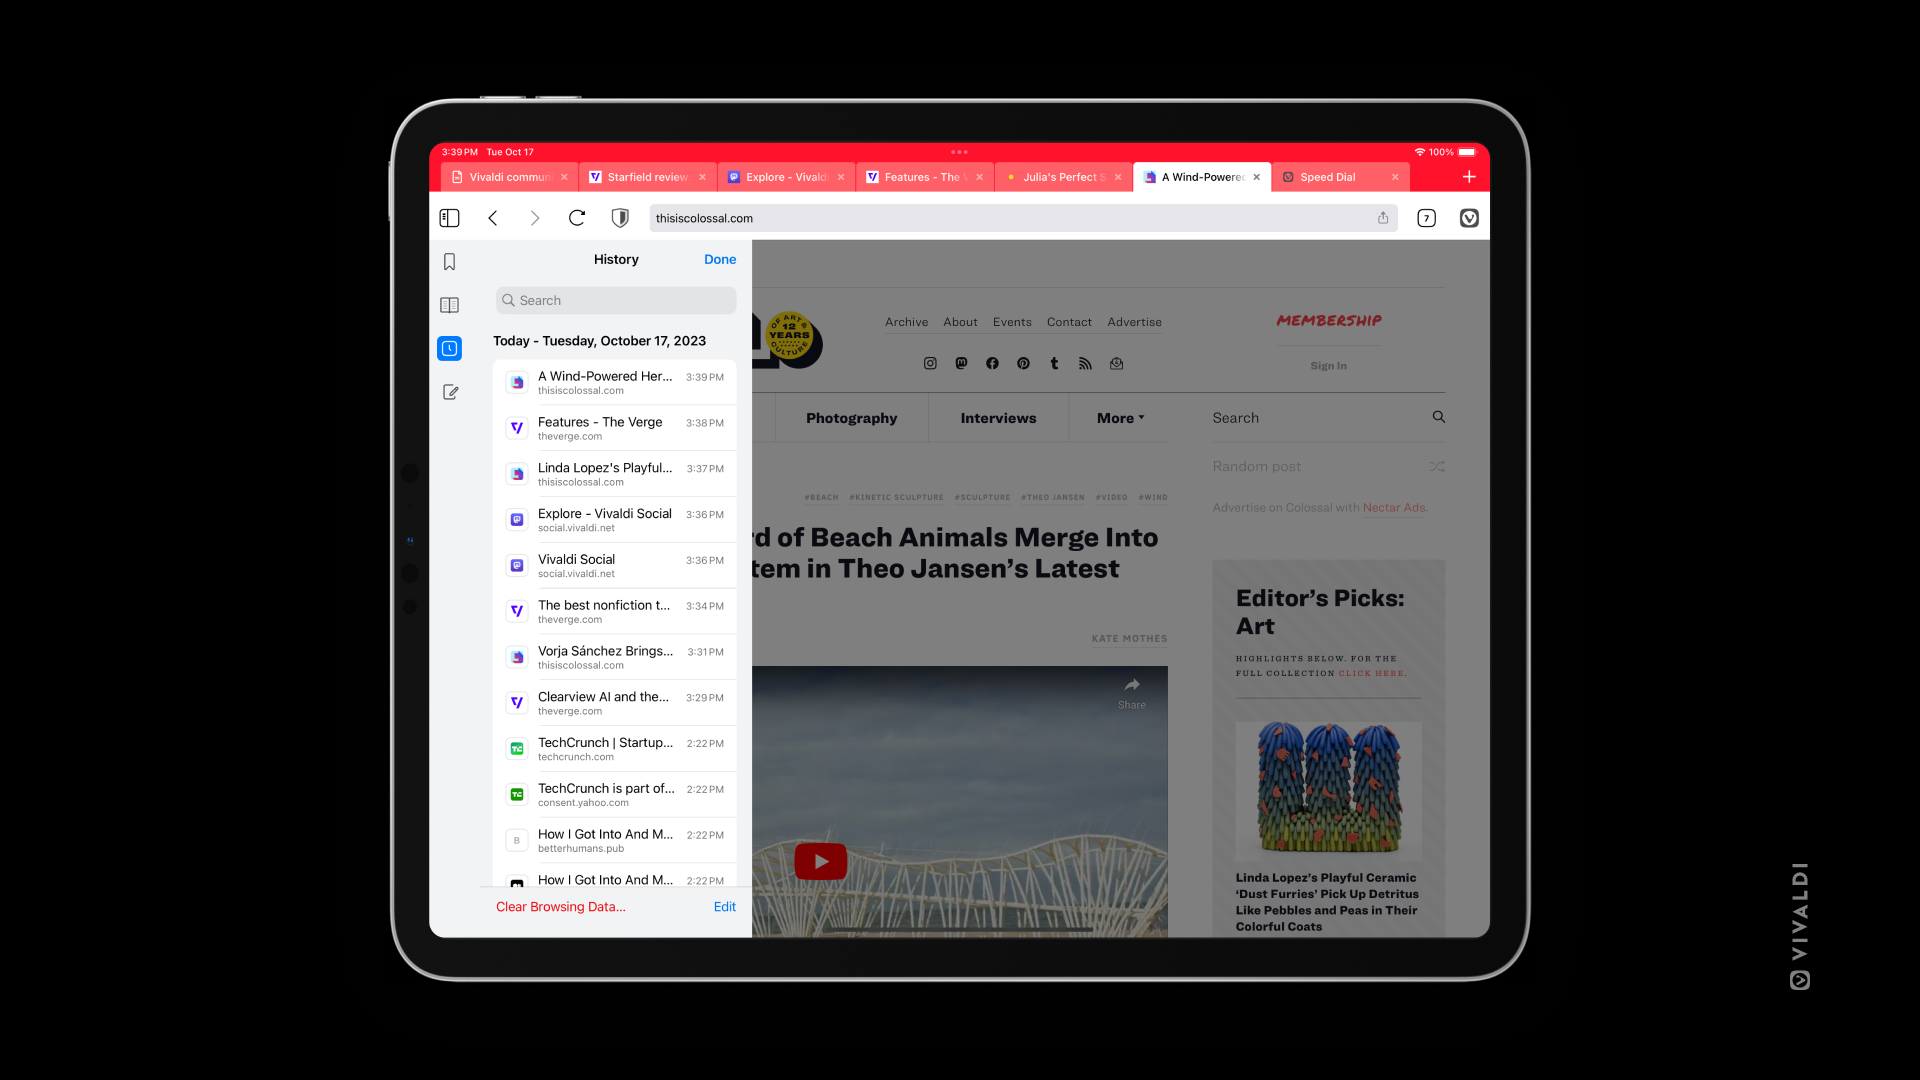
With more screen space available, Panels on iPads follow the design of Vivaldi on desktop.

To open Panels on a tablet:

  1. Tap on the Panels button on the left side of the Address Bar. Panels open with the last visited panel.
  2. Tap on the different panel icons listed vertically on the left side to switch between them.

To close the panel:

  • Tap on Done in the top right corner of Panels.
  • Tap outside the Panels area.

Vivaldia 2

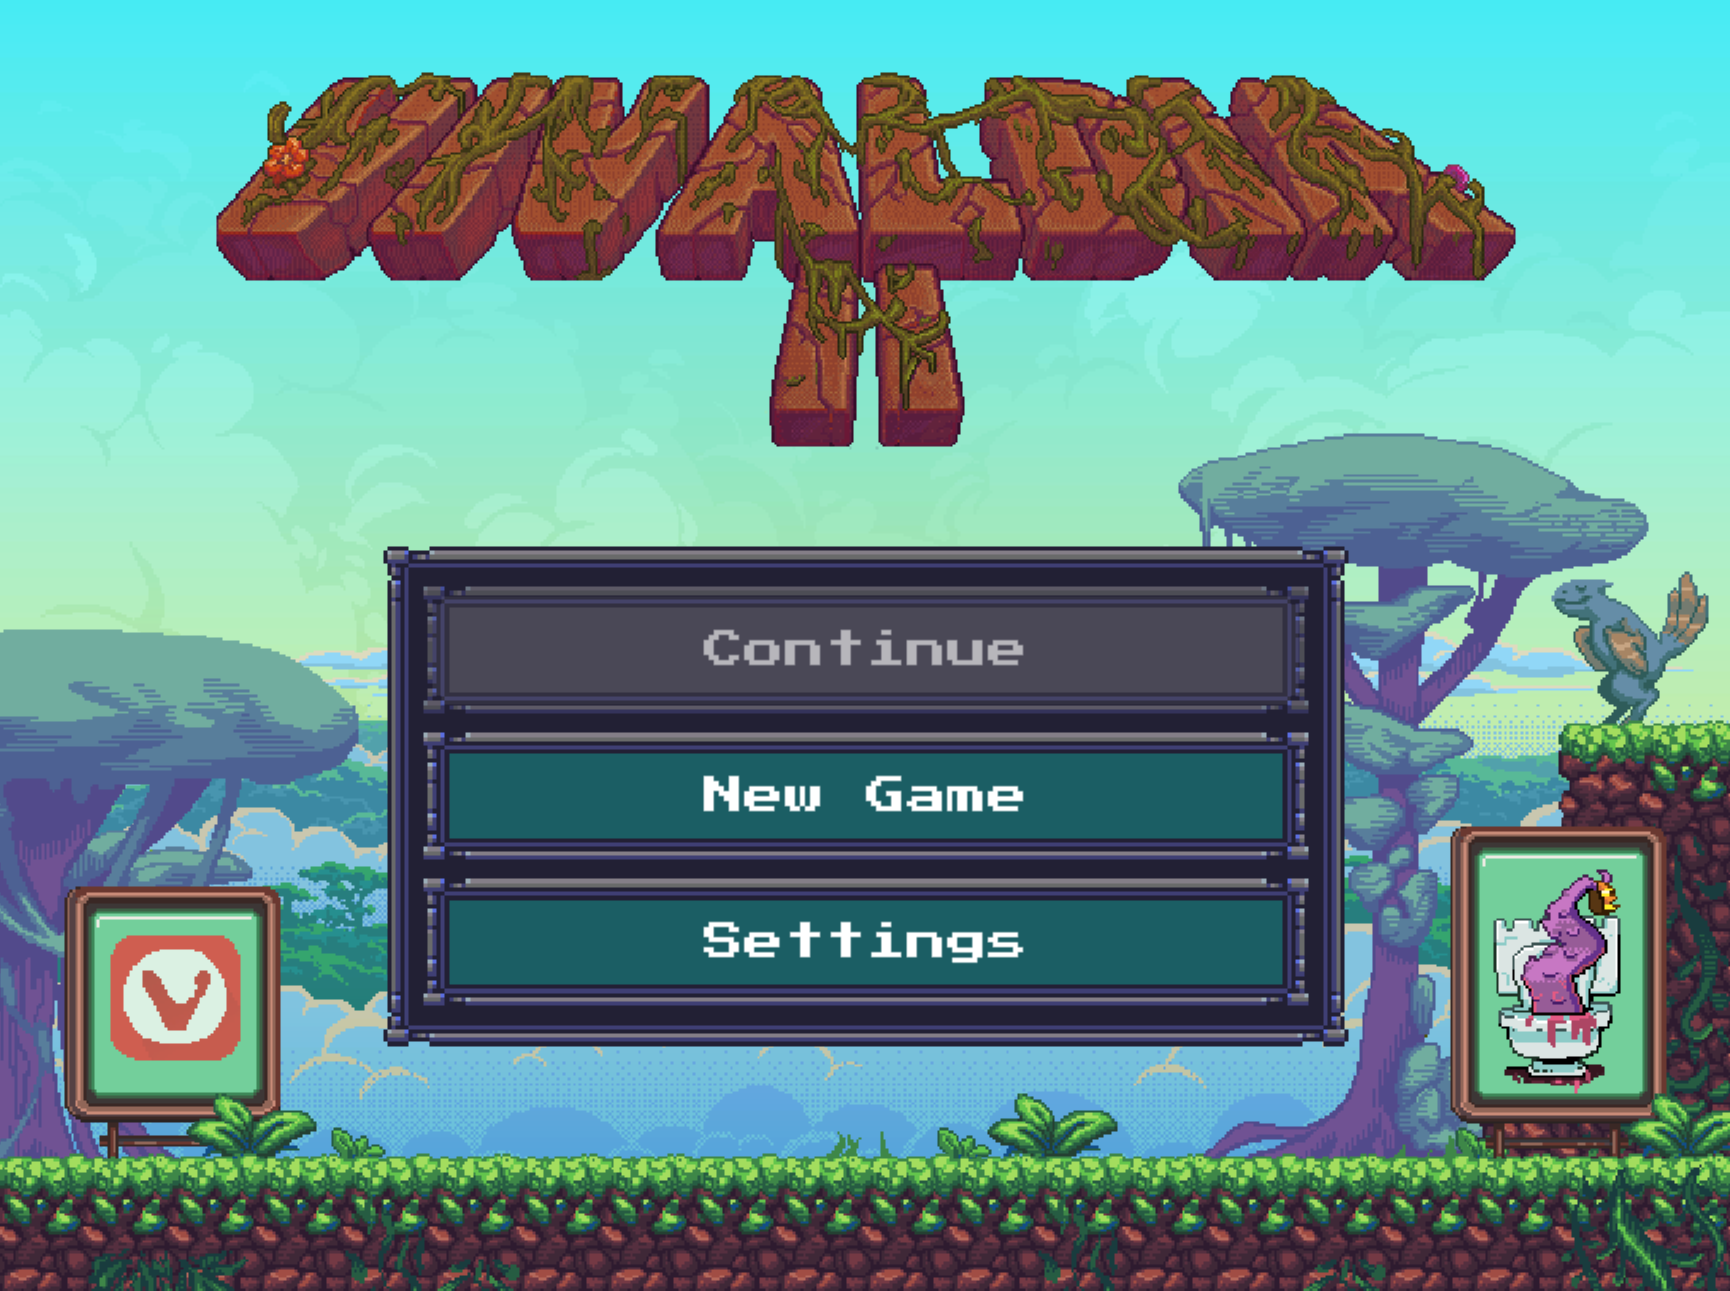
Vivaldia is a game series developed by Porcelain Fortress for Vivaldi. Vivaldia 2 is an arcade-style runner game, where, as the character Vivaldia, you embark on an adventure and fight against the evil Robot Overlord to save the Lost Valley.

While the first Vivaldia game is integrated into the Vivaldi browser on desktop and Android, Vivaldia 2 can be played on the web on any device and browser.

Playing the game

To play Vivaldia 2:

  1. Go to https://vivaldi.com/games/vivaldia2/.
  2. Select New Game.
  3. Choose your mode:
    • Normal, or
    • Challenge.
  4. Decide, whether you’d like to start with the tutorial or get straight to playing.

Game inputs on desktop:

  • and – move left and right
  • – climb up and proceed to the next level
  • – crawl and climb down
  • N or Space – jump
  • M – shoot

The game can be played with a game controller as well.

On a mobile device with a touch screen, you can display the controller buttons on the screen or play with a connected game controller.

Vivaldia 2 on a mobile screen with touch inputs displayed.

To get the best experience, enable full-screen mode, by clicking/tapping on the double-ended arrow in the top left corner.

You get points by collecting golden coins and other (hidden) treasures, and for defeating enemies. Additional points are given at the end of each level if you pass the level in good time.


Settings

Game settings

Go to Settings > Game to adjust the volume of in-game sounds. You can adjust the volume separately for:

  • Sound effects (SFX)
  • Music
  • Ambience

Set the volume to 0 to mute the sound.

If you’ve connected a game controller to your mobile, you can hide on-screen input buttons by going to Settings > Game and enabling Hide touch input.

Language

To change the language of the game:

  1. Go to Settings > Language.
  2. Select the language of your choice.

Warnings about unsafe websites

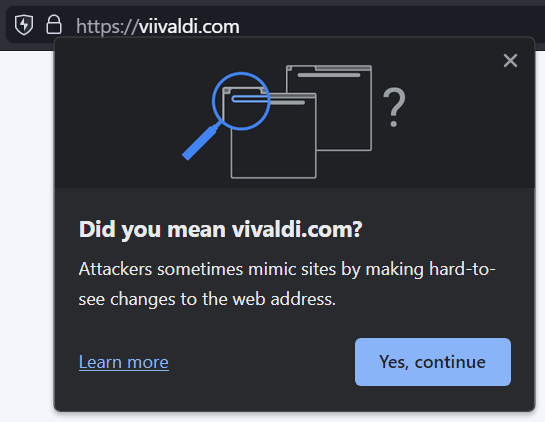
Did you mean [site name]?

Sometimes spelling mistakes slip in when typing a URL into the Address Field. When navigating to a link with a typo, you might end up nowhere with the message “This site can’t be reached“, but you may also end up on another website. Some of these websites with eerily similar URLs to the one you planned to go to might be legitimate, but it’s not uncommon for malicious people to take advantage of this honest mistake, so you’ll need to be cautious.

If, based on your browsing history and URL variants of a small protected blocklist, Vivaldi suspects that you may have ended up on a website you didn’t plan to visit, it will show a warning dialog, prompting you to be vigilant about the site. For example, if you have somesite.com in History, you might see the warning when you enter smoesite.com in the Address Field.

In that case, double-check the URL in the Address Field to confirm that you are in fact visiting a website you intended to.