Start Page in Vivaldi on iOS

Similarly to the desktop and Android browsers, your favorite Bookmarks can be displayed on the Start Page as Speed Dials.

Accessing the Start Page

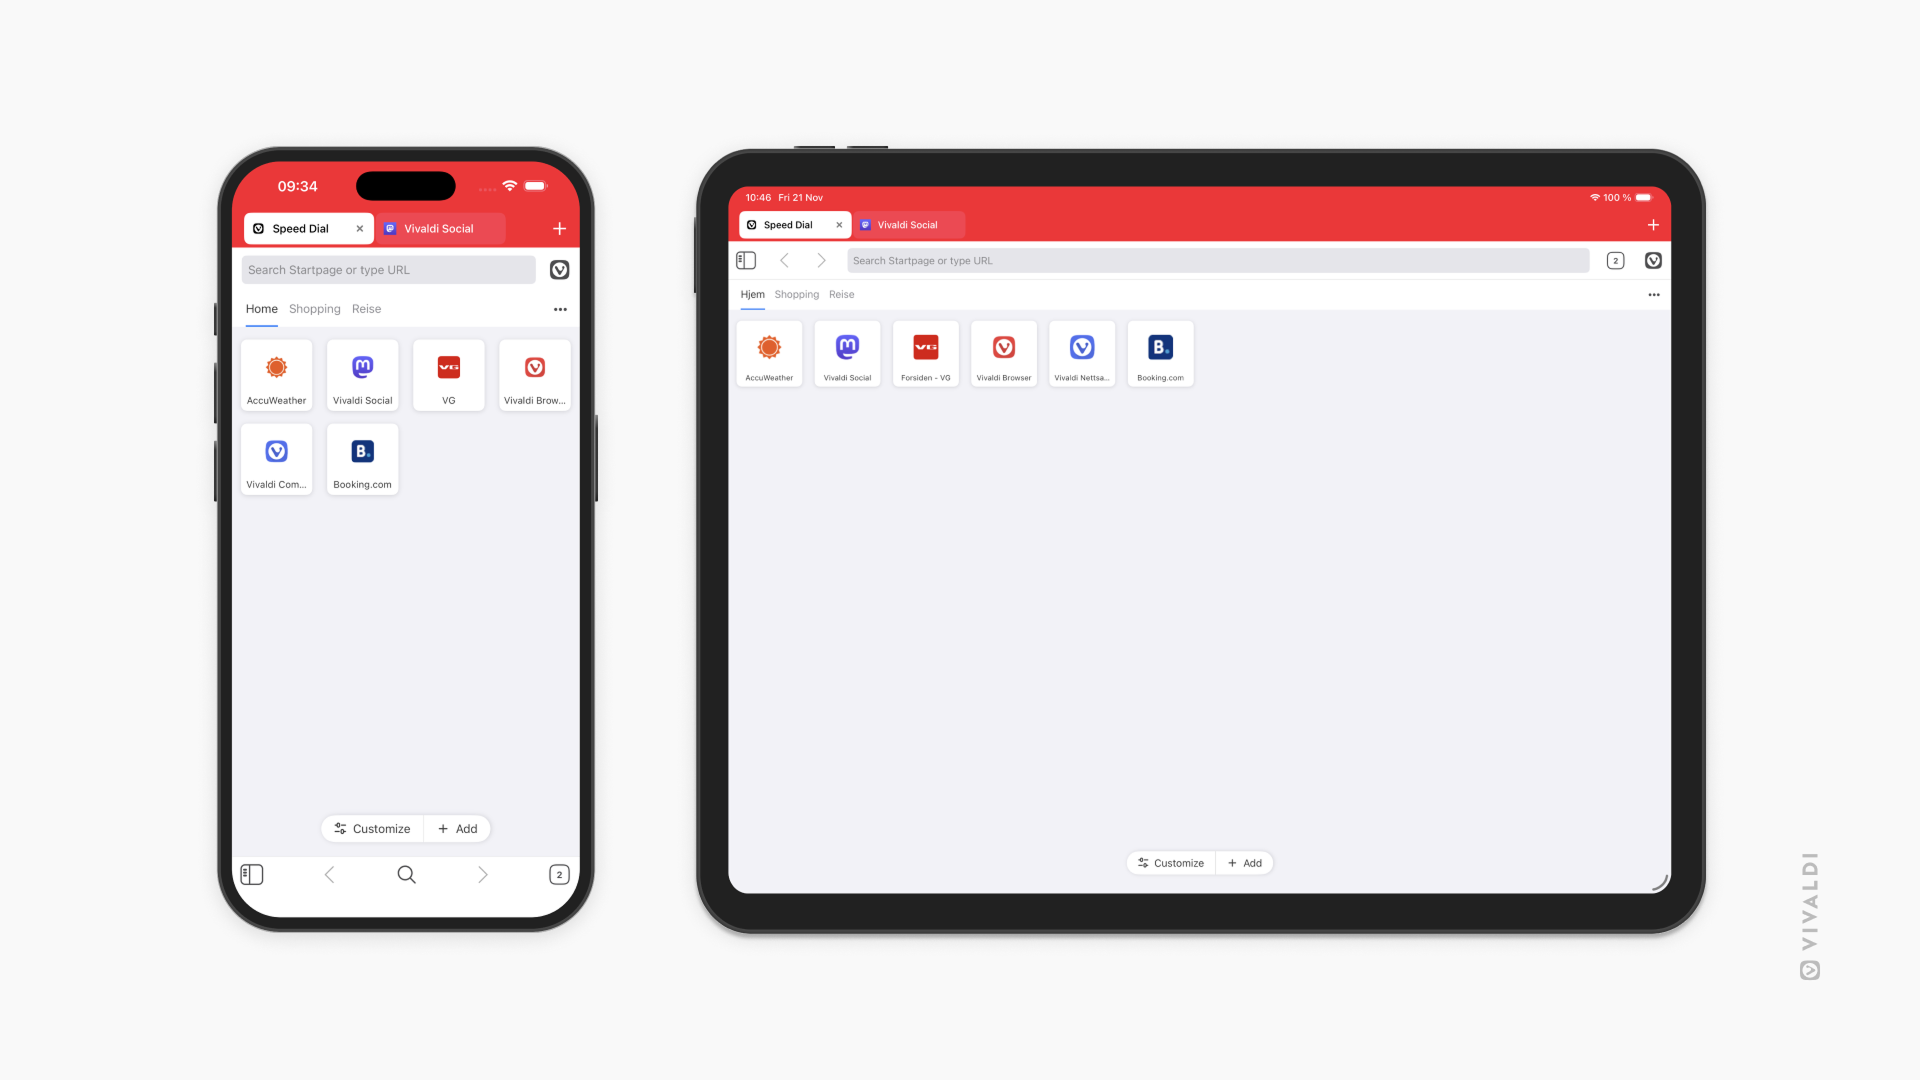
Your Start Page is the default new tab and homepage for the browser and can be accessed by opening a new tab or from any web page by tapping the middle New Tab button on the bottom toolbar.

Vivaldi's Start Page with Speed Dials on an iPhone and iPad.

Reopen Start Page with

Since the Start Page can have many Speed Dial groups plus Top Sites on it, you can decide, which one to show whenever you go to the Start Page.

To choose which group to open the Start Page with:

  1. Go to the Vivaldi menu button Vivaldi menu > Settings > Start Page > Reopen Start Page with.
  2. Choose between:
    • First group,
    • Top Sites,
    • Last Visited Group.

Customizing the Start Page

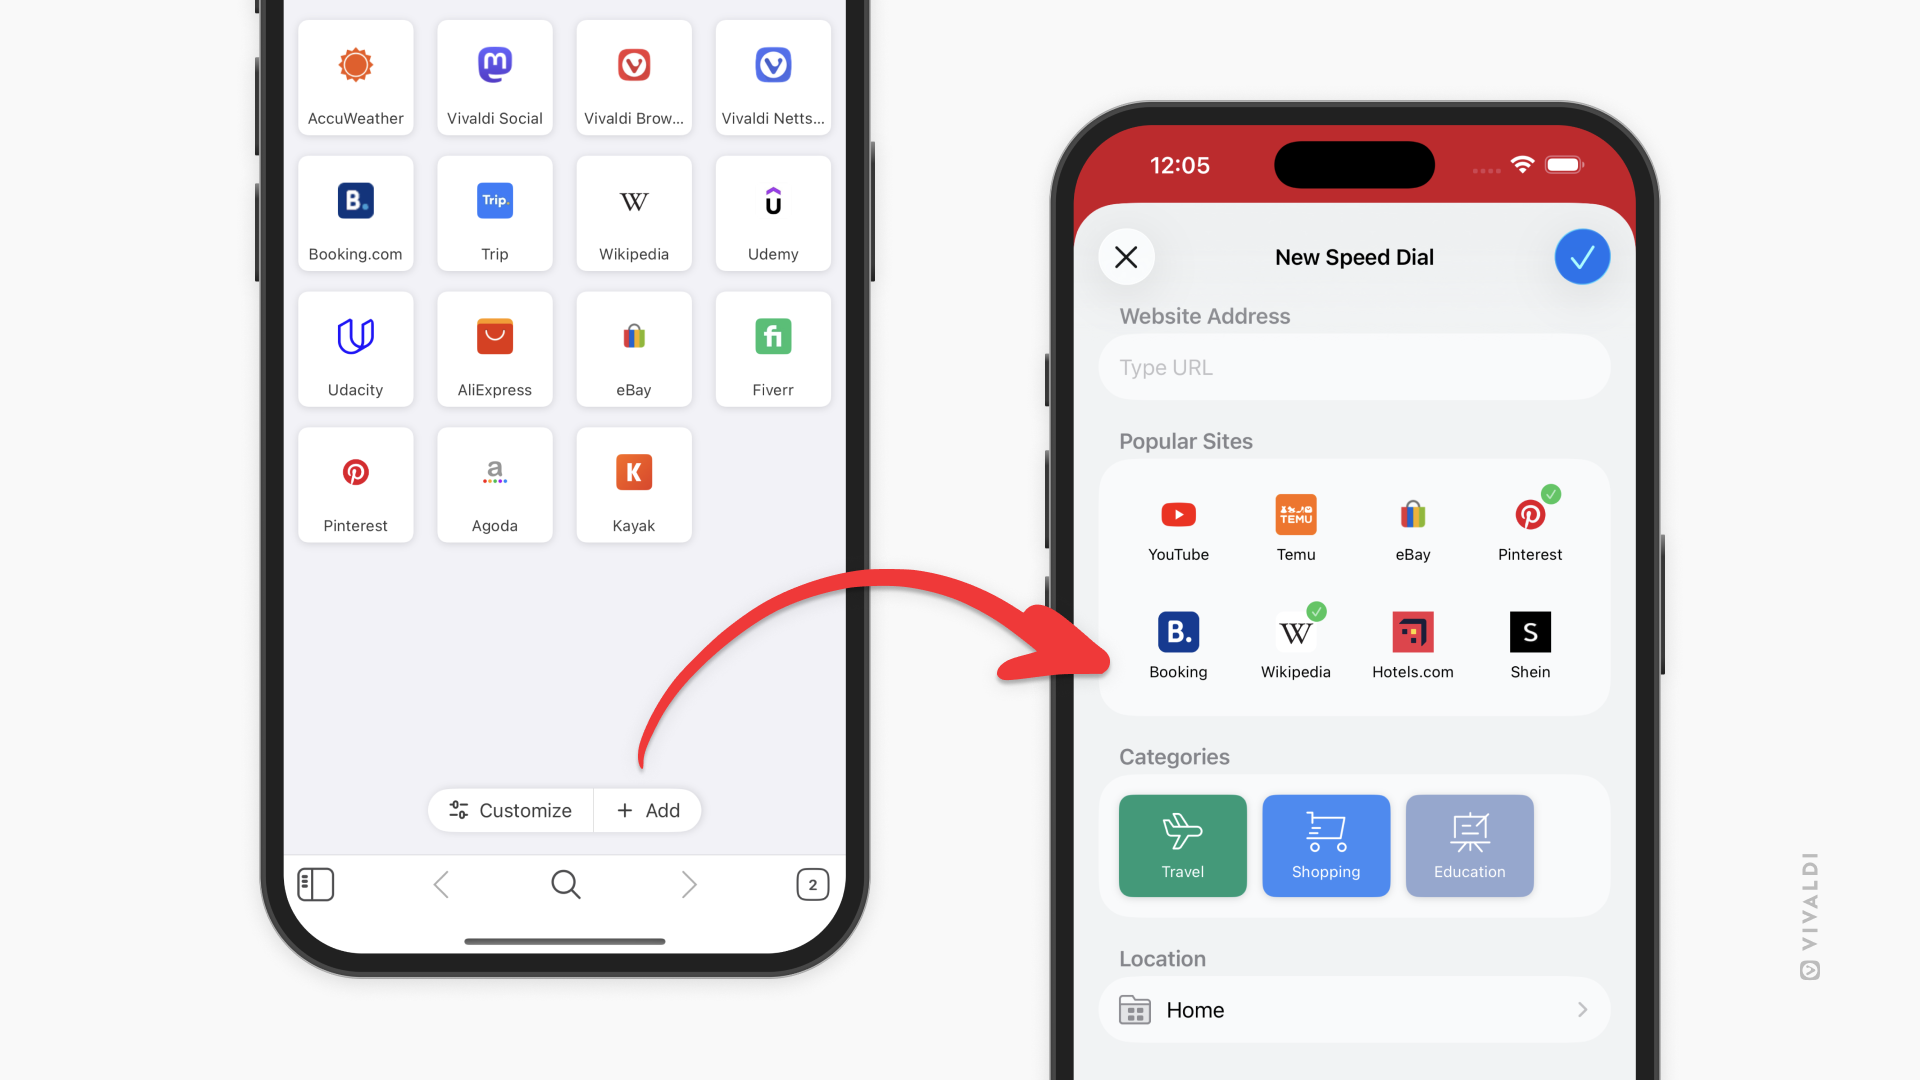
To customize the Speed Dials on the Start Page, open the Bookmarks Panel and edit your bookmarks there. In the folder editor window, toggle on Use as Group to display the bookmarks in that folder on your Speed Dial. You can display multiple folders on the Start Page.

To customize your Start Page:

  1. Open a new tab with the Start Page.
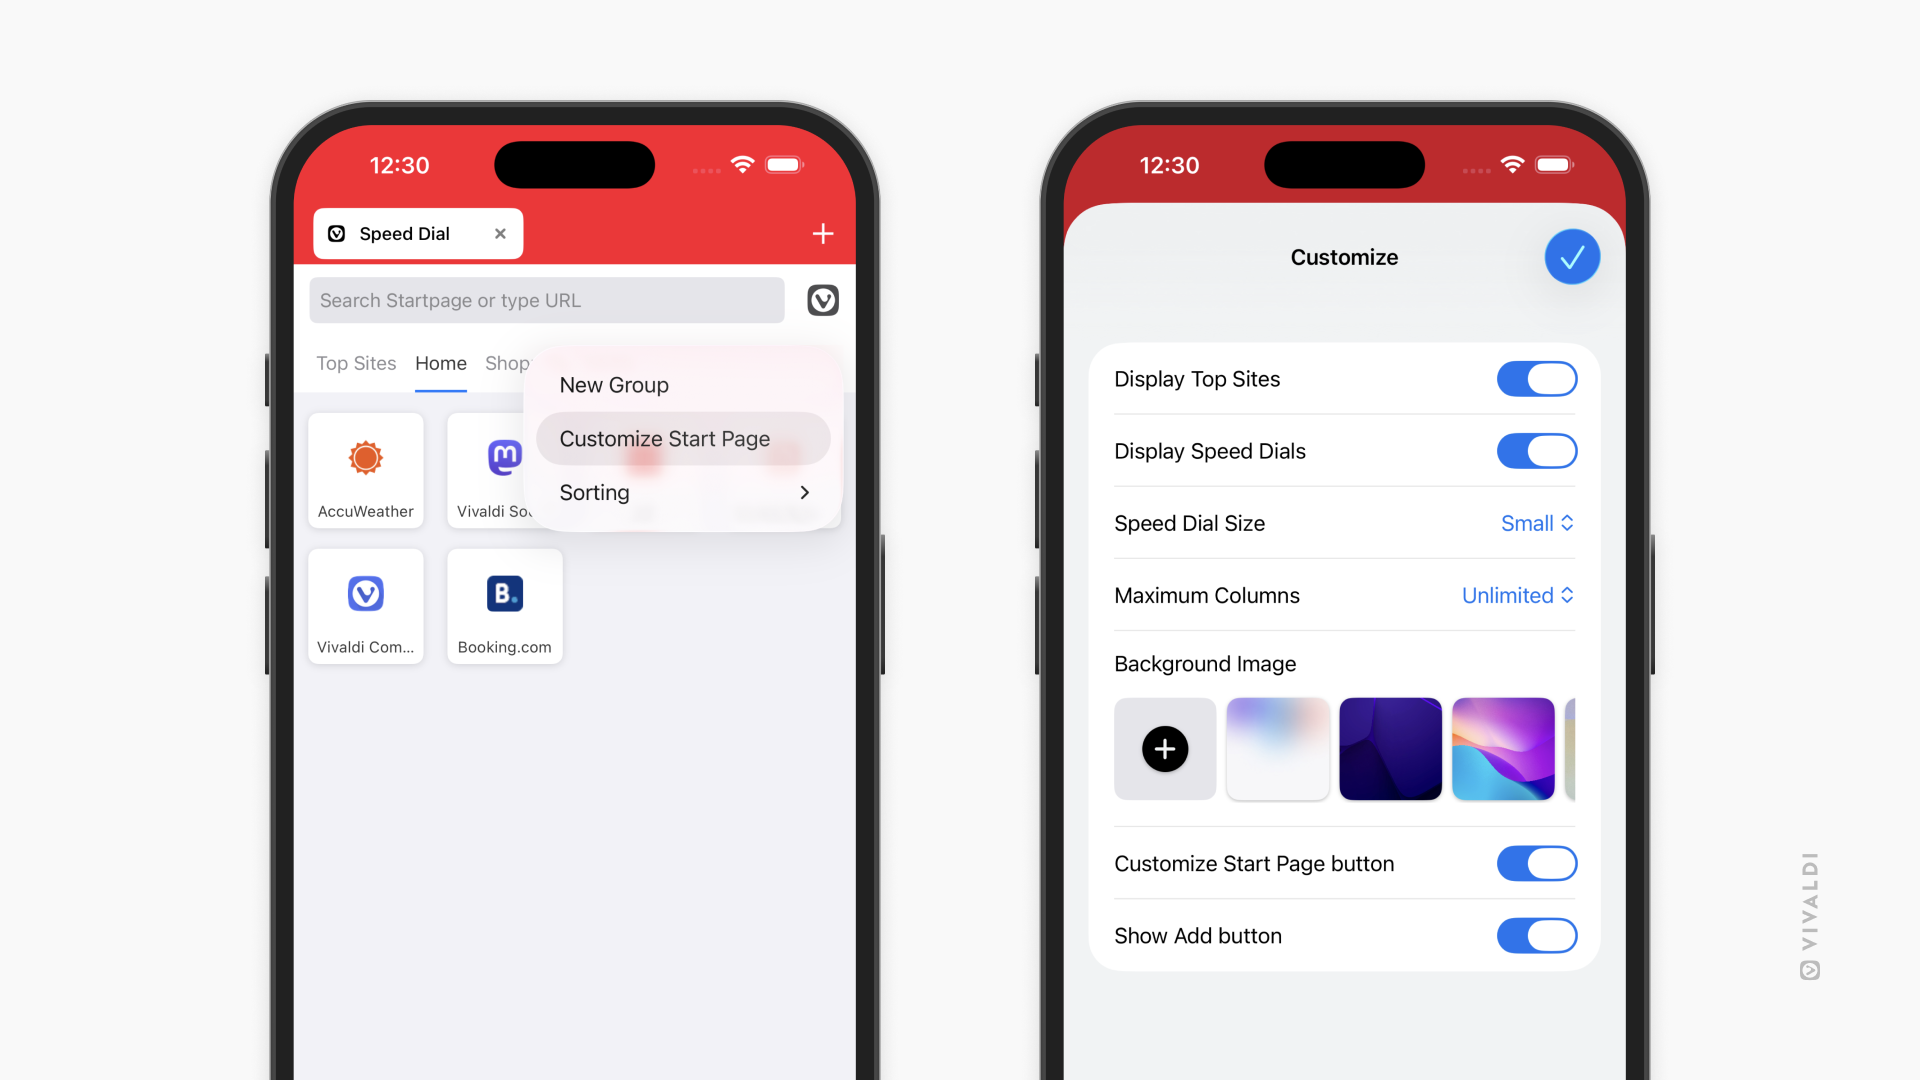
  2. Tap on the 3 dot menu in the top right corner and select Customize Start Page.
  3. Make the changes.
  4. Click Done.
Two iPhones with Vivaldi open. One showing the menu for opening customization settings, the other displaying the settings view.

Options available to you there include:

  • Toggling Speed Dials visibility on/off.
  • Changing the size of the Speed Dials (large, medium, small, list).
  • Changing the number of Speed Dial columns.
  • Updating the background image.

If you enjoy switching things up regularly, toggle on Customize Start Page button. You can also find the same settings by going to the  Vivaldi menu button Vivaldi menu > Settings > Start Page.


Top Sites

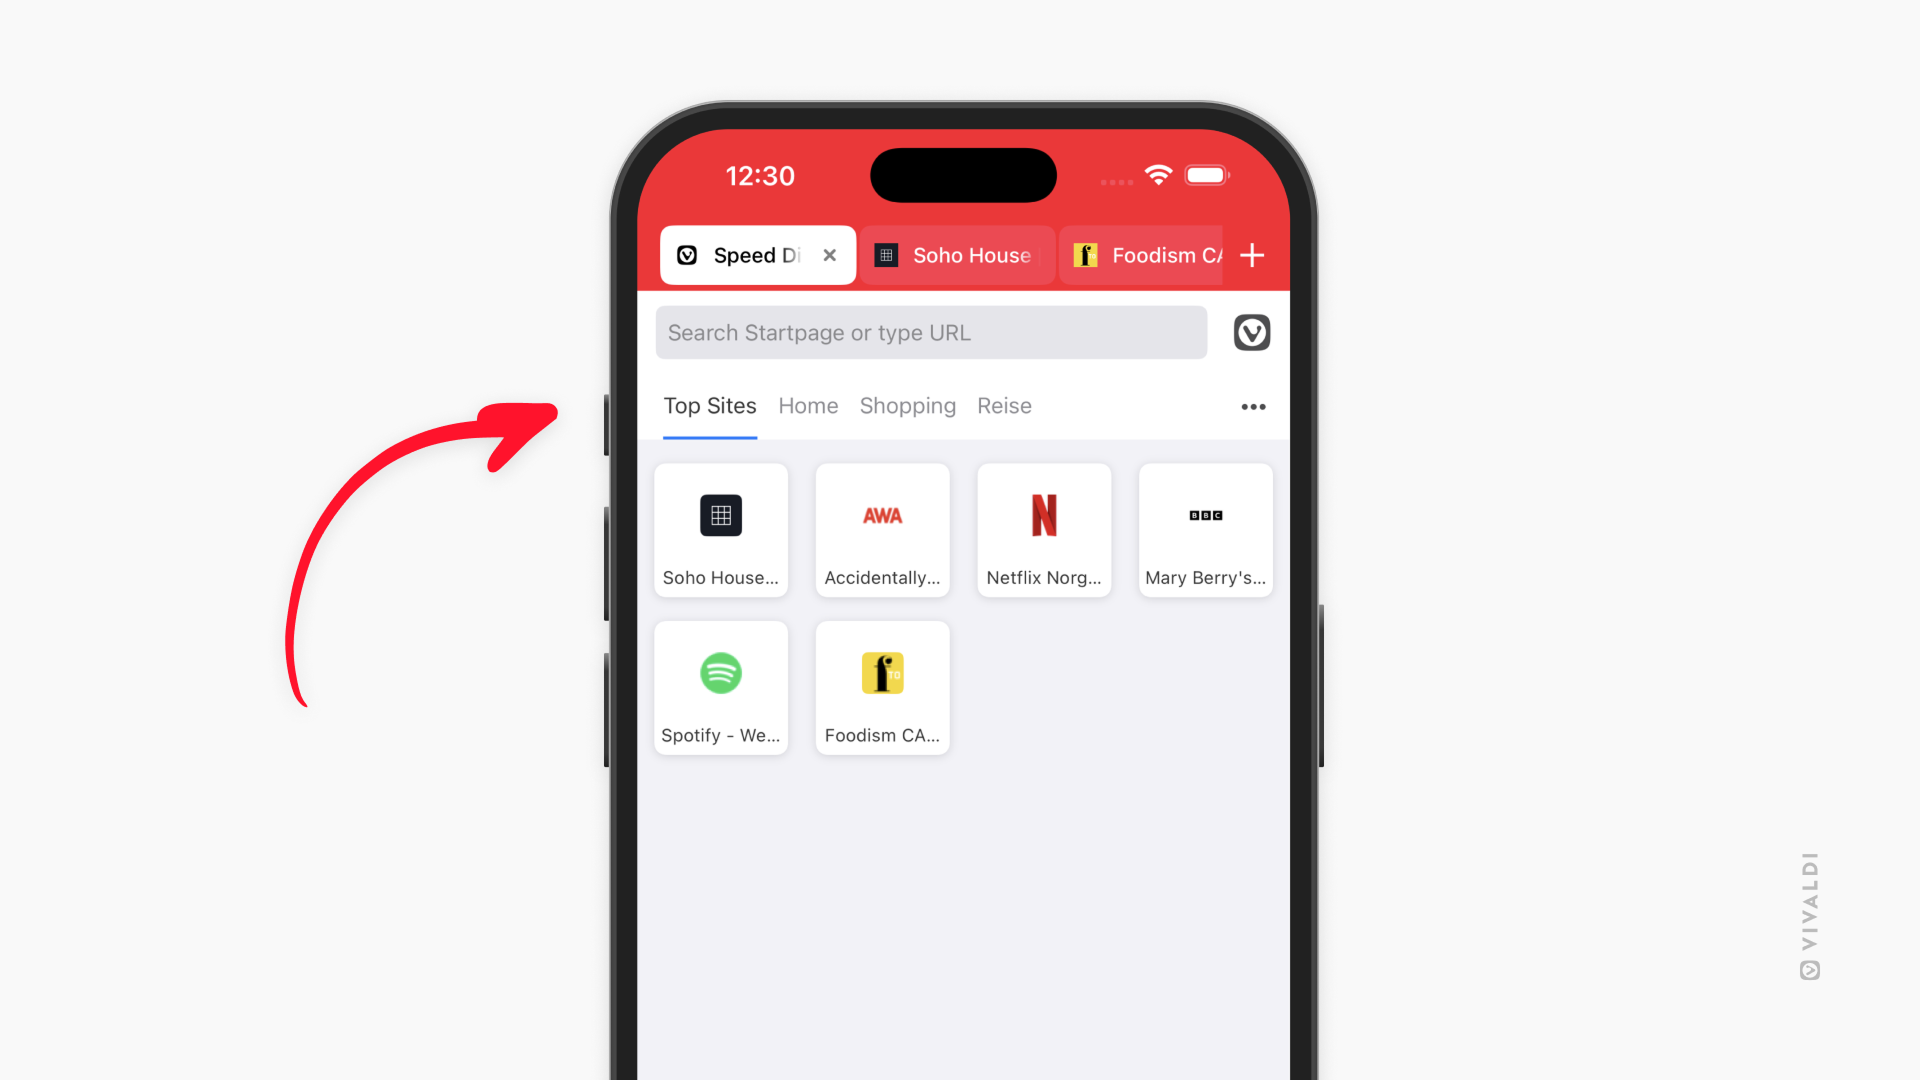
In addition to Speed Dials, you can have an automatically generated group of links on the Start Page made up of your most visited web pages.

Start Page in Vivaldi on iOS open on Top Sites.

To enable Top Sites:

Option 1

  1. Open a new tab with the Start Page.
  2. At the bottom of the page or from the 3-dot menu in the top right corner of Start Page, open Customize Start Page settings.
  3. Toggle on Display Top Sites.

Option 2

  1. Go to Vivaldi Menu > Settings > Start Page.
  2. Toggle on Display Top Sites.

Tab Bar

Tab Bar visibility

To toggle the visibility of the Tab Bar, use one of the following options:


Tab Bar position

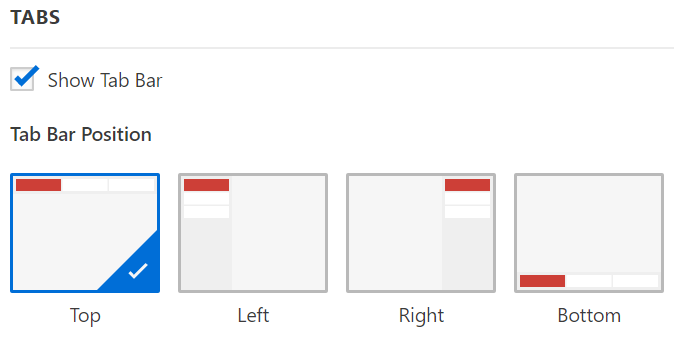
The Tab Bar can be located on any side of the browser window. To change the position:

  1. Go to Settings > Tabs > Tab Bar Position.
  2. Select your preferred side:
    • Top,
    • Left,
    • Right, or
    • Bottom.

When you have moved the Tab Bar to the left or right side of the browser window, you have the option to show the Title of the active tab in a Title Bar, which will also include the Vivaldi Menu button as well as window controls for minimizing, maximizing and closing browser windows.

To enable the Title Bar:

  1. Go to Settings > Appearance > Window Appearance
  2. Enable Show Title Bar.

Tab Bar Appearance

To apply an accent color to the Tab Bar:

  1. Go to Settings > Themes.
  2. Select a theme and open the Editor > Colors.
  3. Make sure Accent on Window setting has been enabled.
  4. Either set an accent color yourself or enable Accent from Page to get the color from the website you’re currently viewing.

From Settings > Themes > Editor > Settings you can also adjust transparency and blur settings.

Tab Bar width on the side of the window

If you’ve positioned the Tab Bar on either the left or right side of the browser window, you can adjust the width of it. You can go wide enough to see plenty, if not all, of the tab title, or as narrow as to show only the website’s favicon.

To resize the Tab Bar:

  1. Hover over the outer edge of the Tab Bar.
  2. When you see a double-ended arrow, drag in either direction to change the width.

Tab Bar Display

Horizontal Scrolling

When the Tab Bar is placed horizontally on the top or bottom of the browser window, by default, tabs start to shrink in size, the more you open them. That can result in page titles or even favicons becoming invisible. Enabling Scrollable Tabs can prevent that. When enabled, tabs won’t shrink in size. Instead, they’ll go out of view and you can scroll the Tab Bar to browse through the open tabs.

To enable Scrollable Tabs:
1. Go to Settings > Tabs > Tab Display > Tab Bar.
2. Check the box for Enable Horizontal Scrolling.

Tab Spacing

When the browser window is not maximized in size, a narrow space is visible above the tabs. It allows you to click and drag the window around. By default, the space is removed when you maximize the window, but you can keep the space by disabling Remove Tab Bar Spacing in Maximized Windows in Settings > Tabs > Tab Display > Tab Bar.

Toggle the visibility of features

Workspaces menu can be hidden from Settings > Tabs > Workspaces > Show Workspaces in Tab Bar or by right-clicking on the Workspaces menu and selecting Show Workspaces in Tab Bar.

Synced Tabs, which allows you to access tabs you have open on other devices, can be hidden from Settings > Tabs > Tab Display > Tab Bar > Display Synced Tabs Button. When disabled, you can still access synced tabs from the Windows Panel.

Recently Closed Tabs can be found behind the trash can button. It can be hidden from Settings > Tabs > Tab Display > Tab Bar > Display Trash Can. Like synced tabs, recently closed tabs can also be found in the Windows Panel.

Tab Thumbnails give you a preview of the website you have open in the tab. To toggle thumbnails on and off, use one of the following methods:

Split View and Slide Over mode on iPad

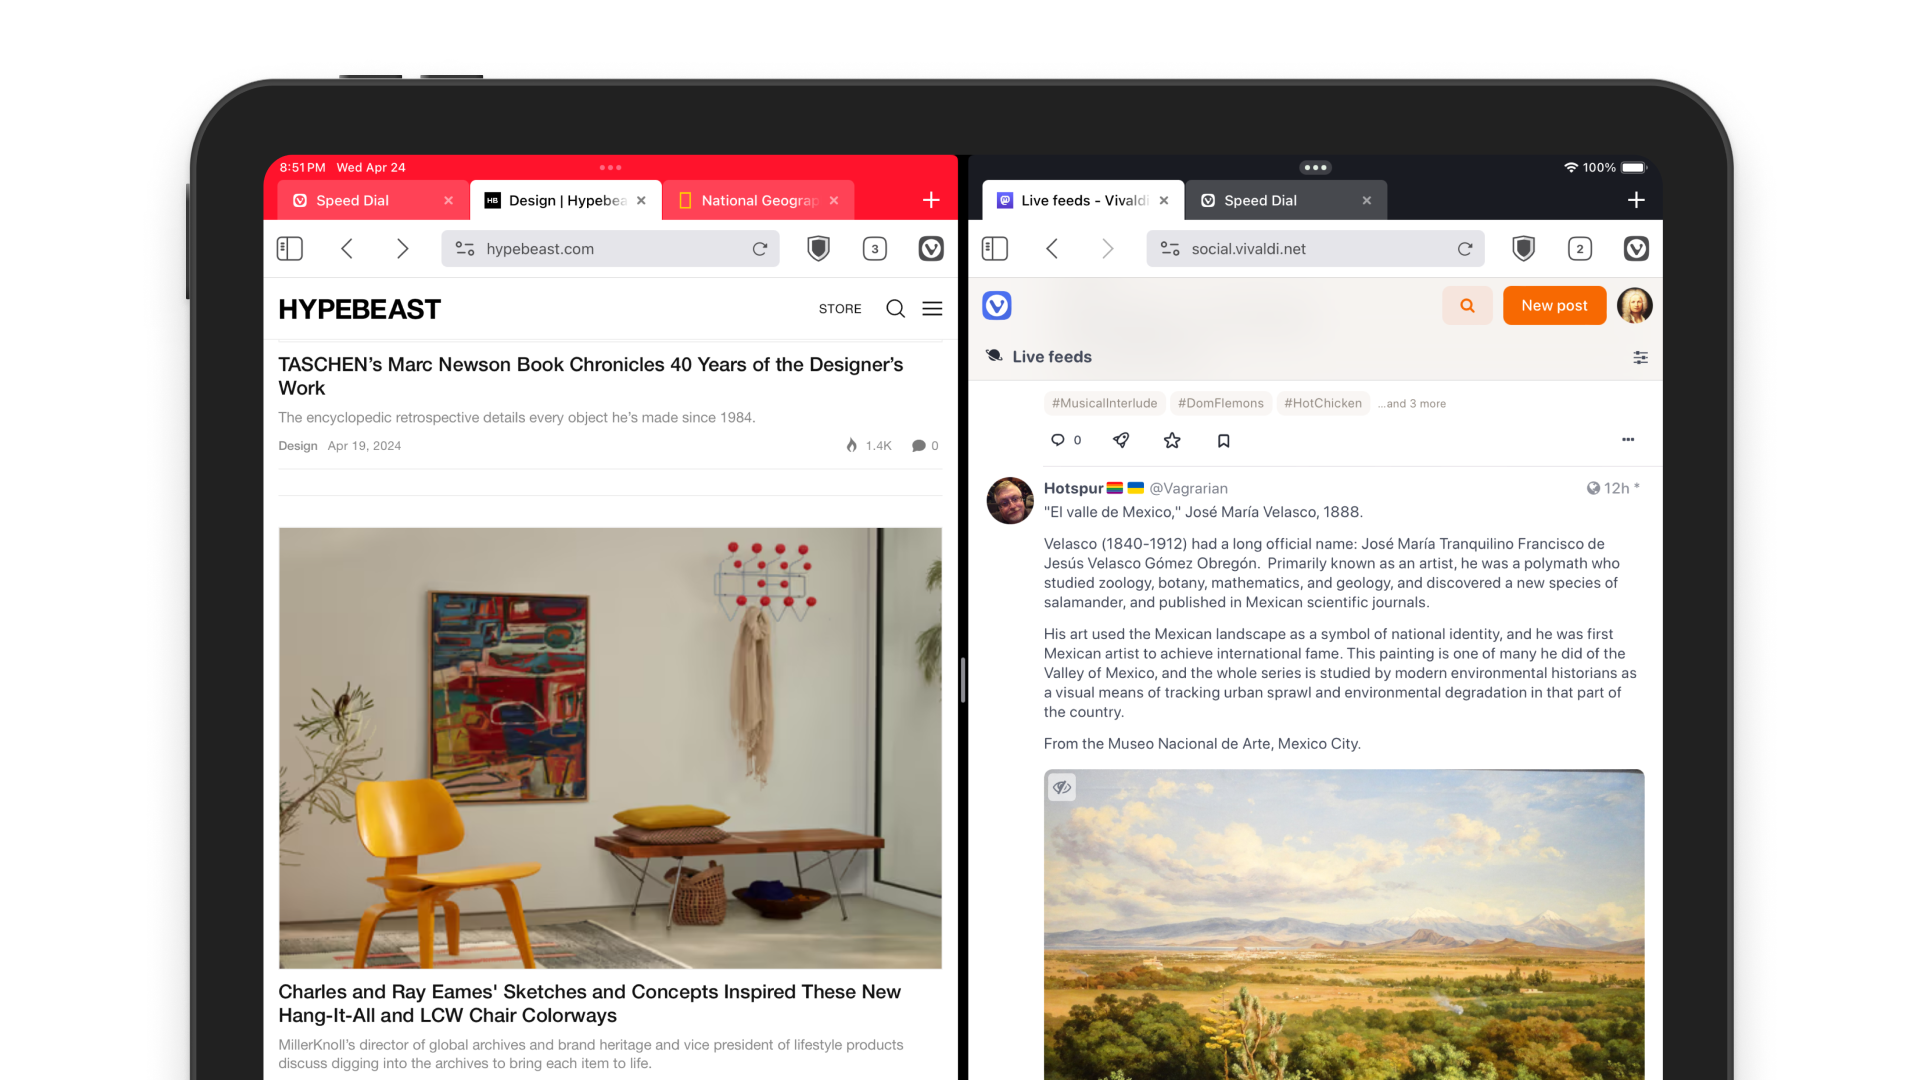
On the iPad’s larger screen, you can get more of the desktop experience by tiling two Vivaldi windows or a Vivaldi window with another app side by side. In addition, you can open Vivaldi in Slide Over mode for a quick check of the app, while doing something else on your iPad.

Split View with Vivaldi

Open new windows

There are a few ways you can open a new Vivaldi window in split view on an iPad.

Option 1

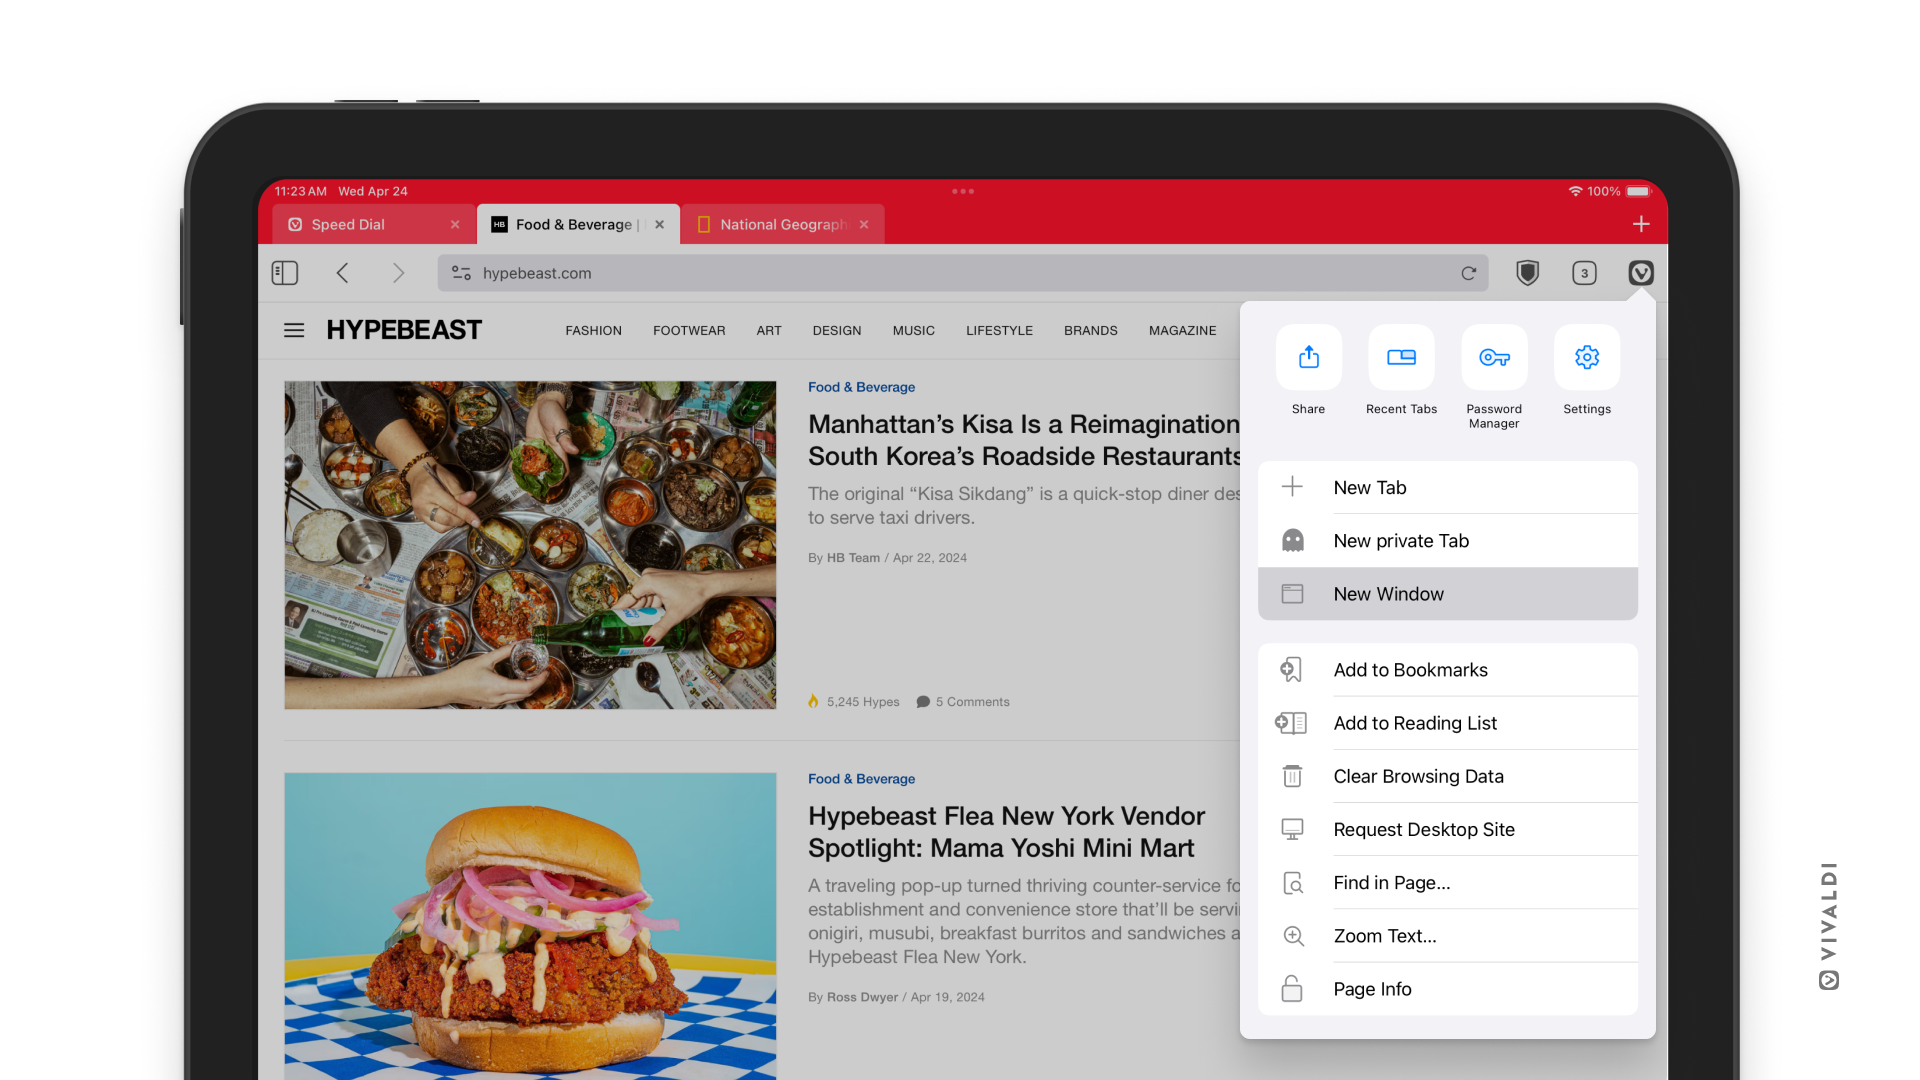
  1. Open the  Vivaldi menu.
  2. Select New Window.

The new window will create a split view with the window you already had open.

Vivaldi browser on an iPad. The main menu is open, highlighting the New Window option.

Option 2

  1. If Vivaldi is pinned to the dock, swipe up from the bottom of the screen to display the dock.
  2. Long-press on Vivaldi’s icon on the dock.
  3. Drag it either to the left or right side of the screen to create a split view.

Option 3

  1. Long-press on a link on a web page.
  2. Select Open in New Window.

Option 4

  1. Tap on the Multitasking button at the top of the screen.
  2. At the bottom, where other open Vivaldi windows are displayed, tap on the new window button.

Resize windows

To make one window bigger than the other:

  1. Tap and hold your finger on the line between the two windows.
  2. Slide your finger towards either side to resize the tiled windows.

View all open Vivaldi windows

To view all windows, either:

  • Tap on the multitasking button at the top of the screen. All windows will appear at the bottom of the screen. Tap on one to bring it into focus.
  • Open iPad’s App Switcher to view all Vivaldi windows together with other apps.

Move tabs to other windows

It’s not possible to move tabs from one Vivaldi window to another, but you can open a duplicate.

  1. Open the Tab Switcher in the window from which you want to move the tab.
  2. Long-press and drag the tab you want to move from one window to the other.
  3. Drop the tab on the Tab Bar to open it in the second window.

Close windows

To close a Vivaldi window:

  1. Swipe from the bottom of the screen to open the App Switcher.
  2. Locate the Vivaldi window you want to close.
  3. Swipe it off the screen.

Slide Over mode

Open Vivaldi in Slide Over mode

To open Vivaldi in a smaller window on top of another app or Vivaldi window:

  1. Open Vivaldi.
  2. Tap on the multitasking button at the top of the screen.
  3. Select Slide Over mode.
  4. Select the app you want to open Vivaldi on top of.
A web page with a dark theme in Slide Over mode over a light themed web page.

Revert to full-screen

To open Vivaldi in Slide Over mode back in full-screen view:

  1. Tap on the multitasking button at the top of the slide-over window.
  2. Select the full-screen option.

Close Slide Over mode

To close a slide-over window:

  1. Swipe from the bottom of the screen to open the App Switcher.
  2. Swipe to the view that displays all apps open in Slide Over mode.
  3. Locate the Vivaldi window you want to close.
  4. Swipe it off the screen.

More info on multitasking on iPads can be found on Apple’s Support pages.

Memory Saver

The Memory Saver helps reduce memory usage by automatically hibernating tabs that haven’t been used in a while.

Vivaldi Feed Reader Auto-Detects Feeds

Vivaldi Feed Reader helps you discover more feeds on popular sites that have made their feeds difficult to find.

Memory Saver

Memory Saver helps reduce memory usage by automatically hibernating tabs that haven’t been used in a while. This way, active tabs, such as those used for gaming or streaming, can run more smoothly.

How much memory will be saved depends on the number of tabs you have open and how much memory they use. Also, how soon a tab is hibernated varies (especially with the Automatic option). Tabs that you rarely visit will be hibernated a lot sooner than the ones you view often. Tabs playing media, including forms, updating frequently (e.g. a mailbox), etc. will be kept active for longer.

To enable Memory Saver:

  1. Go to Settings > Tabs > Memory Saver.
  2. Select your preferred option:
    • Disabled
    • Automatic (recommended)
    • After 1 Hour Idle
    • After 2 Hours Idle
    • After 3 Hours Idle
    • After 6 Hours Idle

To reactivate a tab just go to it and it will reload. Due to this, you may lose your place on the page.

While Memory Saver puts tabs into hibernation automatically, you can still hibernate background tabs, Tab Stacks, and Workspaces whenever you need it by right-clicking on a tab, Tab Stack, or Workspace and selecting the hibernation option from the menu.


Memory usage per tab

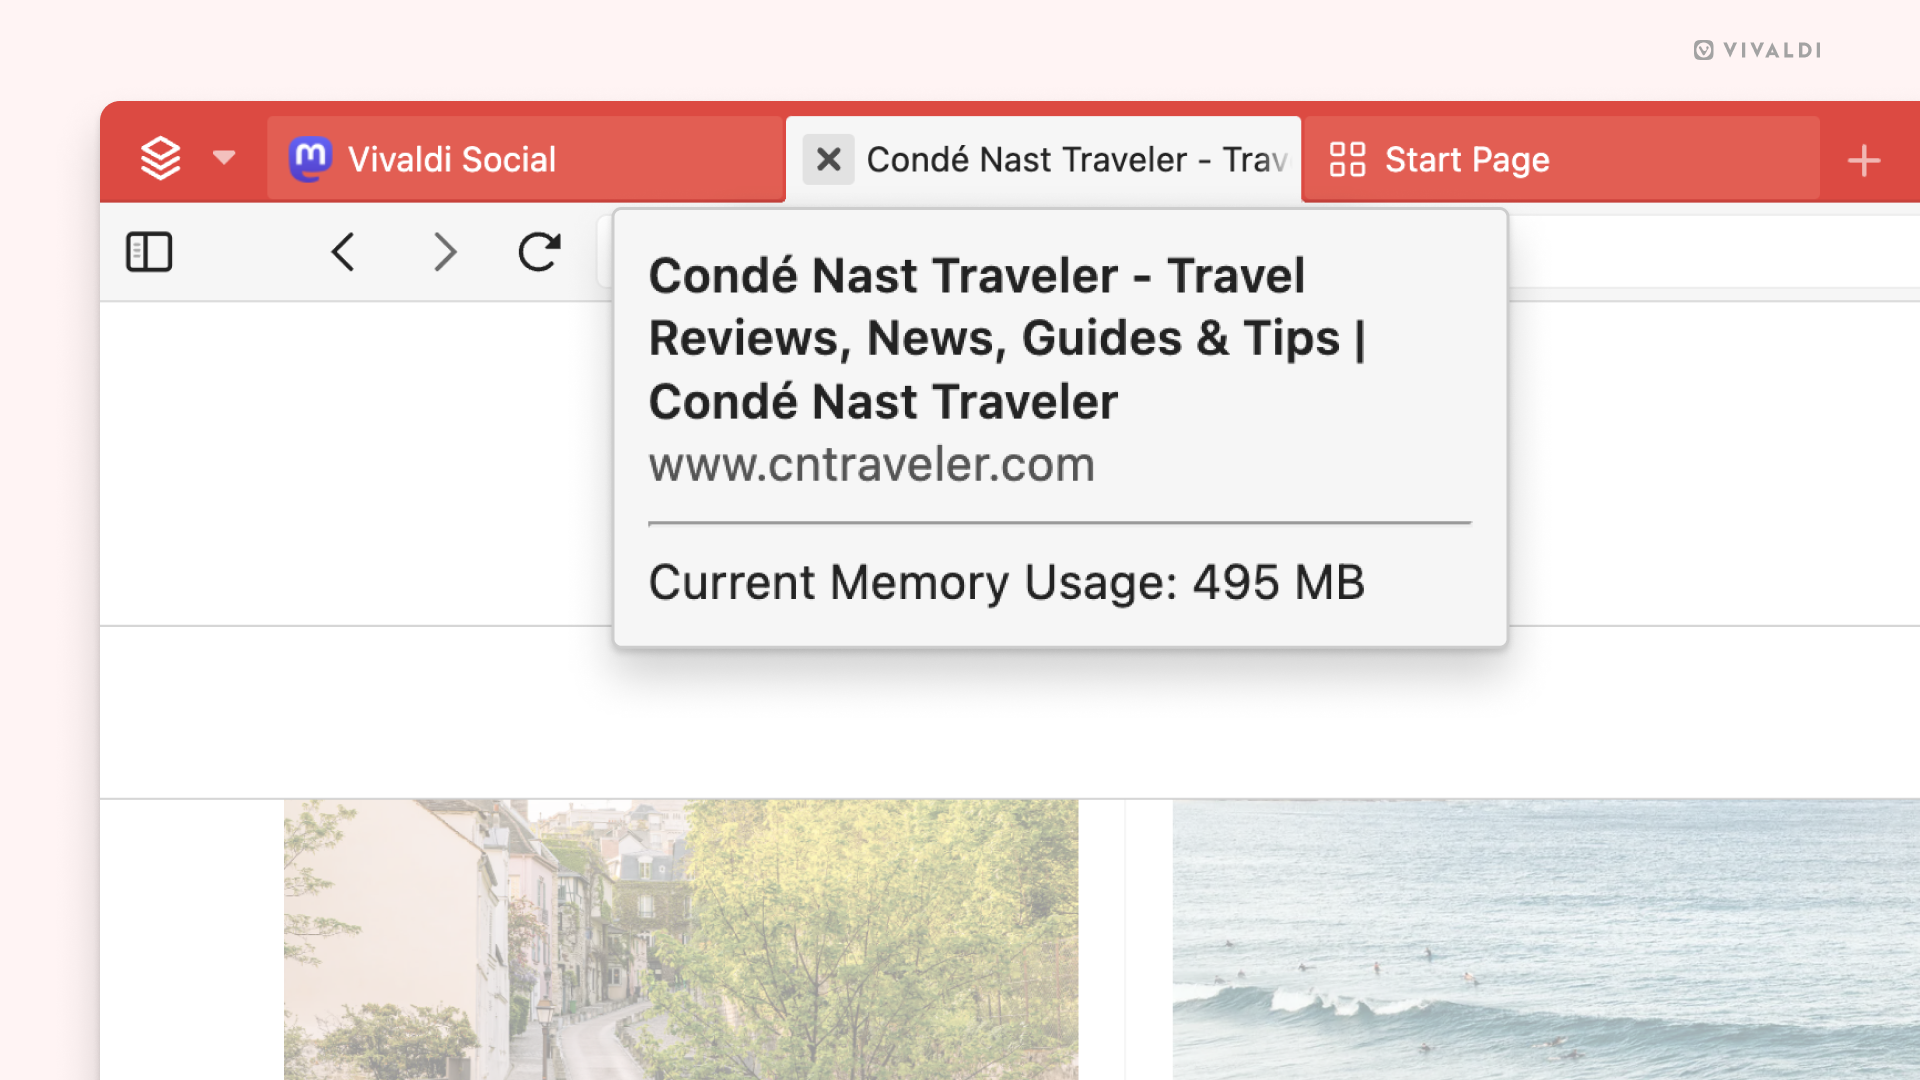
To see how much memory a specific tab uses in real time, hover over the tab on the Tab Bar to display the Tab Thumbnail. The thumbnail preview also lets you know when a tab is hibernated.

If you don’t see Tab Thumbnails on hover, go to Settings > Tabs > Tab Display > Tab Options and make sure Show Popup Thumbnails has been enabled.

Active tab's tab thumbnail showing its current memory use.

Filter content on Vivaldi Social

On Vivaldi Social, you can automatically hide posts that you find offensive, deal with sensitive matters, just oversaturate your timelines or you don’t wish to see for any other reason.

Add a new Filter

To create a filter:

  1. Go to Preferences > Filters.
  2. Click Add new filter in the top right corner.
  3. Give the filter a name (if you choose to hide the posts with a warning, the filter’s name will be mentioned on the post).
  4. If you want to apply the filter temporarily, select an expiration time.
  5. Choose where the filter will be applied – Home and lists, Notifications, Public timelines, Conversations, Profiles.
  6. Decide whether to hide the post behind a warning or remove it altogether.
  7. Enter the keyword(s) you want to filter out. You can enter words, phrases, hashtags or emojis.
  8. Click Save new filter.

Edit a Filter

To update a filter:

  1. Go to Preferences > Filters.
  2. In the list of filters you’ve created, click Edit Filter on the one you wish to edit.
  3. Make the changes.
  4. Click Save Changes.

Delete a Filter

  1. Go to Preferences > Filters.
  2. In the list of filters you’ve created, click Delete on the one you wish remove.

Vivaldi Notes File Format

Products: Vivaldi for desktop.

Vivaldi can import and export Notes to a Markdown+Front Matter files (.md file extension) and directory structures. Vivaldi can also import plain text files (.txt file extension).

You can import your notes through the File: Import menu and export through the File: Export menu.

Notes will be exported while recursively preserving the notes folder structure in your file system. When importing notes, the selected notes directory is imported recursively while preserving the folder structure as notes folders.

On import, all files are assumed to be Markdown formatted, regardless of file extension. Unrecognized file extensions are ignored during import. Note attachments cannot be imported or exported. (We hope to include this in a future version.)

Vivaldi preserves note metadata — including a note’s title, associated URL, creation- and modification time — as a Front Matter preamble.

During import, all metadata and the entire Front Matter preamble is optional. The file name will be used as the title if the title is not provided in the metadata.

A Front Matter preamble consists of three hyphens on the first line of the file followed by a line break. Metadata is then listed as colon-separated key-value pairs which are separated by line breaks. The preamble is terminated by another sequence of three hyphens followed by a line break. Unrecognized keys in the Front Matter preamble are ignored.

Metadata dates should be in the ISO 8601 datetime format. Other formats may lead to unexpected results.

Example file with the complete set of recognized metadata keys:

---
title: Example Title
url: https://example.com/
date: 2024-02-19T07:30Z
lastmod: 2024-02-21T15:09:58Z
---

I'm a *bold* Markdown note!

* List item

Vivaldi Reading List File Format

Products: Vivaldi for desktop.

Vivaldi can import and export the Reading List to a comma-separated values (CSV) file. The data structure is a table which is interoperable with the Instapaper CSV file format.

You can import your reading list through the Vivaldi menu > File > Import from Applications and Files and export through the Vivaldi menu > File > Export > Export Reading List.

The file must comply with RFC-4180 and have a .csv file extension. Please note the special requirements in RFC-4180 for table fields containing any of the following characters: comma (,), double-quote ("), and line breaks (carriage returns and line feeds).

The first line of the file must be the following exact table header declaration:

URL,Title,Selection,Folder,Timestamp

Each reading list entry is defined as a table row following the above schema. Each row is separated by a carriage return and a line feed character. A complete example is included at the bottom of this document.

The URL and Title columns contain the URL and title of the reading list entry. The URL must be unique and a valid absolute URL. On duplicate URL values, Vivaldi will keep the last use of the URL.

The Selection column is unused in Vivaldi.

The Folder column. Vivaldi only supports two values for the Folder column: Unread for all unread entries, and Archive for all read entries. Unrecognized or empty folder names will be treated as Archive on import.

The Timestamp column is a POSIX timestamp associated with the reading list entry. For example, the date it was added to the list or its state last modified. Vivaldi uses the reading list entry’s last modification time.

Example file:

URL,Title,Selection,Folder,Timestamp
https://example.com/,Example,,Unread,1708327800
https://example.net/,"Escaped, ""Title""",,Archive,1708327800

Search messages in Vivaldi Mail

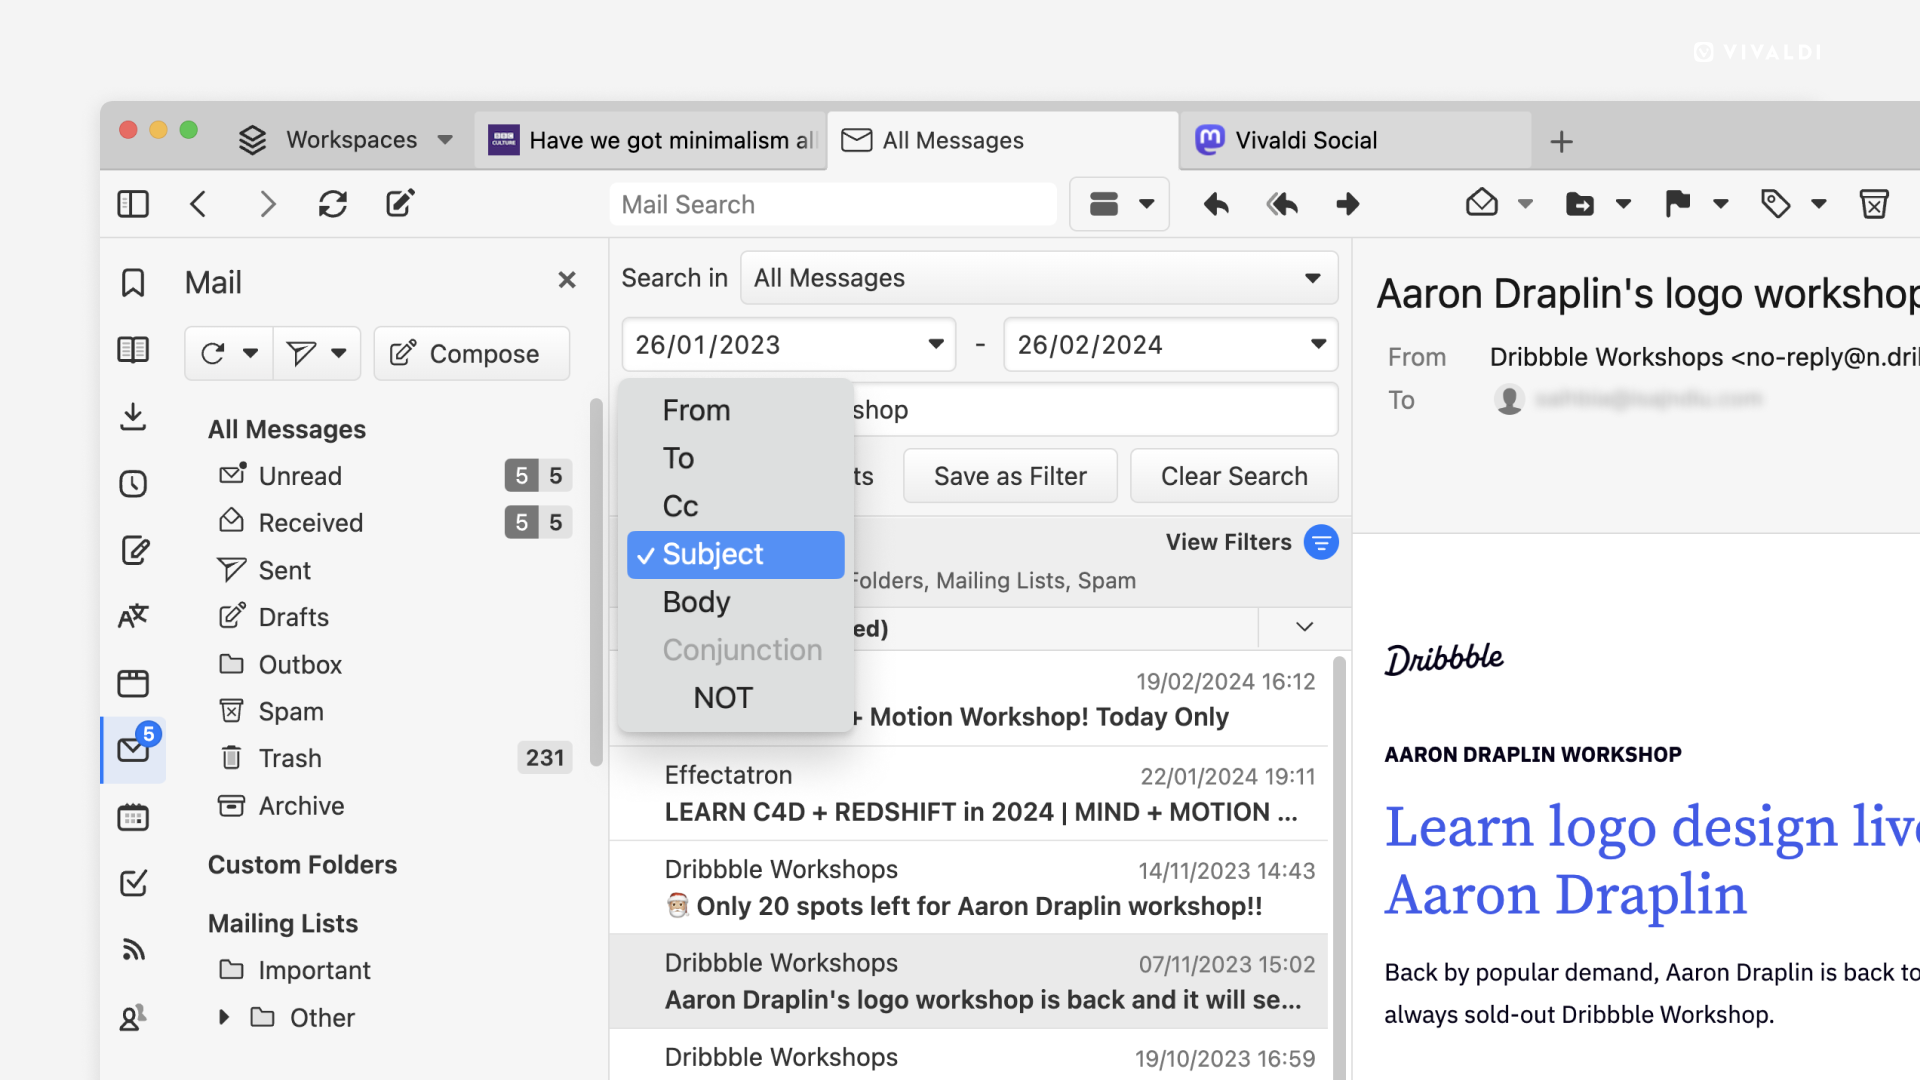
With multiple mailboxes and probably thousands of emails, finding the correct one can be tough. Vivaldi Mail’s search function makes it easy to pin down the one you need in just a few steps.

Search messages

To search through everything, just type something relevant to the message you’re looking for in the search field and Vivaldi will show you all the relevant email messages.

To narrow down the search, use the various search filters that appear as soon as you’ve started a new search. The options include:

  • Searching through all messages or specific accounts or folders.
  • Specifying the date range.
  • Looking for senders or recipients (From, To, CC).
  • Search by the email subject.
  • Search by something in the body of the message.
  • Showing only messages that include attachments.
  • Use the conjunction NOT to only find messages that do not match with the search keyword.

From View Filters you can further choose whether to display read messages, and messages from Custom Folders, Mailing Lists, Archived, Feeds, Spam, and Trash folders.

To reset the search filters, click on Clear Search.


Save searches

Frequently performed searches can be saved as Filters.

To save a search:

  1. Review the search keyword(s) and filters.
  2. Click on Save as Filter, below the search filters.

Once the search is saved as a filter you can add actions to it.

  1. Go to Settings > Mail > Mail Filters and Actions.
  2. Select the saved search filter.
  3. At the bottom of the filter settings, click Add Action.
  4. Choose the action. For example, add a label, mark as read, etc.
  5. If you wish, add more actions by clicking the + button next to the current action.
  6. Finish by clicking Update Mail Filter.