Themes on Android
Learn how to customize the look of your Vivaldi on Android.
Learn how to customize the look of your Vivaldi on Android.
There was a recent news report that showed that thousands of people had accidentally uploaded their home directories/folders to public Git repositories that they were working on, and that included the profile directories for other browsers. You can read more about this here: https://www.theregister.com/2021/11/18/firefox_cookies_github/
We added a detection and protection to the latest release of Vivaldi, to prevent you from having the same thing happen to your Vivaldi profile.
The detection checks if there is a .git folder either in the Vivaldi profile folder, or a parent folder of the Vivaldi profile folder and will show a warning message when .git folder has been detected.
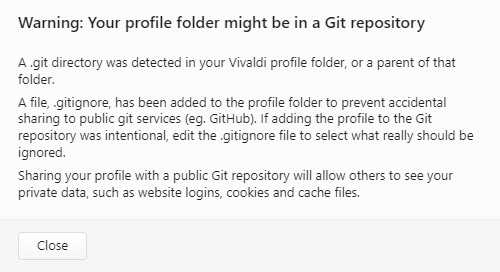
For example, on Windows, the default Vivaldi profile folder is:
C:\Users\<your_username>\AppData\Local\Vivaldi\User Data\DefaultSo you would need to check for the following folders:
C:\Users\<your_username>\AppData\Local\Vivaldi\User Data\Default\.git
C:\Users\<your_username>\AppData\Local\Vivaldi\User Data\.git
C:\Users\<your_username>\AppData\Local\Vivaldi\.git
C:\Users\<your_username>\AppData\Local\.git
C:\Users\<your_username>\AppData\.git
C:\Users\<your_username>\.git
C:\Users\.git
C:\.git
On Linux, the default Vivaldi profile folder is:
/home/<yourusername>/.config/vivaldi/DefaultSo you would need to check for the following folders:
/home/<yourusername>/.config/vivaldi/Default/.git
/home/<yourusername>/.config/vivaldi/.git
/home/<yourusername>/.config/.git
/home/<yourusername>/.git
/home/.git
/.git
For snapshot releases, the default profile folder is /home/<your_username>/.config/vivaldi-snapshot. Note that these folders could be placed somewhere else on some distros.
On Mac, the default Vivaldi profile folder is:
/Users/<yourusername>/Library/Application Suppert/Vivaldi/DefaultSo you would need to check for the following folders:
/Users/<yourusername>/Library/Application Support/Vivaldi/Default/.git
/Users/<yourusername>/Library/Application Support/Vivaldi/.git
/Users/<yourusername>/Library/Application Support/.git
/Users/<yourusername>/Library/.git
/Users/<yourusername>/.git
/Users/.git
/.git
For snapshot releases, the default profile folder is /Users/<yourusername>/Library/Application Suppert/Vivaldi Snapshot/Default.
Check your profile folder location to work out where to start. You can see this using  Vivaldi menu > Help > About, or Vivaldi application menu > About Vivaldi on Mac.
Note that any .git folder is hidden on most systems by default. On Windows, you need to tell Windows Explorer (My Computer) to show hidden files and folders, in the folder options. On Mac, open the Finder and press Cmd Shift . to show or hide hidden files and folders. On Linux, use your favourite terminal/console application, and use the following command to see all files and folders, including hidden ones:
ls -aAlternatively, on Mac or Linux, you could use your favourite terminal/console application, and use the following command to search for .git folders:
find ~/ -name '.git'You can also use / instead of ~/ to search the entire filesystem, but be aware that it might show a lot of errors when there are folders that you do not have access to.
Once you find the folder containing the .git folder, you may wish to note that everything from that folder and below, might be in a Git repository. The “git status” command can give more details.
In the Vivaldi browser, you can choose a theme from a selection of pre-installed themes, create your own theme or install themes shared by other Vivaldi users. In this article we’ll focus on the latter, how to install user created themes and also how to share your own themes.
To see the selection of user created and shared themes:
You can filter themes by category, color, whether the theme has been featured by the Vivaldi Team and whether the theme includes custom icons. You can sort themes by popularity, upload time or alphabetically. Also, you can view themes from the same author by opening one of their themes and in the theme info, clicking on their name next to Made by.
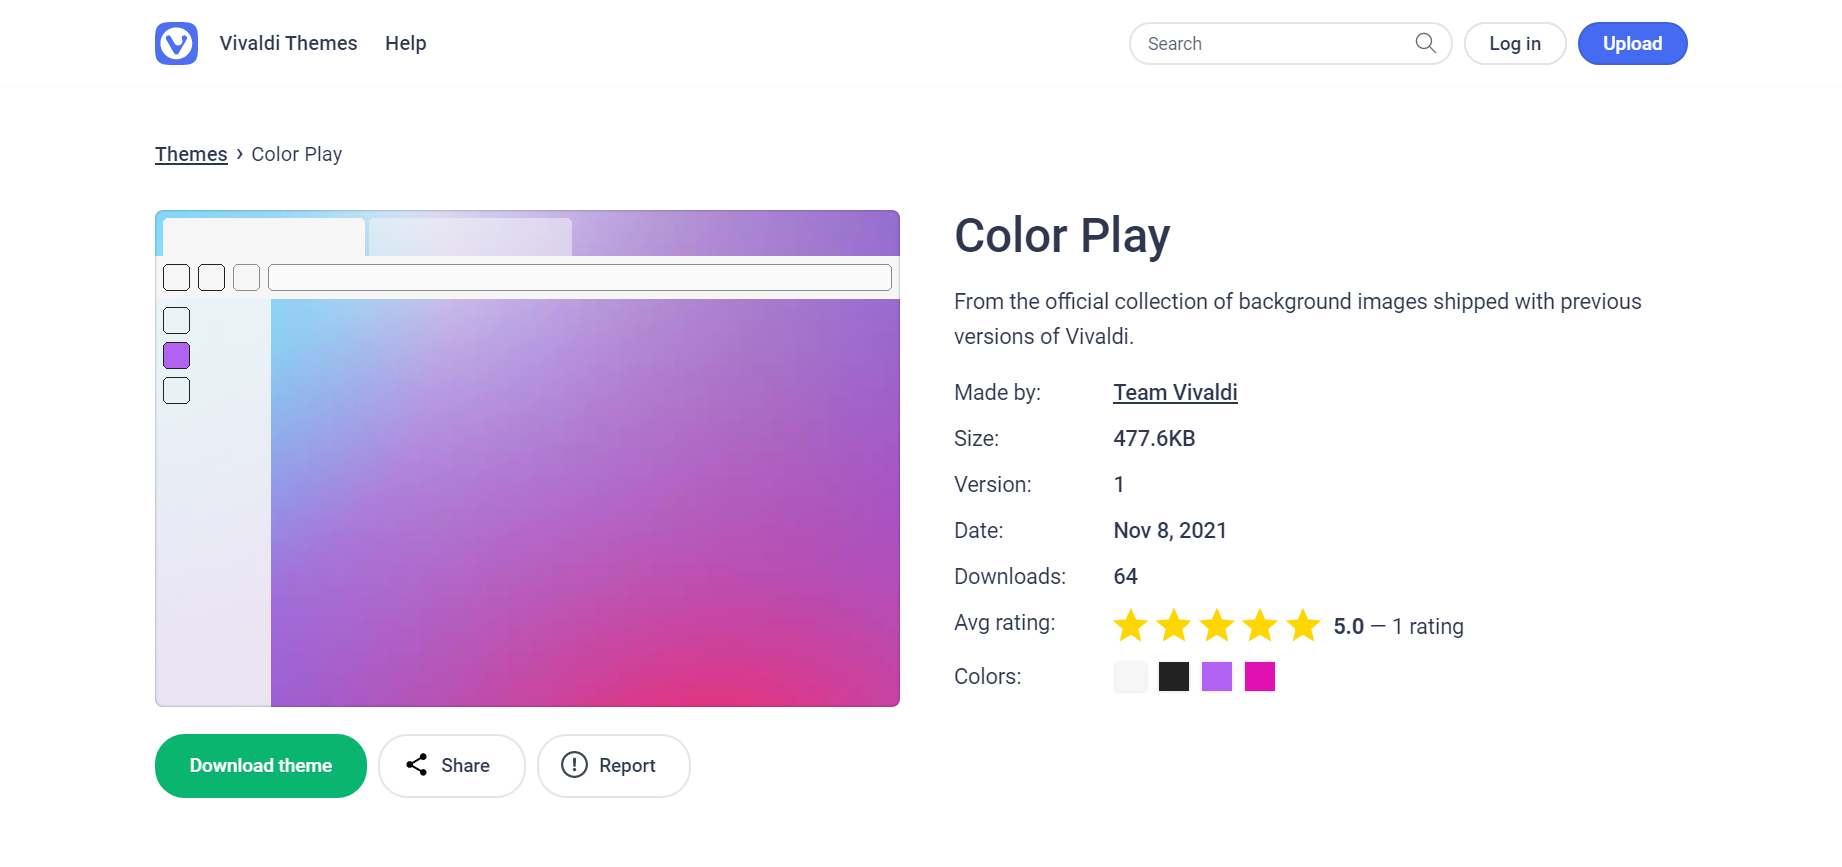
When you’ve found a theme you like:
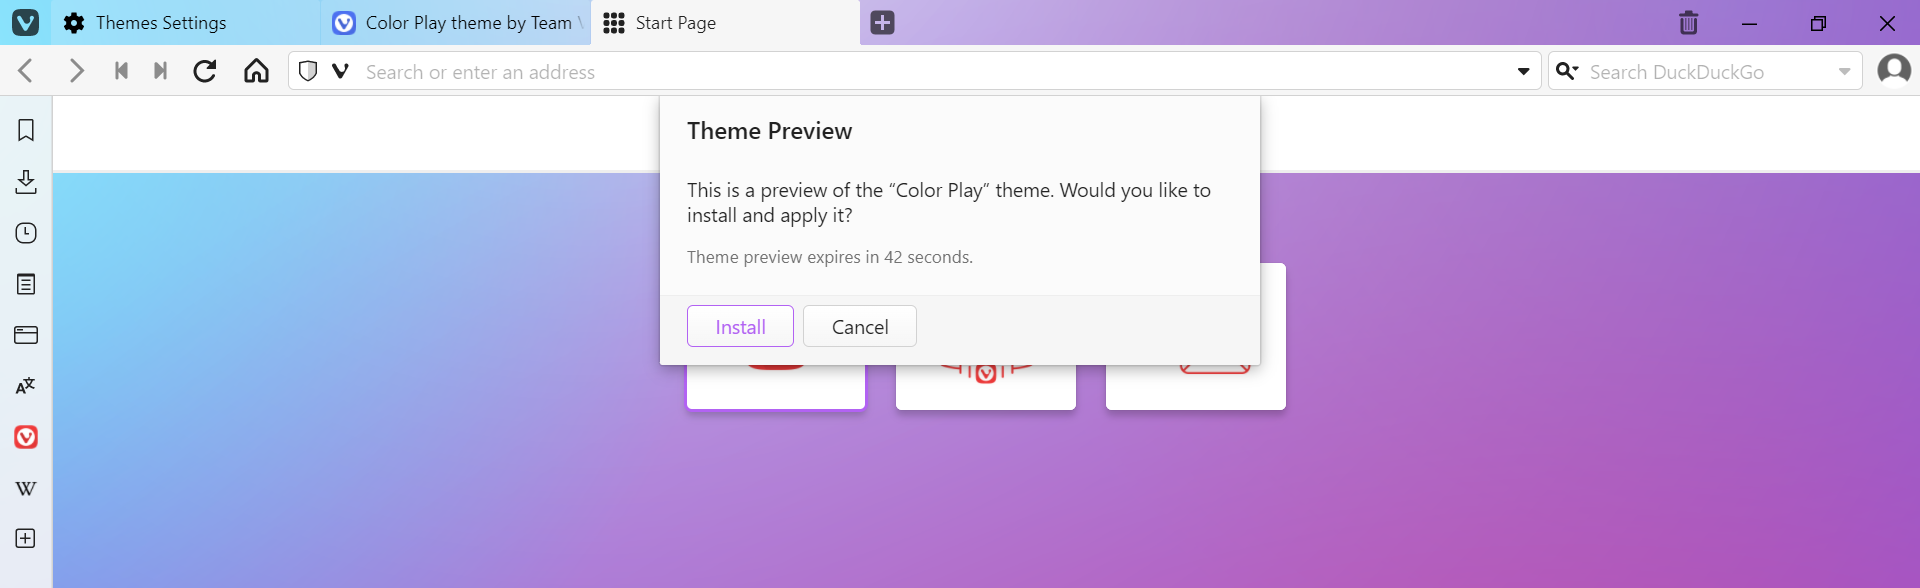
The installed theme will be added to your Theme Library, where you can view the theme’s settings and edit it further.
After having installed the theme, it’d be great if you could rate the theme
In case you’re on an older version of Vivaldi or a different browser, you can download the theme as a ZIP file. When you’ve found a theme you like:
When you’ve made your own theme and would like to share your creation with everyone else, follow these steps:
Vivaldi Team will review your theme and publish it. You’ll be notified once the theme has been published (also, when for some reason, the theme was rejected). In addition, you’ll receive notifications when someone leaves a comment on your theme.
In some cases, we may reject a theme for one of the following reasons:
To view the themes you’ve shared:
Alternatively, go to https://themes.vivaldi.net/users/YourUsername.
Click on a theme on the page to view more details about it. On the theme page you can see the theme’s:
To update a theme you’ve shared:
Vivaldi Team will review your theme and publish it.
The theme’s ZIP file consists of 1 or 2 files. First, the JSON file with the theme’s parameters and secondly, in case your theme uses one, the theme’s background image. In addition to changing the various values in the browser’s settings and exporting the theme, you can take one of the exported theme files as an example and change the values for the parameters using a code editor.
When you’re ready with the new theme, compress the JSON and background image files into a new ZIP file and test it in the browser.
Though all themes will be reviewed before publishing, some unsuitable themes may slip through the review. If you come across a theme that, for example, is broken, includes copyrighted/trademarked content, or something else, please let us know about it.
To report a theme:
Vivaldi team will review the report and make a decision whether to remove or keep the theme.
To open the Translate Panel:
 Translate button on the Panel. Vivaldi menu > View > Translate Panel.
To translate text in the panel:
To use the translation, click on  Copy translation in the bottom right corner of the output field or use the common text highlighting and copying options.
When you’re done with the translation or want to translate something else, click Clear below the output field.
To translate content on a website you can use the full page translation option accessible from the right side of the Address Bar. To translate only some sections of the web page, you can use translation of selected text. The output of translation can be displayed in a pop-up dialog or in the Translate Panel.
To display translations in the panel:
If you prefer the pop-up dialog, disable the setting.
To translate just a small block of text:
Once the text has been highlighted, you can also type “Translate selection” into Quick Commands. In addition, you can create a Keyboard Shortcut or a Mouse Gesture for the action.
In case you use the translation feature often and have the Translation Panel open, you can also cut out the command of translating selected text and do it automatically on text selection.
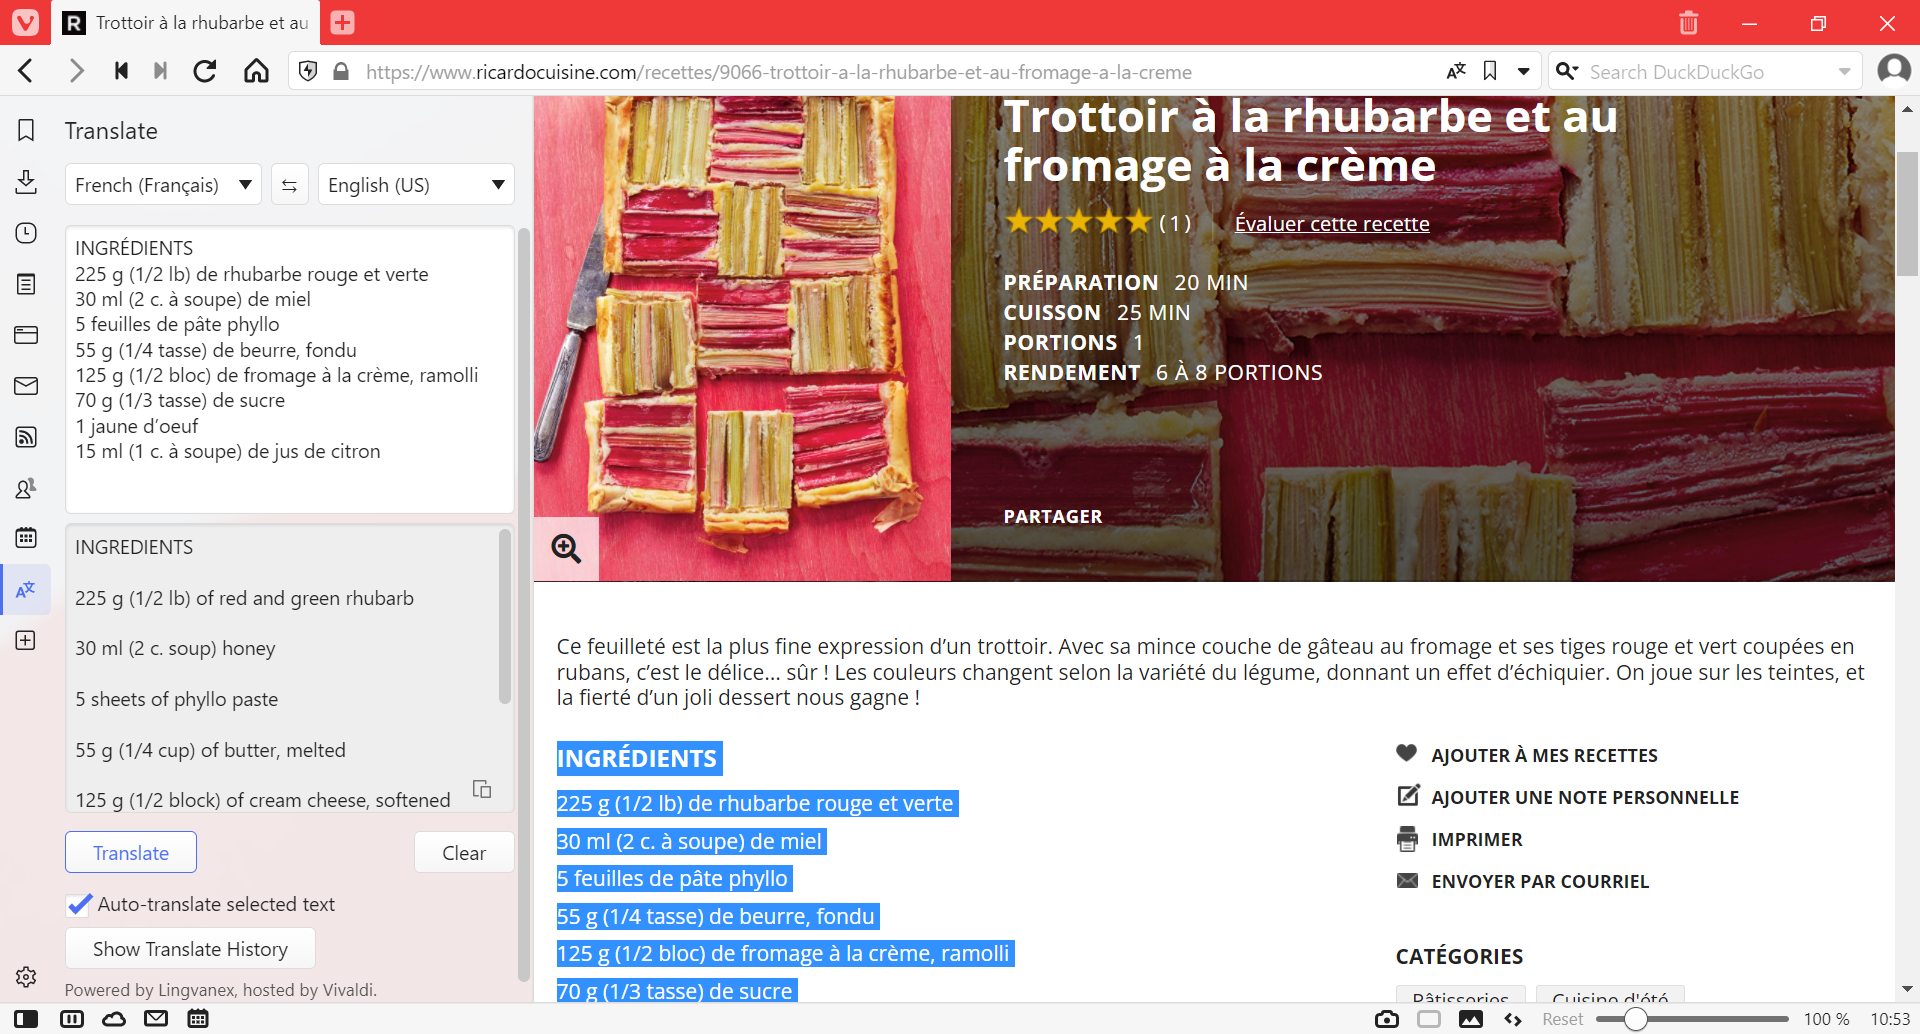
To translate selected text automatically:
To view past translations, click on Show Translate History at the bottom of the panel. Double-click on the history entry to view the translation again. Right-click on the entry to open the context menu with options:
To delete a single history entry:
To delete all history:
Progressive Web Apps (PWA) are websites that can be installed as independent applications.
Start Page is the gateway to the web, hosting the Search field, Speed Dials and some of the browser’s internal pages.
To share page links:
 Vivaldi menu >
  Share. Share.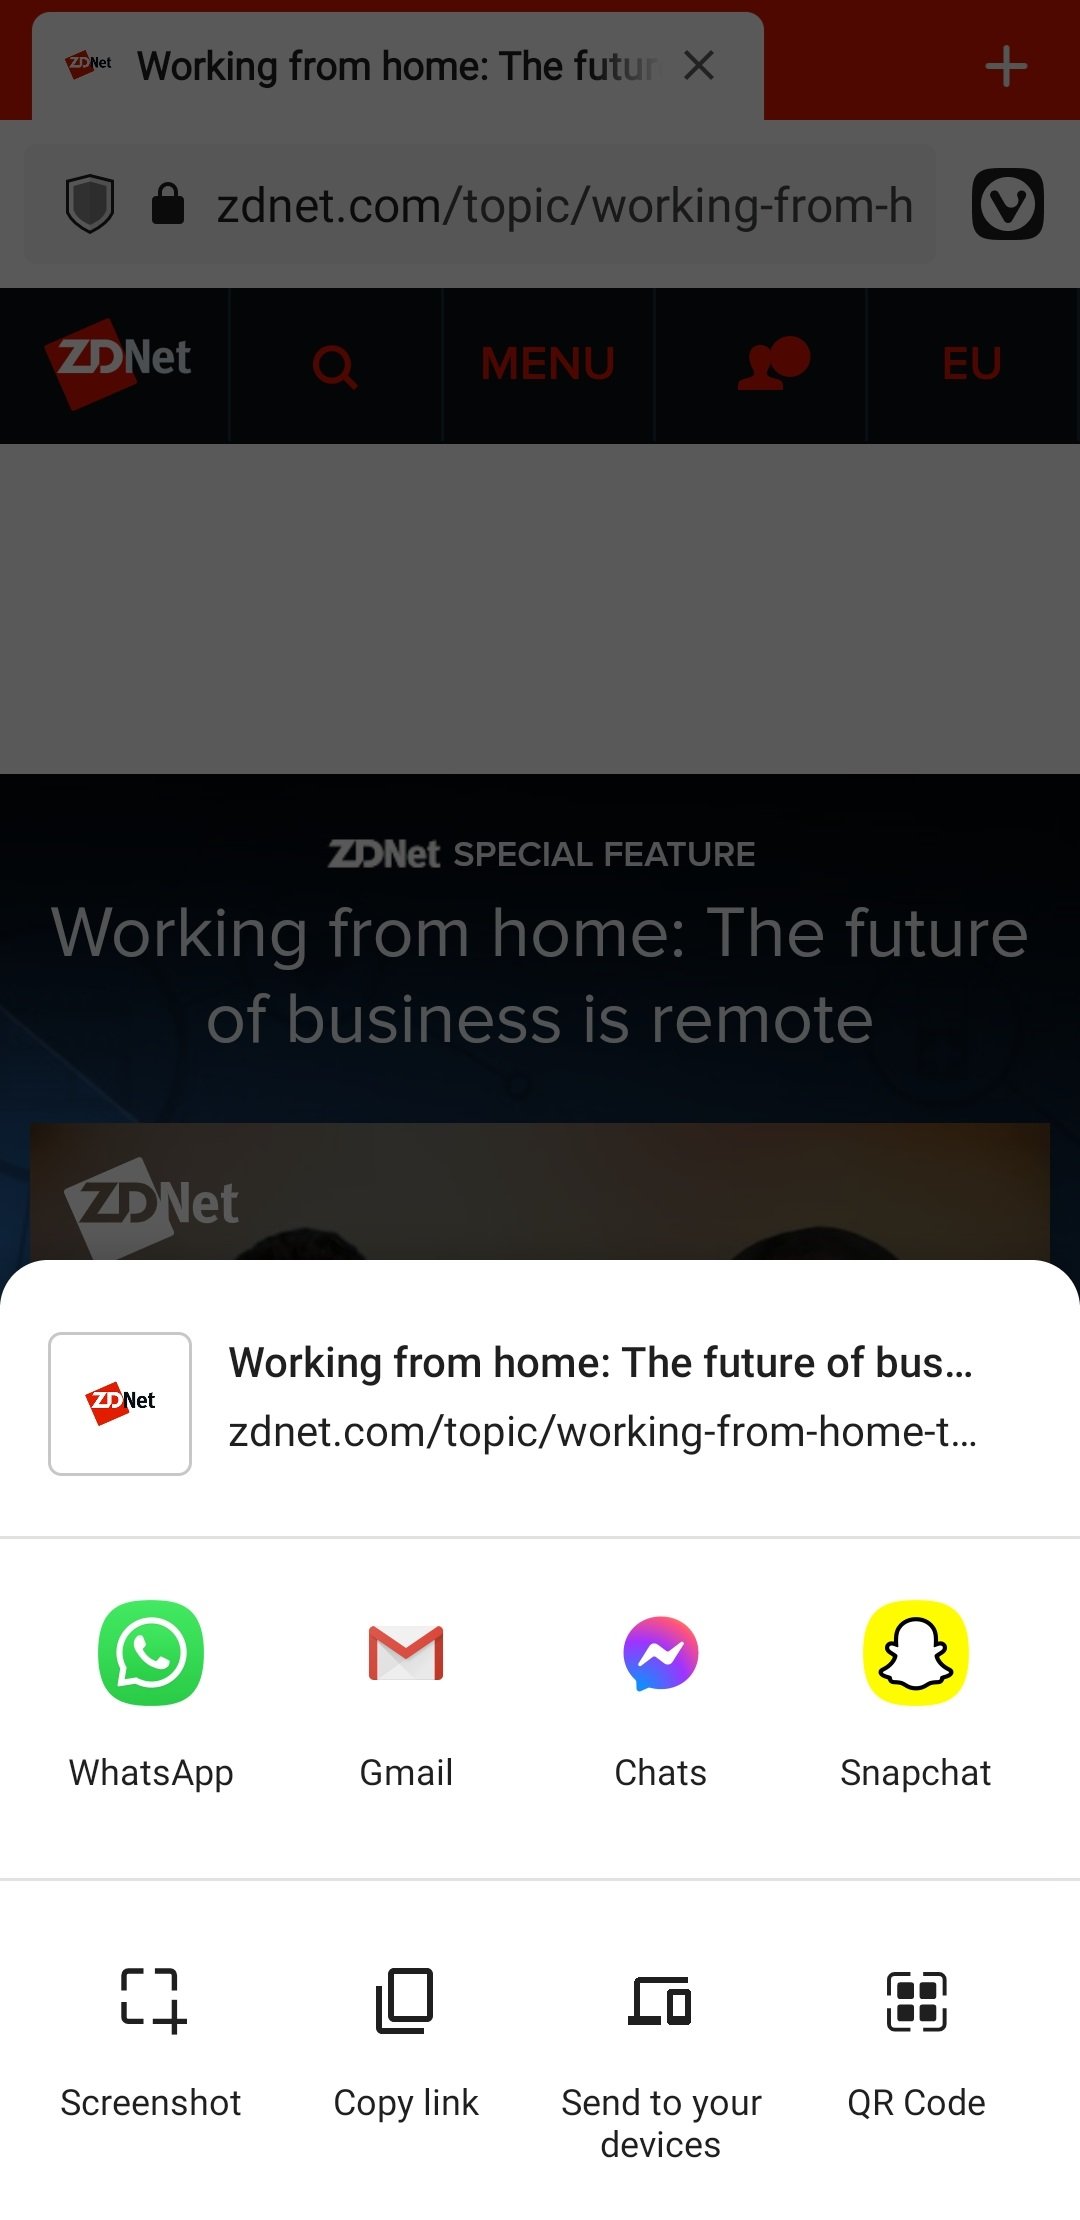
The menu fits 4 apps on the main screen. Swipe left to see more apps and tap on More to see the full list of available options.
In addition to sharing the page directly to another app, you can also:
Share menu’s capture option will only capture the visible area including the browser user interface. Use Vivaldi’s Capture page feature to take a screenshot of the visible area without the UI or of the whole page.
Alternatively, you can copy the link by tapping on the Address Bar > Copy link.
To share a page with someone nearby, create a QR code they can scan with their mobile device. You can also download the QR code image for later use. Read more about QR codes on the help page here.
Send a page from your Vivaldi on Android to other devices you have Vivaldi on. Make sure Sync is active on multiple devices and syncing of Typed History and Remote sessions has been enabled.
To print the whole page or save it as a PDF file:
To access a web page you have open in Vivaldi on Android on another device with Vivaldi, use the Sync feature.
If there’s something odd going on in your mail client there are a few things you can do in order to check for errors.
main.html and click inspect.This will open Developer Tools. To see any errors, go to the Console tab.
There’s also an additional background Developer Tools window that might show more errors. Just follow these similar steps as above:
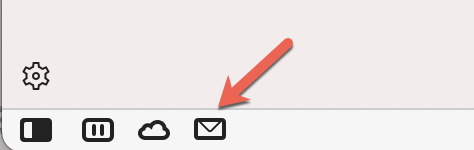
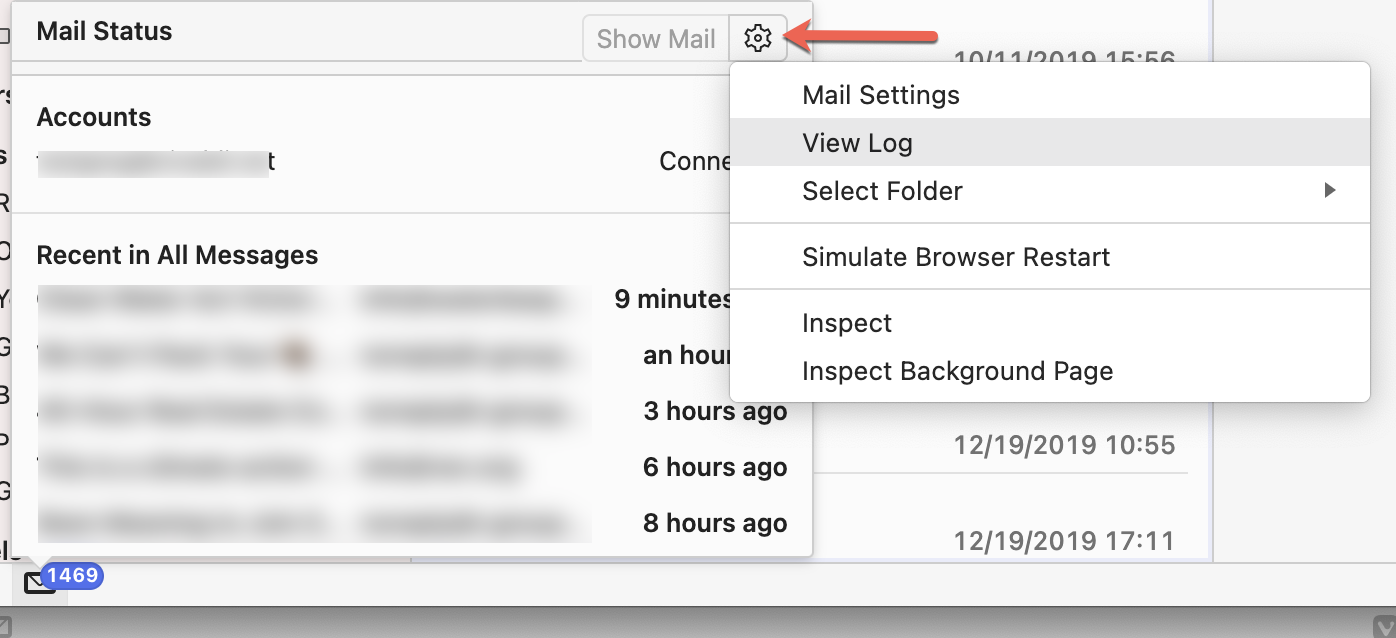
_generated_background_page.html and click inspect.Another way to open the console using the Mail status button.
When you’ve chosen to add an account to Vivaldi Mail and/or Calendar using OAuth, occasionally, you can be asked to log in again. This can happen, for example, after you’ve updated your browser to a new version. The login prompt will usually appear after you start the browser as a pop-up window with your service provider’s (Vivaldi.net, Google/Gmail, Outlook, etc.) branding and often, unfortunately, with little to no context as to why you’re being asked to log in.
If you’ve added the email/calendar service provider’s account to Vivaldi Mail and/or Calendar, it’s safe to just log in and carry on with your browsing as normal. Dismissing the prompt without logging in will trigger it again after some time. If you don’t want to log in, you should remove the account altogether in Settings > Mail / Calendar.
If you do log in, but still get the prompt again soon after, please report the issue to us on vivaldi.com/bugreport.
Tab Stacks let you organize your tabs into various groups to keep related tabs together and to declutter your Tab Bar and Tab Switcher.
A Command Chain is a group of commands executed in a sequence. For example, instead of toggling on first the Reader View and then Fullscreen Mode to focus on what you’re reading, with Command Chains you can do it with a single shortcut in one go.
You can trigger a chain from Quick Commands, assign it a custom Keyboard Shortcut or a Mouse Gesture, or add a button to one of the Toolbars.
 Add Command Chain. Add Command on the right side to add the next command in the sequence.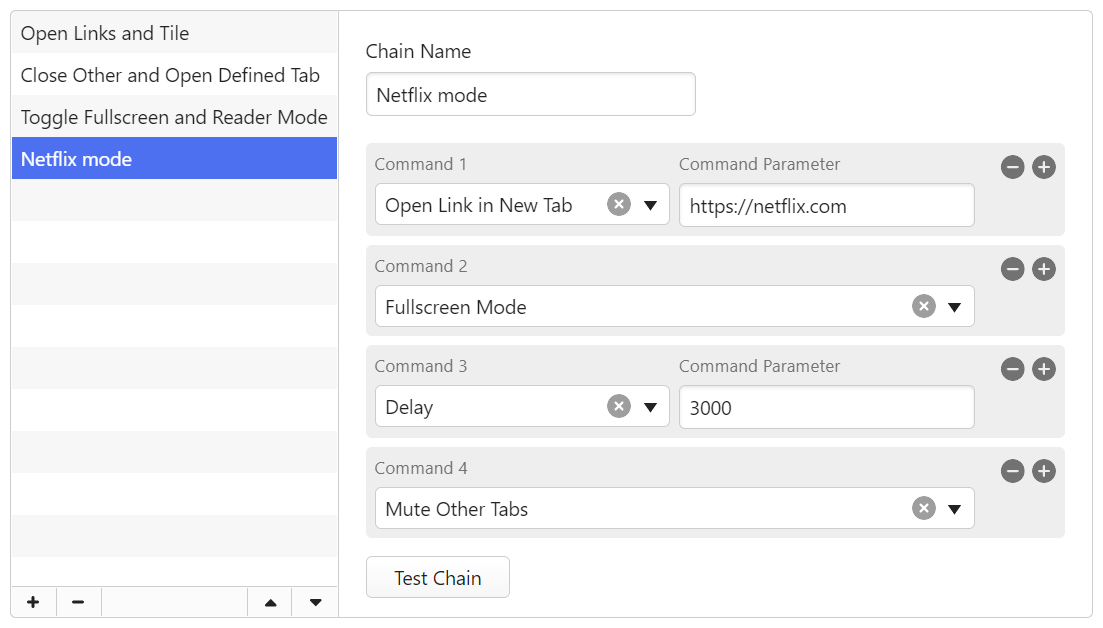
Use the command Delay between other commands to give the previous command time to be executed before applying the next command. Delay time is measured in milliseconds and can be adjusted.
To reorder commands in the chain:
 Move cursor, drag the command to its new location in the sequence.
When you want to create a new chain which is very similar to an existing one, you can clone the chain and edit it to make a new Command Chain.
Once a new Command Chain has been created you can immediately execute it from Quick Commands.
Before you can execute a Command Chain using a Keyboard Shortcut, you’ll need to assign a new shortcut for the new chain.
Once the chain is assigned a keyboard shortcut, you can use it anywhere to run the sequence of commands.
Before you can execute a Command Chain using a Mouse Gesture, you’ll need to assign a new gesture for the new chain.
 New Gesture button.
Once the chain is assigned a Mouse Gesture, you can use it anywhere to run the sequence of commands.
To add a Command Chain as a button to a toolbar, so you can execute it with one click:
Vivaldi menu > View > Customize Toolbar.To update a chain:
The chain will be updated automatically.
To delete a chain:

To get some inspiration for what kind of chains you can set up, check out the Command Chains Vivaldi Community members have shared on the Forum – Command Chain Recipes.