Vivaldi for Snap is distributed through Snapcraft. You may find Snap already built into your Linux distribution’s software center app. If not, click the button below or copy the following link: https://snapcraft.io/vivaldi.
How do I set Vivaldi for Snap as my default browser and/or as my mail client?
You must set your preferred applications through the desktop’s file and protocol association settings.
For GNOME, go to System Settings > Apps > Default Applications > Web > select Vivaldi.
For KDE Plasma, go to System Settings > Applications > Default Applications > Web Browser > select Vivaldi.
For LXQt, go to Settings > File and Protocol Associations > Default Apps > Web Browser.
The instructions will be similar for other desktop environments. If you do not see Vivaldi as an option after installing, please log out of your desktop session and back in again.
How do I import data from another web browser?
Vivaldi for Snap cannot detect or import data directly from another web browser, such as Firefox, Google Chrome, or Opera, but you can import the files exported from the other browsers for Bookmarks, Notes, and more.
In the Import passwords section, click on Select File.
Locate the file and open it.
For a more complete import, including browser History and Cookies, you can import into a native installation for Vivaldi, available from vivaldi.com, set up Vivaldi Sync in the native version, and then log in to Sync in Vivaldi for Snap.
Vivaldi Sync is available for free and uses confidential end-to-end encryption.
I’m having trouble getting an extension to talk with an app on my system.
The NativeMessaging API — used by extensions to communicate with other installed software on your computer — is unavailable in Vivaldi for Snap. This can affect password managers, hardware-integration extensions, and other extensions.
How do I migrate my profile between Vivaldi for Snap and a native install?
The best way to migrate from one install to another, or to keep using both versions in sync with access to your Bookmarks, Logins, Notes, and other data, is to set up Vivaldi Sync.
Vivaldi Sync is available for free and uses confidential end-to-end encryption.
Where is my User Data stored in Vivaldi for Snap?
Vivaldi for Snap stores data in the ~/snap/vivaldi/current/.config/vivaldi/ folder. Native Vivaldi stores data in the ${XDG_CONFIG_HOME:-$HOME/.config}/vivaldi directory.
You may do a one-time migration by copying the folder from one to the other, on the same computer. You should not run two copies of Vivaldi with the same data directory.
In this article we’ve put together some guidelines that will help you write a good bug report. A good bug report will help our developers reproduce and fix the bug.
Before reporting a bug
Make sure you have the latest version of Vivaldi. If you’re on an older version, please update your browser and check if you can still reproduce the issue.
If you can still reproduce it, follow the steps on our help page about troubleshooting issues in Vivaldi. Some bugs are caused by an Extension or a setting and can be easily solved.
Check the Forum. Well-known bugs, updates and temporary workarounds are often discussed there.
In case no one has mentioned the issue you’re having on the Forum, please start a new topic. Then our Community members can either suggest solutions for a fix or confirm the bug. When others can confirm the bug, please report the bug following the instructions below.
How to report a bug?
Report each bug separately on vivaldi.com/bugreport/. Reports with more than one bug cannot be processed because each bug is allocated a unique bugtracker number.
Describe the issue in as much detail as you can.
If you’re reporting from another computer / browser, include information about the Vivaldi version and the operating system the bug is occurring on.
Add an exact link to a web page where the issue occurs, so it can be tested.
It helps, if you include some information about the extensions and security tools you’re using – they often point us in the right direction.
If you’re having issues with audio or video give information about your installed codecs and graphics card/GPU (vivaldi://gpu).
You can add more information, by attaching relevant files (screenshots, crash logs, etc.) to the bug report.
After reporting the issue, you will receive a confirmation email from the bugtracker with the bug number VB-XXXXX, so make sure you give a valid contact email address.
If you have questions about the bug please ask in the forum first and do not forget to post the VB-XXXXX bug number. Our helpful forum moderators will be able to help you.
Important! Please do not use the bug report page for support or other questions. These questions should be asked on the forum.
Issues with a Third Party Product
Lastly, if you are encountering an issue with a Third Party product, such as a firewall provider or security software that your company has set up, please share with us the following information:
Product name
Product version
Relevant error messages
If support cases have been opened with the Third Party Product’s support team, we would appreciate information (e.g. a case number) about it as well, so we can reference it in case we need to contact the vendor.
Type the search term in the Search Field on the Address Bar.
To switch between Search Engines, click on the Change Search Engine button on the left side of the Search Field and pick a different Search Engine from the dropdown menu.
When you search with different search engines from your default one in the Search Field, your last used Search Engine will revert back to the default one when you close the browser. To keep your last used search engine, go to Settings > Search and enable Keep Last Selected Search Engine.
To search for the same search term again, click on the Show Search History button on the right side of the Search Field to see a list of your latest searches.
To display the active Search Engine’s favicon instead of the magnifying glass, enable it in Settings > Search > Show Search Engine Icon.
The size of the search field on the Address Bar can be changed by placing the mouse cursor on the left edge of the Search field and dragging the mouse in preferred direction.
Search on the Speed Dial
To search on the Start Page, go to Settings > Search and make sure the Show Search Field on Speed Dial is enabled.
Type the search term in the Search Field on the Speed Dial.
To switch between Search Engines, click on the search engine favicon button on the left side of the Search Field and pick a different Search Engine from the dropdown menu.
To search for the same search term again, click on the Show Search History button on the right side of the Search Field to see a list of your latest searches.
Open search results in a New Tab
You can have your search results open in a new Tab, instead of the current one when you search in the Search Field. This feature could be particularly useful if you’re doing research or need to look up multiple search terms at once.
To enable it, go to Settings > Search and tick the box for Always Search in New Tab.
Alternatively, type the search term in the Address or Search Field and press ALT + Enter to open the results in a new tab.
Search images
You can do a reverse image search to find more information about it or to find similar images.
To do an image search:
Open the web page with the image you want to search with.
Right-click on the image to open the context menu.
Select Search for Image. Select Image > Search for Image, if the image is also a link.
Search results will open in a new tab.
The search is done with your default Image Search Engine. To change the default search engine for images:
Select your preferred search engine that offers image search.
Search with page selection
Instead of copying and pasting a search term from a web page to the Address or Search Field, right click on the highlighted text > hover over Search With > select a Search engine. To open the search results in a new background tab, go to Settings > Search and tick the box for Page Selection Search in Background (see the image above).
Search Suggestions
Among other options in Settings > Search > Allow Search Suggestions, you can decide whether to enable search suggestions in the Address and Search fields. When enabled, you’ll get search suggestions as soon as you start typing in a search query. It’s a convenient feature, but has privacy implications. You can read more on our Team Blog.
Even if you have enabled search engine suggestions, in Settings > Search > Allow Search Suggestions, you can limit it to allowing search suggestions only if you type a Search Engine nickname, which is a clear indication that this is intended to be a search, not a URL.
Alternatively, you can manually disable search suggestions for particular Search Engines, by going to Settings > Search > Search Engines > selecting the Search Engine > emptying the Suggest URL field. Or you can use another Search Engine’s Suggest URL. For example, get suggestions from a more privacy conscious DuckDuckGo, even if you search with Google.
Available Search Engines
Vivaldi has several search engines available by default.
You can set any of the search engines listed in Settings > Search Engines as the default Search Engine.
Option 1
Go to Settings > Search > Default Search Engine;
Select your preferred Search Engine from the dropdown menu.
Option 2
Go to Settings > Search > Search Engines;
Select the Search Engine you want to set as default;
Tick the box for Set as Default Search.
Search in Private Window
To make your private browsing more private, you can set a different default search engine for the Private Window.
Option 1
Go to Settings > Search > Private Window Search Engine;
Select your preferred Search Engine from the dropdown menu.
Option 2
Go to Settings > Search > Search Engines;
Select the Search Engine you want to set as default;
Tick the box for Set as Private Search.
Some search engines allow users to use the POST method for search. The combination of POST and no-redirects, ensures that websites won’t know the search terms you use to find their site, nor will your search terms be stored in your local history. If you have enabled Use POST method, but search doesn’t come up with any results, this means that the search engine of your choice doesn’t support the POST method. If you still want to use this search engine, you should disable Use POST method.
Search Engine Nicknames
Using Search Engine Nicknames, you can quickly switch between one Search Engine to another just by typing the nickname at the front of your search term.
Get to know the default Search Engine Nicknames in Settings > Search > Search Engines.
Start the search with the Search Engine Nickname, followed by Space. For instance, the search term “d Vivaldi browser” will search for “Vivaldi browser” via DuckDuckGo.
You can change the default Search Engine nickname to anything you like by:
Clicking on the search engine you would like to assign a new nickname to;
Entering the new nickname in the Nickname field;
To hide search engine nicknames in drop-down menus, go to Settings > Search > Search Field Display and disable Show Search Engine Nickname in Drop-Down Menu.
Add a New Search Engine
Vivaldi lets you add your preferred search engines in a few simple steps.
Option 1
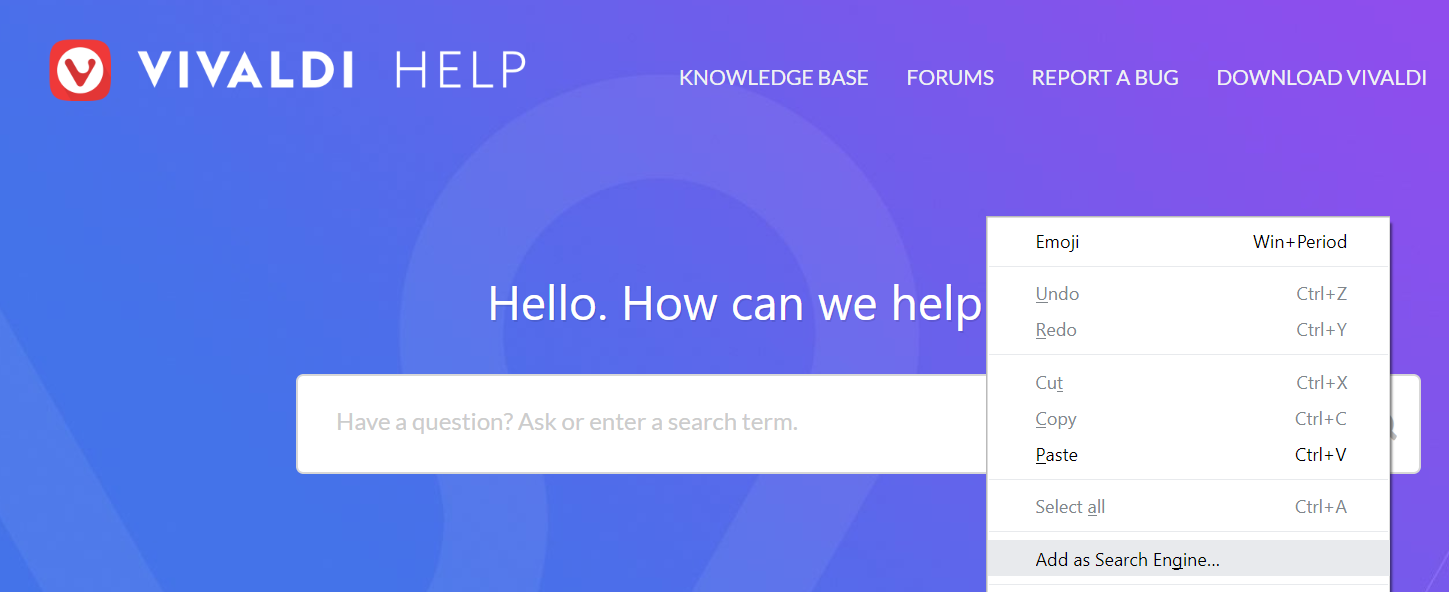
Go to the page you want to add.
Right-click on the search field of the page and select Add as Search Engine.
If you wish, add a nickname and make the new Search Engine your Default Search.
Click Add.
Option 2
Do a search on the website you want to add as a Search Engine.
Copy the URL of the search results page.
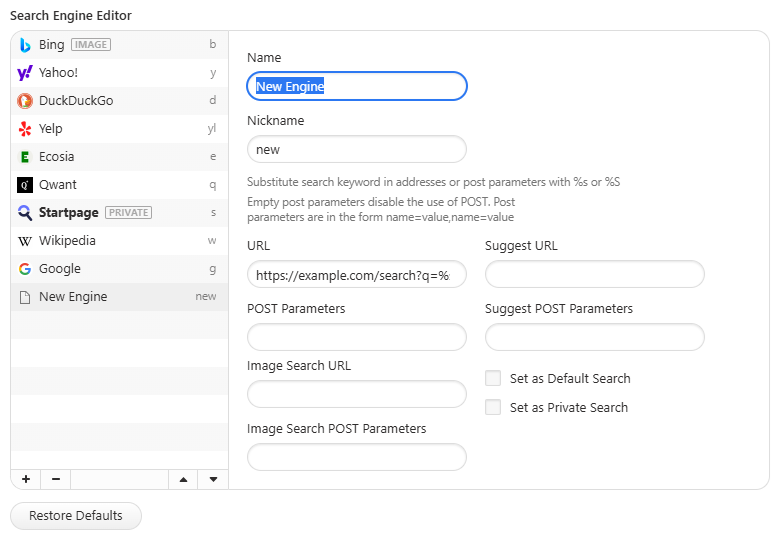
Go to Vivaldi Browser Settings > Search > Search Engine Editor.
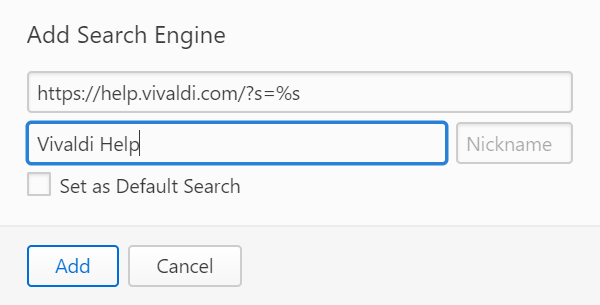
Click on the Add Search Engine button to add a new Search Engine.
Paste the link to the URL field and substitute the used search term with %s
Enter the Name and a Nickname for the Search Engine.
Some websites make sure to check from which browser you’re viewing their pages from and based on the information may alter what you see. The websites may also block access to their content and features altogether. To check whether a website is displayed differently because you’re using Vivaldi, you can change the browser’s Sec-CH-UA identity and check the website again.
To change which browser brand is reported:
Go to Settings > Network > User Agent Brand Masking.
From the drop-down menu, select whether you want the browser to identify itself without a brand, as Vivaldi, Google Chrome, or Microsoft Edge. In addition, you can set up a custom brand by entering the browser’s brand and version number manually.
Restart the browser for the change to take effect.
Tick the box for Append Vivaldi Brand to, in addition to the chosen brand, add Vivaldi’s brand information at the end of the reported identity.
Important! Please note that changing the reported browser brand can cause compatibility issues with sites.
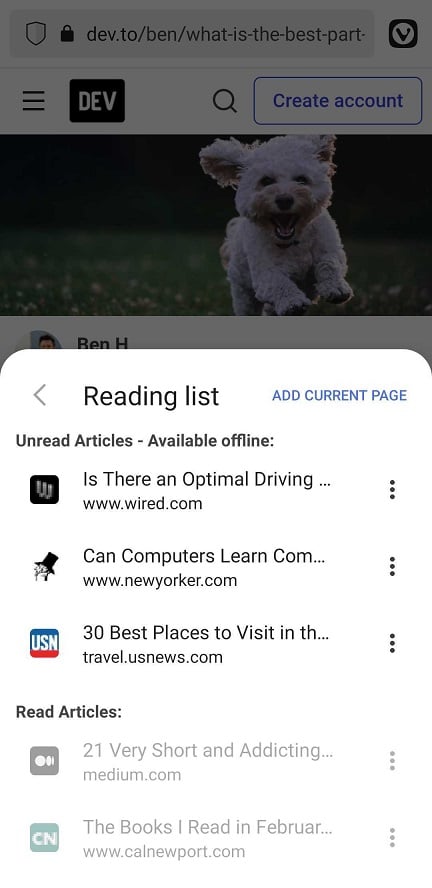
Reading List allows you to add web pages to a list to keep for later. It prevents endless tabs from accumulating on your Tab Bar/Tab Switcher and Bookmarks being filled with entries you only need once.
Though, there are similar services out there, Vivaldi’s Reading List doesn’t require an external app nor do you need to sign up for an account. Also, you can keep your lists in sync on all Vivaldis on all your devices.
Add pages to the Reading List
To add an open web page to the Reading List.
Option 1
Go to the Vivaldi menu > Add Page To > Reading List.
Option 2
Go to the Vivaldi menu > Reading List.
Tap on the 3 dot menu in the top right corner.
Select Add current page.
To add a link on a page to the Reading List:
Long press on the link to open the context menu.
Select Add to Reading List.
To add a web page from another app to the Reading List:
In the app, tap on the Share button.
Tap on the Vivaldi logo with Add to Reading List” written below it. If you don’t see it, tap on Vivaldi Browser, which should open a sub-menu with Add to Reading List as one of the options.
View and manage articles on the list
To open an article from the Reading List:
Open the Vivaldi menu and select Reading List.
Select an article you’d like to read.
Tap on the entry to open the article in a new tab.
Opened articles will be marked as read automatically and moved to the Read Articles section.
To open an article from the Reading List in a Private Tab:
Open the Vivaldi menu and select Reading List.
Long press on the article you’d like to read.
In the top right corner of the Reading List, tap on the menu button.
Select Open in private tab.
Mark articles as read
To mark an article read without opening it:
Open the Vivaldi menu and select Reading List.
In the Unread Articles section, select an article you’d like to mark as read.
Tap on the menu button on the right side of the title.
Select Mark as read.
Remove articles from Reading List
You can remove both unread and read articles from the Reading List. To do that:
Open the Vivaldi menu and select Reading List.
On the right side of the page title, tap on the menu button.
Select Delete.
Alternatively, long press on a saved entry and tap on the Trash button above the list of entries.
To remove multiple articles at once:
Open the Vivaldi menu and select Reading List.
Long press on one of the articles you want to remove. A check mark should appear before the page title.
Tap on the other list entries you want to remove.
Tap on the Trash button above the list of entries.
Sync Reading List
Saved pages in your Reading List can be synced with Vivaldi on your other devices. (Currently available only on desktop.)
Reading List allows you to add web pages to a list to keep for later. It prevents endless tabs from accumulating on your Tab Bar and Bookmarks being filled with entries you only need once.
Though, there are similar services out there, Vivaldi’s Reading List doesn’t require an Extension nor do you need to sign up for an account.
To keep track of how many unread articles you have on your Reading List, make sure Show Unread Counter has been enabled in Settings > Panel > Reading List Panel. If the counter is a distraction untick the box.
Sync Reading List
Saved pages in your Reading List can be synced with Vivaldi on your other devices.
Break down language barriers and open up the web with Vivaldi Translate.
Accessing the Translate Panel
To open the Translate Panel:
Tap on the Panel button.
Tap on the Translate panel button at the bottom of the page (on the side on tablets and larger screens).
Translate text
To translate text in the panel:
Open the Translate Panel.
Type or paste the text into the input field.
Scroll through the lists or start typing the language name to select the input (From) and output (To) languages. If the text is longer, you can also rely on automatic detection of the source language and only need to define the translation language, in case you wish to translate to a different language from your default language.
Tap Translate.
Clear translation
When you’re done with the translation or want to translate something else, tap Clear below the output field.
Translate text from a web page
To translate content on a website you can use the full page translation option accessible from Vivaldi menu > Translate. To translate only some sections of the web page, you can use translation of selected text. The output of translation will be displayed in the Translate Panel.
To translate just a small block of text:
Highlight the text you want to translate.
Tap on Translate selection in the small menu that appears.
The Translate Panel will open with both the source text and the translation. If your selected text is very short, you may have to select the source language manually.
Translation history
To view past translations, tap on Show Translate History at the bottom of the panel.
Delete history
To delete all history:
In the Translation Panel open the translation history.
Tap on Clear Translate History above the list of history entries.

 Vivaldi menu > File > Import From Applications or Files menu.
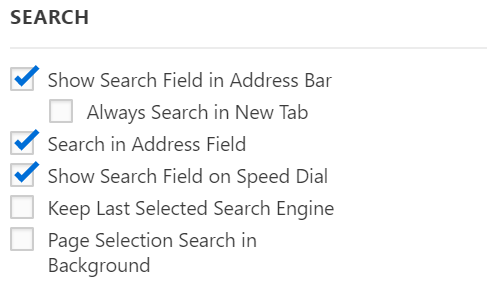
 Vivaldi menu and select Reading List.
 Trash button above the list of entries.
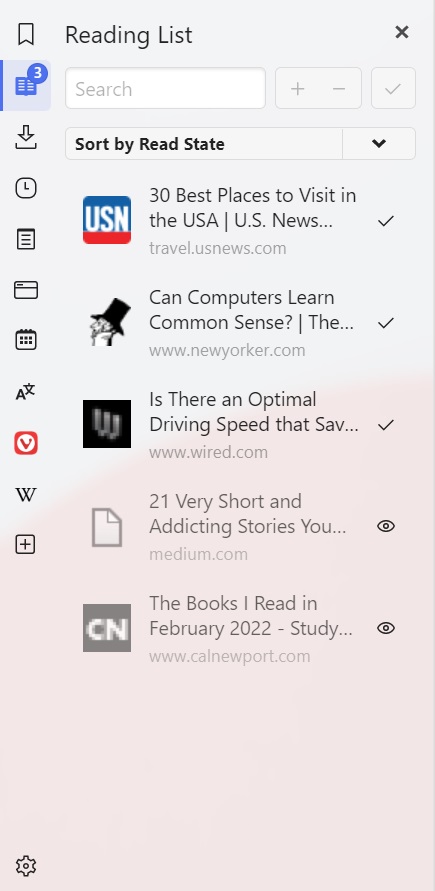
 Mark as read.
 Mark as unread.