Vivaldi Feeds Reader supports import of any RSS, Atom, or unlabelled feed types from an OPML file, which makes it possible for you to export your feeds from your current feed reader to Vivaldi. The following instructions are based on Thunderbird, which means the first 3 steps may differ, if you use a different feed reader, but the rest are the same.
Import feeds from Thunderbird
In Thunderbird, go to the feeds group and right click on it;
Select Subscribe;
In a popup window click on the Export button;
Save the file on your computer. It is then saved as an OPML file (feeds.opml for example);
In Vivaldi, go to the Vivaldi menu > File > Import from Applications or Files.
From the dialog’s drop down menu select Import Feeds (OPML file).
Click Choose a File and find the OPML file.
Review the feeds’ names, links and update frequency.
Click Add Feeds.
Import feeds from a website
In case someone has shared the set of feeds they follow on their website and they serve it as an OPML file, you can add those feeds to Vivaldi in just a few steps. To do that:
Go to the website that serves the OPML file and open it.
A page with all the feeds listed and an option to select all or some of them will open. Make your selection.
Click Subscribe to selected feeds.
Review the feeds’ names, links and update frequency.
Click Add Feeds.
Export feeds from Vivaldi
In addition to importing feeds from other feed readers, you can also export the feeds you follow in Vivaldi as an OPML file.
To export feeds:
Go to the Vivaldi menu > File > Export > Export Feeds.
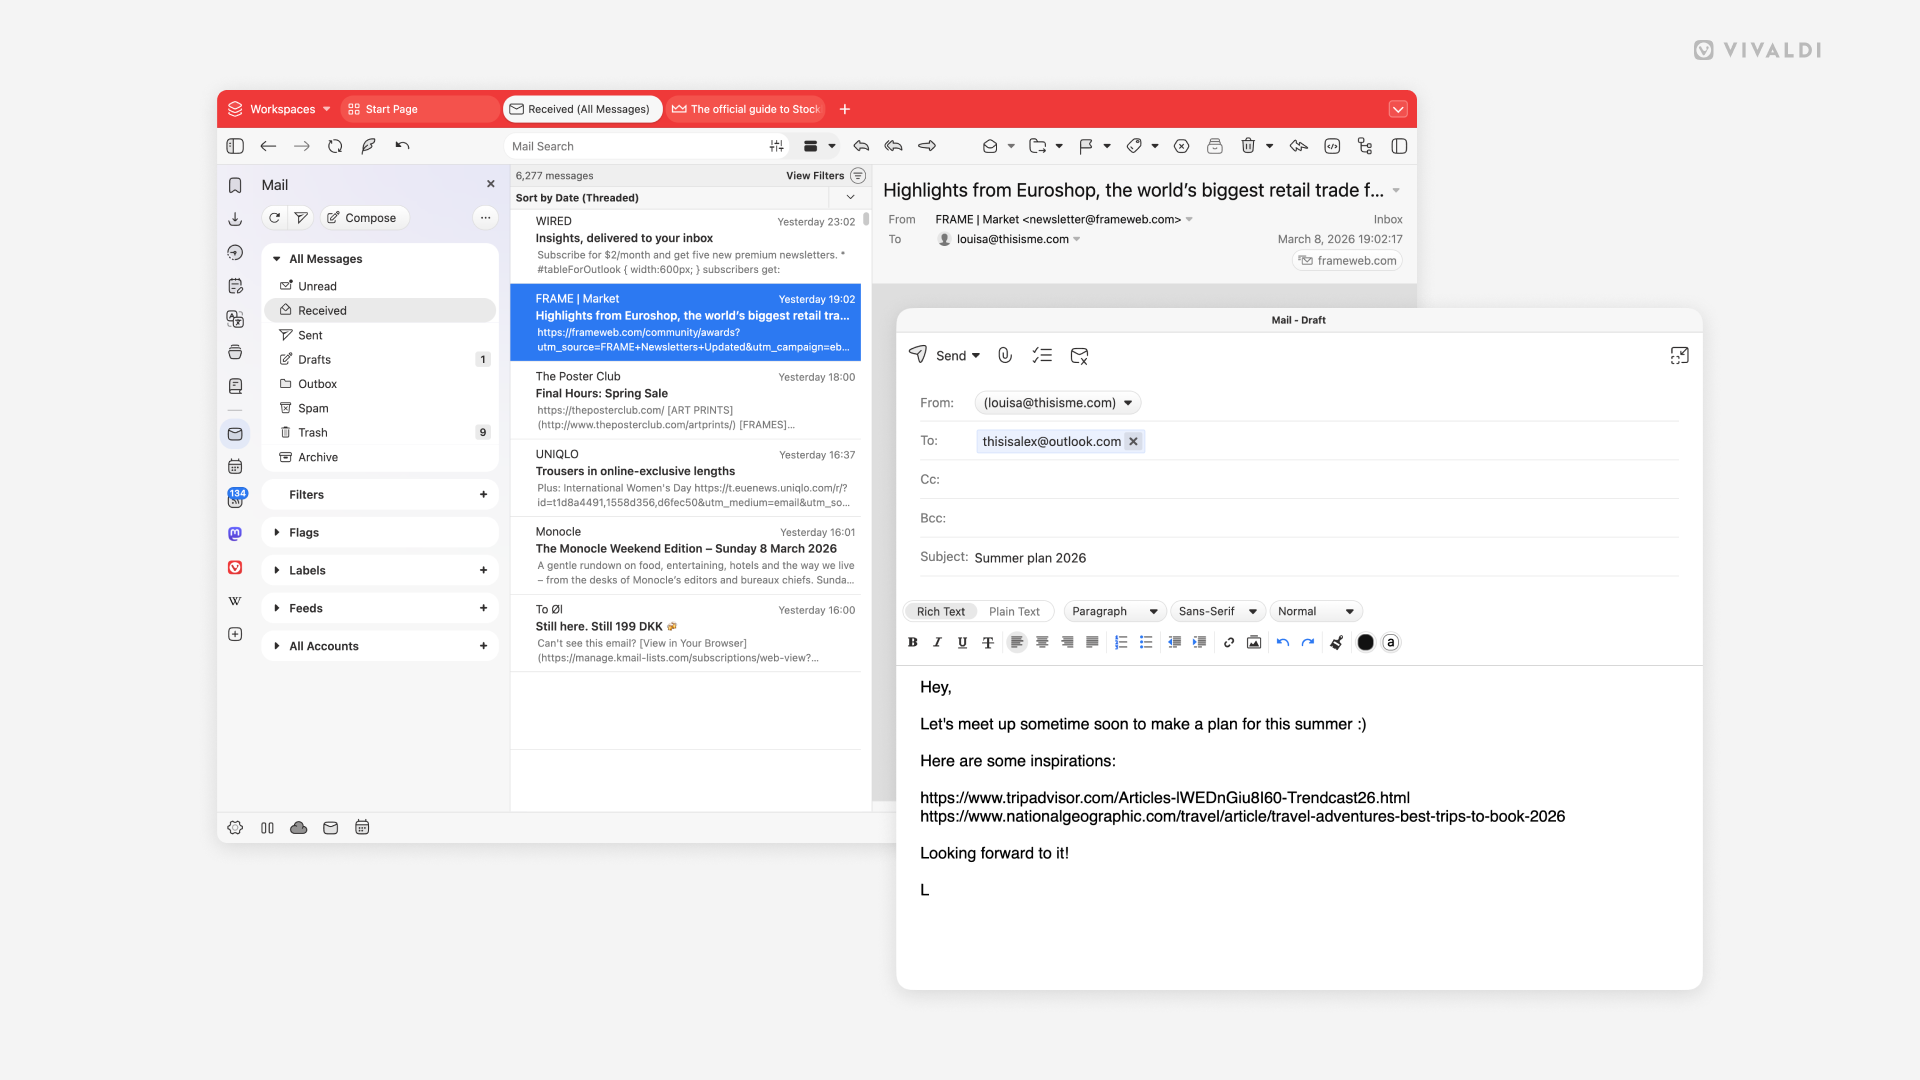
In All Messages you see emails from all your mail accounts in one central location.
Unread – All unseen and unread messages;
Received – All messages, regardless of the read status;
Sent – All messages you’ve sent from any of your accounts;
Drafts – All messages you have started composing, but haven’t sent or moved to the Outbox for sending;
Outbox – Messages that you’ve finished writing and are ready to send;
Spam – Junk mail. A good place to check when you’re expecting an email, but can’t see it in inbox folders.
Trash – Deleted messages from all accounts.
Custom Folders
Custom folders are mail folders you’ve created on the server under the Inbox folder.
Mailing Lists
Messages sent to a mailing list you’re subscribed to will be grouped and listed in the Mailing Lists folder. Read more here.
Filters
By creating filter rules, you can automatically organize incoming messages. Read more here.
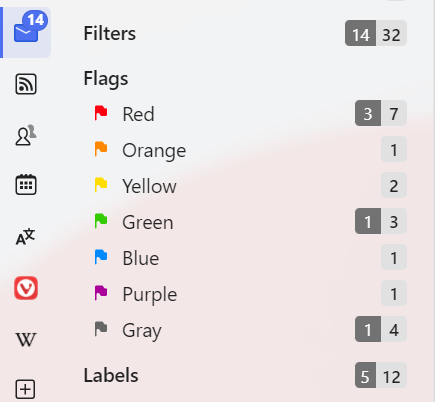
Flags
Flags can be assigned to messages for easier tracking and follow-up. Read more here.
Labels
You can add labels to all messages in all folders in all accounts as another way to group them together. Read more here.
Feeds
Feeds allow you to access updates from various websites from a single location. Feeds are commonly used for blogs, news feeds, and other content posted in episodes at regular intervals. Read more here.
All Accounts
All your mail accounts with their Inbox, Sent and custom folders are listed in the All Accounts section.
To change the order in which your accounts appear in the Mail Panel:
Place the mouse cursor on the outer edge of the panel
Drag the panel wider or narrower.
To give the panel a separate width from other panels, first right-click on the Mail Panel button and select Separate width, then resize the panel as instructed above.
Mail Panel order and visibility
To toggle the visibility of the folders in the Mail Panel:
Go to Settings > Mail > Mail Settings > Mail Panel Order and Visibility.
Click on the check boxes to show/hide the folder.
To reorder folders in the Mail Panel:
Go to Settings > Mail > Mail Settings > Mail Panel Order and Visibility.
Select the folder you want to move.
Click on the arrows at the bottom of the list to move the folder up or down in the list of folders. Alternatively, click and drag the folder to its new location.
Using Flags is a good way to highlight important messages and make them easy to spot in your mailbox. In Vivaldi Mail you can pick between 7 flag colours – red, orange, yellow, green, blue, purple and grey. You decide what each colour stands for.
Add a Flag to a message
To add the default red flag to a message:
Open the message and click on Flag on the message toolbar;
Right-click on the message in the message list and select Add Flag.
To add a different color flag to a message:
Open the message, click on the arrow next to the Flag button and select the flag color;
Right-click on the message in the message list and select Flags > flag color.
The flag will be shown in front of the subject in the message list and after the subject in the opened message. Each message can have only one flag.
To add flags to multiple messages at once:
Hold down the Shift or Ctrl/Cmd key while clicking on the messages you want to add a flag to;
Right-click on one of the selected messages and select Add Flag or Flags > flag color.
Click on the Flags root folder title to see all flagged messages or click on a specific color to see only messages with that flag color.
Remove a Flag
To remove a flag from a message:
Open the message and click on Flag on the message toolbar;
Right-click on the message in the message list and select Remove Flag.
Syncing flags
Flags are synced with other mail clients that also support flags. If the other client has multiple flag colours, like Apple Mail, the different flag colours will be synced. If the client supports only one flag colour (commonly red) or stars, all flags, despite the colour in Vivaldi, will be in a single colour in the other client. When you’ve added a flag or a star to a message in another mail client, it will get a red flag in Vivaldi.
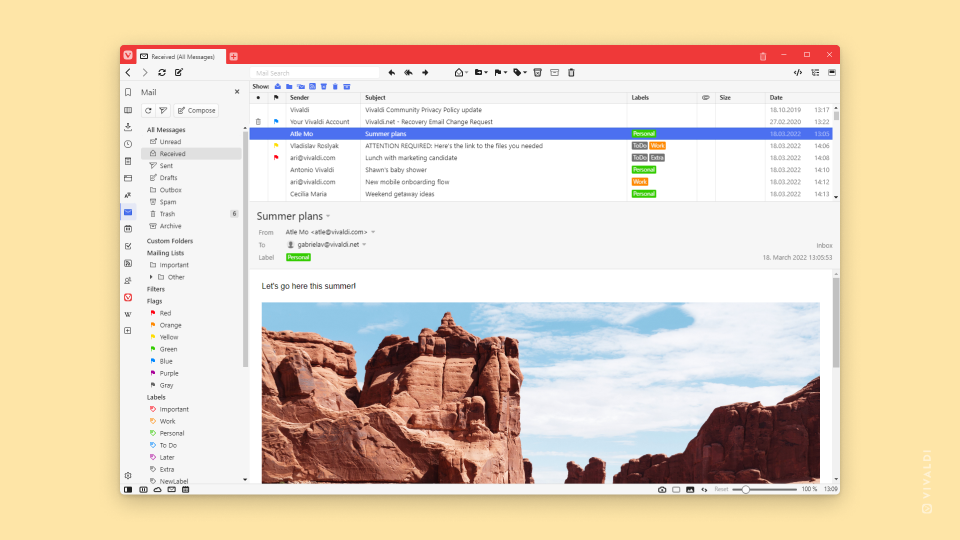
Labels are an excellent way to group and organize messages. You can add labels to all messages, regardless of the account or folder they’re in. Unlike Flags, each message can have multiple labels. You can even add labels to Feed messages.
Add a label
Create a label
Option 1:
Open the message you want to label;
Click on Label > Add New Label on the message toolbar;
Give the new label a name;
Click Save.
The new label is created and the open message is labeled with it.
Option 2:
Right-click on a message in the message list;
Select Labels > Add New Label;
Give the new label a name;
Click Save.
The new label is created and the open message is labeled with it.
Add an existing label
Option 1:
Open the message you want to label;
Click on Label > label name on the message toolbar.
Option 2:
Right-click on a message in the message list;
Select Labels > label name.
View labeled messages
All labels you’ve created will be listed in the Labels folder in the Mail Panel. Click on the Labels root folder title to view all labeled messages or click on a specific label to view only messages with that label.
Mailing Lists are collections of email addresses that are used to send the same message to multiple recipients. Vivaldi Mail recognizes this kind of messages and automatically groups them together into a Mailing List folder. You can also create your own mailing lists from a sender.
Important and Other Mailing Lists
The lists you create will be listed in the Important Mailing List folder in the Mail Panel. Automatically generated ones will, by default, be listed in the Other folder. You can move lists between the folders by:
Right-clicking on the mailing list you want to move in the Mail Panel;
Selecting Move into Important/Other.
Create a new Mailing List
To create a mailing list with messages from the same sender:
Open one of their messages;
Right-click on the message header;
Select Treat Sender as a Mailing List.
Alternatively:
Right-click on one of their messages in the message list;
Select Sender > Treat Sender as a Message List.
A folder with all their messages will be created in the Mail Panel in the Mailing Lists root folder.
Vivaldi Mail comes with a multitude of settings to tweak to make the mail client work for you. In this article we’ll go over all the settings you can find in Settings > Mail so that you can make educated decisions when customizing the mail client.
Message Previews
1-3 line previews in the message list can give you a sneak peek into what the message is about before opening it.
To review Mail Preview settings:
Go to Settings > Mail > Mail Settings > Message List Preview.
Select how many lines of preview you want to see. Select None to disable previews.
By default, previews are only displayed in vertical view, but you can disable Only Show Message Preview in Vertical View to display previews in horizontal Mail layout.
To see previews, the messages need to be prefetched, i.e. downloaded from the mail server to your computer. You can toggle Download Messages to Generate Previews on Demand on and off from Settings > Mail > Mail Settings > Message List Preview.
Mail View Layout
To change the mailbox layout:
Go to Settings > Mail > Mail Settings > Mail View Layout;
Select between:
Horizontal
Vertical
Vertical Wide
Alternatively, click on the Toggle View button in the top right corner of the Mail tab.
Mail List Sorting
Messages in your incoming and outgoing mail folders can be sorted according to a few different categories and despite being able to set the sorting order for each folder separately, it’s good to choose the best default option.
To select the sorting order for the messages you’ve sent:
Go to Settings > Mail > Mail Settings > Mail List Sorting > Default order for sent folders.
Choose between sorting:
By Recipient
By Subject
By Date Sent
By Date (Threaded)
To select the sorting order for all other folders:
Go to Settings > Mail > Mail Settings > Mail List Sorting > Default order for other folders.
Choose between sorting:
By Sender
By Subject
By Date Received
By Date (Threaded)
Mail Notifications
Receiving notifications allows you to focus on other things without needing to constantly check the mailbox to see if a new message has arrived. On the other hand, if you receive a lot of emails, it might be best to disable notifications, so you could focus on other tasks.
To enable/disable notifications:
Go to Settings > Mail > Mail Settings > New Message Notifications.
(Un)tick the box Enabled.
There, you can also toggle notification sounds on and off and decide whether you want to receive notifications for successfully sent messages.
Unseen Messages
In Vivaldi, a message can have 3 states – Unseen, Unread, and Read. If enabled, all new messages will be listed as Unseen. When you open a message it will automatically change from Unseen to Unread. It makes it easy to see which emails you’ve already viewed and which haven’t been opened yet.
To make the Unseen and Unread messages look the same and not show the counter of Unseen messages next to Unread messages in the Mail Panel:
Go to Settings > Mail > Mail Settings > Unseen messages.
Disable Highlight and Count Unseen Messages.
Unread Messages
Marking an email read in Vivaldi Mail is a deliberate choice. If you want messages to be marked read automatically after you’ve opened them:
Go to Settings > Mail > Mail Settings > Unread messages.
Enable Automatically Mark as Read.
Filter View Buttons
Managing your messages is easier, when you can filter unnecessary emails out of view. It’s up to you to decide, whether you prefer to have the filtering options accessible from a drop-down menu, with each option’s name spelled out, or have them at easy reach above the list of messages as icons.
Go to Settings > Mail > Mail Settings > Filter View Buttons.
Select between:
Text Menu
Icons Only
Mail Search
Do you want search results to show up as you type or do you prefer to enter the full search term first and only then go to the results? If you favor the second option:
Go to Settings > Mail > Mail Settings > Default Search Folder.
Enable Start Search Using Enter Key.
Furthermore, are you more likely to search through all your mailboxes and mail folders or in the folder you currently have open? Choose the default accordingly.
To select the Default Search Folder:
Go to Settings > Mail > Mail Settings > Default Search Folder.
Select between:
All Messages
Current Folder
Mailto Links
When you see an email address on a web page that looks like a link, you can click on it to open a mail client and start composing an email to that address.
If Vivaldi Mail is your main mail client, you should allow the browser’s built-in mail client to handle Mailto links. If you prefer using an external mail client, you can disable Handle Mailto Links in Vivaldi Mail in Settings > Mail > Mail Settings > Mailto Links, so your client of choice could take over.
Message Counters
You can show unread mail counters on Mail’s Panel button and on the Status Bar button.
You can also decide whether you want to see counters for unread Trash, Spam, Archive, and Draft messages in the Mail Panel.
Adjust the settings in Settings > Mail> Mail Settings > Mail Counters.
Mail Panel
You can read about the Mail Panel and its settings in detail on the Help page here.
Checking Frequency
Vivaldi Mail offers 3 frequencies for checking for new messages.
To choose your preferred frequency:
Go to Settings > Mail> Mail Settings > Check For New Mail.
Choose between:
Every Minute
Every 15 Minutes
Manually
Composer Windows
If you prefer to compose emails in a separate composer window instead of a browser tab:
Go to Settings > Mail> Mail Settings > Composer Window.
Enable Open Composer in a Window.
Mail Rendering
Email messages can be displayed either using HTML formatting (when the sender has used it) or in plain text.
To pick your preferred rendering option:
Go to Settings > Mail> Mail Settings > Mail Rendering.
Choose between:
Prefer HTML over Text – will display formatted emails in HTML and plain text emails as just text.
Text Only – will display all emails in plain text.
In case of a longer email correspondence with multiple replies, you can display each message in a different color by enabling Color Quoted Text in Settings > Mail> Mail Settings > Mail Rendering.
In case you have added multiple email accounts to Vivaldi Mail, you can choose which email address will be used as the default sender. Or you can opt for always using the email address that was used to send the latest message.
Contacts
By default, when you send a message to a new email address, Vivaldi Mail will create a contact with it. If you don’t want that to happen:
In Settings > Mail > Mail Settings > Composer Colours, you can decide, whether the background of the message writing area in the message composer is white and the text black or use your Theme colours.
Deleting Duplicate Messages
In Vivaldi Mail, duplicate emails are the ones that have identical headers. In Settings > Mail > Mail Settings you can decide, how to handle such messages. The following options are available:
Delete duplicates:
Ask;
From All Folders on Current Account;
From All Accounts and Folders.
Permanently delete duplicates:
Ask;
From the Current Folder Only;
From All Folders on Current Account;
From All Accounts and Folders.
Message threads
You can view all messages in a list or you can group linked emails into threads.
To toggle threading on and off for all mail, click on the Show/Hide Message Threads button in the top right corner of the Mail tab.
To view all messages in a single thread:
Right-click on one of the messages in the thread and select Thread > Show Message Thread.
Select one of the messages in the thread and press the single key shortcut T.
External content in emails
To protect your privacy, Vivaldi does not download external content by default. If a message contains external content, such as images, a notification “This message was prevented from loading external content” will be displayed between the message header and message body with an option to load the external content. If you trust the sender, you can also enable always loading external content from that sender.
You can also enable displaying external content per contact in the Contacts Panel:
Right-click on a contact and select Edit;
Tick the box for Always allow external content in emails.
Disable Vivaldi Mail
In case you’re not planning to use neither Vivaldi Mail, Calendar nor Feeds, you can disable the features from Settings > General > Productivity Features > untick “Enable Mail, Calendar and Feeds”.
In the Contacts Panel, right-click on a name/email on the list of contacts > select Compose Mail;
On a contact’s profile, in the Contacts Panel, click on the envelope in front of their email address.
Header
From – Choose the account you want to send the email as. You can change the default sender in Settings > Mail > Mail Settings > Default Sender in New Messages.
To – The default recipient field. Add recipients, who the email is for and from whom you’re expecting a reply or action.
CC (Carbon Copy) – Add recipients, who don’t necessarily need to reply, but who should be kept informed about the matter in the message.
BCC (Blind Carbon Copy) – Similar to CC, but other recipients won’t see that contacts listed in the BCC field received the message.
Subject – the title of the email.
Body
For writing the content of your message, Vivaldi Mail’s composer includes an HTML editor, that allows you to add simple formatting to your text. If you don’t add any formatting to your message, the message will be sent in a Plain Text format.
Add an attachment
To attach files to the message:
Click on Add Attachment on the message toolbar above the composer;
Browse and select the file(s) in File Manager/Finder;
Click Open.
You can see the attached files below the Subject field.
To add images to the body of the message:
Click Insert image on the HTML editor toolbar;
Browse and select the image file in File Manager/Finder;
Click Open.
Signature
All accounts you add to Vivaldi Mail, will get Vivaldi’s default signature. To edit that:
Select the account you want to update the signature for.
Add your signature.
Changes will be saved automatically.
Send a message
When you’ve finished writing your message you have a few options:
Send immediately – click on Send on the message toolbar above the message composer;
Queue the message in the Outbox – use the option if you don’t plan to make any changes to the message, but don’t want to send it just yet;
Save as draft – in case you might want to change something later, leave the message as a draft. All messages you start composing will be saved as drafts automatically.
Reply and Forward a message
To reply to a message:
Open the message;
Click on Reply or Reply to All on the message toolbar. Alternatively, use the Keyboard ShortcutR/Shift+R or type “Reply to message”/”Reply all” in Quick Commands;
Write your message above the quoted section;
Click Send.
If you change your mind while drafting the reply, you can switch between Reply and Reply All from the menu in front of the recipient(s) field.
To forward a message:
Open the message;
Click on Forward on the message toolbar;
If you wish to add something, write your message above the quoted section;
Click Send.
In addition to email messages, you can also forward feed messages.
Drafts
All messages that you start composing in Vivaldi will be saved automatically as drafts, which you can access either from Mail Panel > All messages > Drafts or from Mail Panel > All Accounts > your mail account > Drafts.
Edit a Draft
To continue writing a draft message:
Open the message in the Drafts folder;
Click on Edit on the message toolbar. Alternatively, right-click on the message in the list of drafts and select Edit.
To discard a draft while composing, click on Discard Draft on the message toolbar.
To delete a draft at a later point:
Find the message in the drafts folder either under All messages or your mail account’s Drafts folder;
Use one of the following options:
Open the email and click Delete on the message toolbar,
Select the message in the message list, right-click on it and select Delete from the context menu.
Press Delete on your keyboard.
Outbox
In Vivaldi Mail, Outbox is a sub-folder in All Messages, where you can store message drafts that you’ve finished writing, but don’t want to send just yet.
In case, you find something that needs changing, you can edit the queued message the same way as you’d edit a draft.
Queue by default
You can make queuing the message the default action, when clicking the Send button in the message composer. To do that:
Start composing an email;
Click on the arrow next to the Send button on the message toolbar:
Check the option for Queue;
Then, whenever you click on the Send button in the future, the message will be moved to the Outbox instead of being sent.
Send messages from the Outbox
To send all messages from all accounts:
Open the Mail Panel;
Click on Send from All Accounts on the Mail Panel toolbar.
To send all messages from a single account from the Outbox:
Open the Mail Panel;
Click on the arrow next to Send from All Accounts on the Mail Panel toolbar;
Select the account you want to send the messages from.
To send a single message:
Right-click on it in the message list;
Select Send.
Composer settings
Composer window
By default when you start to compose a new email, or to reply or forward an email, the composer will open in a new browser tab. But there’s also a composer window option available.
The message list and message view will open in a new tab.
Single-click on a message to view it.
As you scroll through the long list of messages, you’ll see a button titled “Jump to Latest.” Click on it to return to the most recent emails.
Check for new messages
In Settings > Mail > Mail Settings > Check For New Mail, you can adjust how often the mail client looks for new messages on the server. You can choose between:
Every minute,
Every 15 minutes, or
Manually.
To check for new messages manually in all accounts:
Open the Mail Panel and click on Check All Accounts on the Mail Panel toolbar.
Alternatively, when you have Mail open in a Tab, click on Check for mail on the Mail toolbar in the top left corner of the window.
To look for messages in a specific account:
Right-click on the mail account in Mail Panel > All accounts.
Select Check for Mail.
View messages from the same sender
To view all messages to and from the same sender, either:
Open a message, right-click on the message header and select Show Messages for Sender.
Right-click on a message in the list of messages, select Sender > Show Messages for Sender from the context menu.
Use the Keyboard ShortcutE (make sure you’ve enabled Single Key Shortcuts in Settings > Keyboard > Keyboard Shortcuts).
Depending on your Mail Layout and how you open the message, the message can be opened either on the right of the message list, below it or in a new browser tab.
Message toolbar
On the message toolbar, you’ll find the following options:
Reply,
Reply to All,
Forward,
Mark Read/Unread,
Move to Folder,
Flag,
Label,
Mark message as Spam,
Move to Archive (if supported by the email service provider),
Move to Trash.
/ Show Messages as Text/HTML
Message header
In the message header you’ll see:
The subject of the message.
The flag, if you’ve added one.
The sender’s name and/or email address.
Reply To address, if it’s different from the sender’s email.
The recipients’ email addresses (both To and CC).
Attachments.
Labels.
Folder the message is in.
Message receival date and time.
Notification about external content (if not enabled for sender).
Right-click on the message header section to:
Move back and forward in viewed messages.
Copy the basic message info (subject, date and time, sender and recipient emails).
View the raw message with full message header.
Filter all messages from the same sender to a Mailing List folder.
Show all messages in the message thread.
View all messages from the same sender.
Show Raw Message (called source or original in some clients).
Message body
Below the header you’ll find the main content of the message.
Toggle Plain Text and HTML view
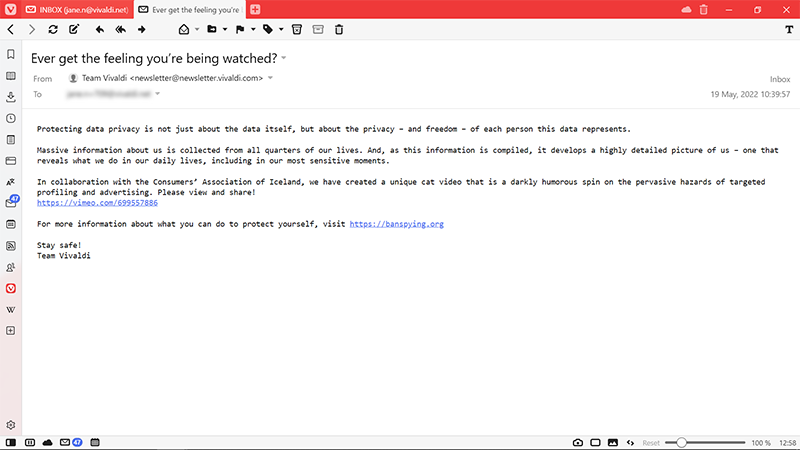
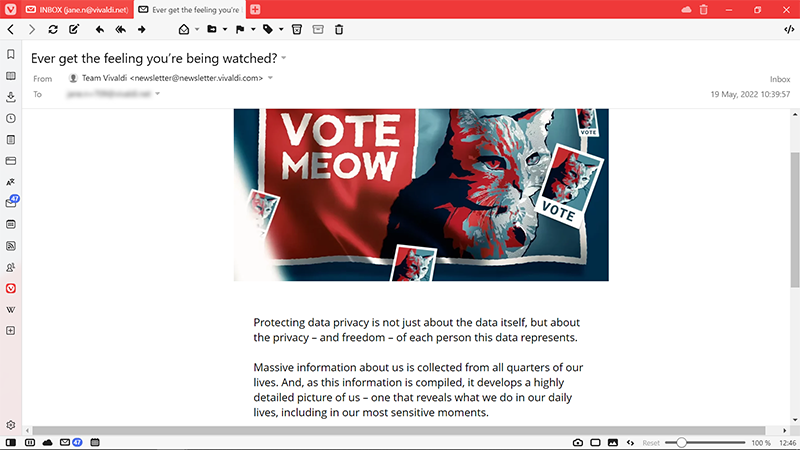
Messages can be displayed in two ways, either as Plaint Text or using HTML formatting. Messages sent in Plain Text formatting, will always be displayed text only, but HTML messages can be viewed in Plain Text as well.
To toggle the message view, either:
Click on the / Show Messages as Text/HTML button in the top right corner of the window.
Go to Settings > Mail > Mail Settings > Mail rendering and choose your preferred view.
Message read status
Unseen
New messages that have never been opened are displayed in bold text using your browser Theme’s highlight color and have a dot in front of them. As soon as you open an Unseen message it will be marked as Unread.
Unread
Messages that have been viewed before but have not been read or have not been dealt with. They’re displayed in bold text using your Theme’s foreground color with a dot in front.
Read
In Vivaldi Mail, by default, all messages need to be marked read manually.
To mark a message as read, either:
Click on the Mark Read button in the message toolbar above the message.
Right-click on the message in the message list and select Mark Message as Read.
Use the Keyboard shortcutK (make sure you’ve enabled Single Key Shortcuts in Settings > Keyboard > Keyboard Shortcuts).
Right-click on the folder in the Mail Panel and select Mark All as Read.
Focus on the message list, use the keyboard shortcut Ctrl+A/Cmd A to select them all, and mark all messages as read using the keyboard shortcut K or select Mark as Read from the right-click context menu.
To mark a message unread, either:
Click on the Mark Unread button in the message toolbar above the message.
Right-click on the message in the message list and select Mark Unread.
Use the Keyboard ShortcutShift+K. To mark the whole message thread unread, press Shift + M.
Select how many lines of preview you want to see. Select None to disable previews.
By default, previews are only displayed in vertical view, but you can disable Only Show Message Preview in Vertical View to display previews in horizontal Mail layout.
To see previews, the messages need to be prefetched, i.e. downloaded from the mail server to your computer. You can toggle Download Messages to Generate Previews on Demand on and off from Settings > Mail > Mail Settings > Message List Preview.
Sort messages
To sort messages in a Vertical layout:
Click on the sort menu above the list of messages
Select the criteria for sorting
Messages can be sorted by:
Message Sender
Subject
Received Date
Received Date, but related messages are displayed in threads
Messages can be sorted both in ascending and descending order. To switch the order, click on the arrow in the top right corner of the messages list, next to the sorting menu.
It’s possible to toggle the visibility of certain messages in each folder using the view toggle buttons on the right side of the search field. The filtering options include:
Show Read
Show messages from Custom IMAP folders
Show Mailing Lists
Show Feeds
Show Junk
Show Trashed Items
Show Archived
There are two ways to display View Filters, either as a drop-down menu or as buttons. You can make your choice in Settings > Mail > Mail Settings > Filter View Buttons.
Available options vary depending on the folder type. If the button is in your Theme‘s highlight color the filter has been enabled, if not, it’s disabled.
Search messages
Use the search field above the message list to find emails from certain senders or with particular content. To make the search more precise, you can use “AND”, “OR” and “NOT” operators (make sure to type them in capital letters). You can also specify from:, to:, cc:, body: and subject:.
A few examples:
United States (messages having both words).
United NOT States (messages have the first word but not the second).
United OR States (messages having either word).
nite OR ates (emphasizing that substring search also works).
By default search results will be shown from the folder you have open, but you can show results from all folders, by selecting All in the message list search details below the search field.
To save the search and its results as a Filter, click Save on the right side of message list search details.
Move messages
To move a message from one folder to another:
Option 1
Open the message.
Click on Move to Folder on the message toolbar.
Hover over Move from account email/current folder.
Select the destination folder.
Option 2
Right-click on the message in the message list.
Hover over Move and Move from account email/current folder.
Select the destination folder.
Option 3
Click and drag a message from the message list to a folder in the Main Panel.
Release the mouse button to complete the move. You can also drop the message on Flags and Labels to add the element or to, for example, Unread to change the message’s state.
View all correspondence between you and the contact;
Send a message to a contact or contacts.
Add a new contact
To add a new contact:
Open the Contacts Panel;
Click on New Contact on the Contacts Panel toolbar;
Fill in the contact information.
The new contact will be added automatically.
Edit a contact
To edit contact’s information:
Open the Contacts Panel;
Select a contact you want to edit and click on the available info in the contact information section at the bottom of the Panel. Alternatively, right-click on a contact and select Edit;
Update the information.
Changes will be saved automatically.
Delete a contact
To delete a contact:
Open the Contacts Panel;
Select a contact you want to delete;
Choose one of the following options:
Click Delete on the Contacts Panel toolbar;
Right-click on the contact and select Delete from the context menu;
Press Delete on your keyboard.
To delete multiple contacts, select them using either the Shift or Ctrl/Cmd key and use one of the options listed above.
View all messages
One of the default Contact Panel actions is viewing all messages you’ve received or sent to the contact.
To view these messages:
(Double-)click on a contact to open a new Tab with all the messages (if it’s your default contact action in Settings > Panels > Contacts Panel);
Select a contact and press Enter (if viewing messages is your default action)
Right-click on the contact and select View All Messages from the context menu.
Other ways to view messages from or to and from sender:
Right-click on one of the messages in the message list in Mail, select Sender > Show messages from sender;
Open a message and use the keyboard shortcut E (enable single key shortcuts for Mail in Settings > Keyboard > Keyboard Shortcuts).
Open a message, right-click anywhere on the header and select Show messages from sender.
Open a message, hover over sender’s or recipient’s name/email, click on the small arrow and select See messages to and from sender.
Compose a new message
The other default contact action is opening the mail composer to send the contact a new message.
To start composing a new email to chosen contact:
(Double-)click on the contact to open the composer (if it’s your default contact action in Settings > Panels > Contacts Panel);
Select the contact and click on Compose mail to contact on the Contacts Panel toolbar;
Right-click on the contact and select Compose Mail from the context menu;
Select the contact and click on the envelope icon in front of their email address in the contact info section.
To start composing a new message to multiple contacts:
Select the contacts you want to add as recipients by holding down the Shift or Ctrl/Cmd key;
Click on Compose mail to contact on the Contact Panel toolbar. Alternatively, right-click on one of the chosen contacts and select Compose Mail.
When you open the mail composer from Mail, you’ll get contact recommendations as soon as you start typing in To, CC and BCC fields.
Contacts Panel settings
Default contact action
In Settings > Panel > Contacts Panel, you can choose whether clicking on a contact should:
open the list of messages you’ve sent each other, or
open the mail composer to send the contact a message.
In Contacts Panel settings you can also choose whether your preferred action should take place after a single or double-click. You can access the other option from the right-click context menu.
Sorting contacts
You can sort contacts by name. To change the sorting order, click on the sorting menu title between the Contacts Panel toolbar and the list of contacts to switch between ascending and descending ordering.
Contacts Panel width
By default changing the side panel width for one Panel will change it for all other Panels. To give Contacts Panel a separate width:
Right-click on the Contacts Panel button;
Select Separate Width;
From the outer edge of the Panel, drag the Panel to desired width.
Contact Info section
At the bottom of the Contacts Panel, you see information about the contact you’ve selected.
To resize the section, place your mouse-cursor at the top edge of the section and drag in preferred direction to either increase or decrease the size.
To hide the information section altogether, either drag the edge all the way down or double-click on the edge. Drag, double-click or start editing a contact to to display the section again.
 Vivaldi menu > File > Import from Applications or Files.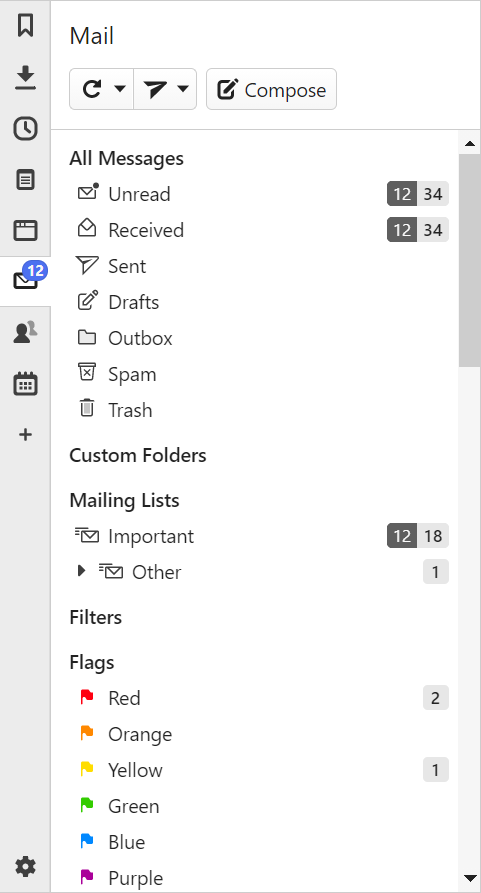
 Flag on the message toolbar;
 Label > Add New Label on the message toolbar;
 Delete Mailing List below the list;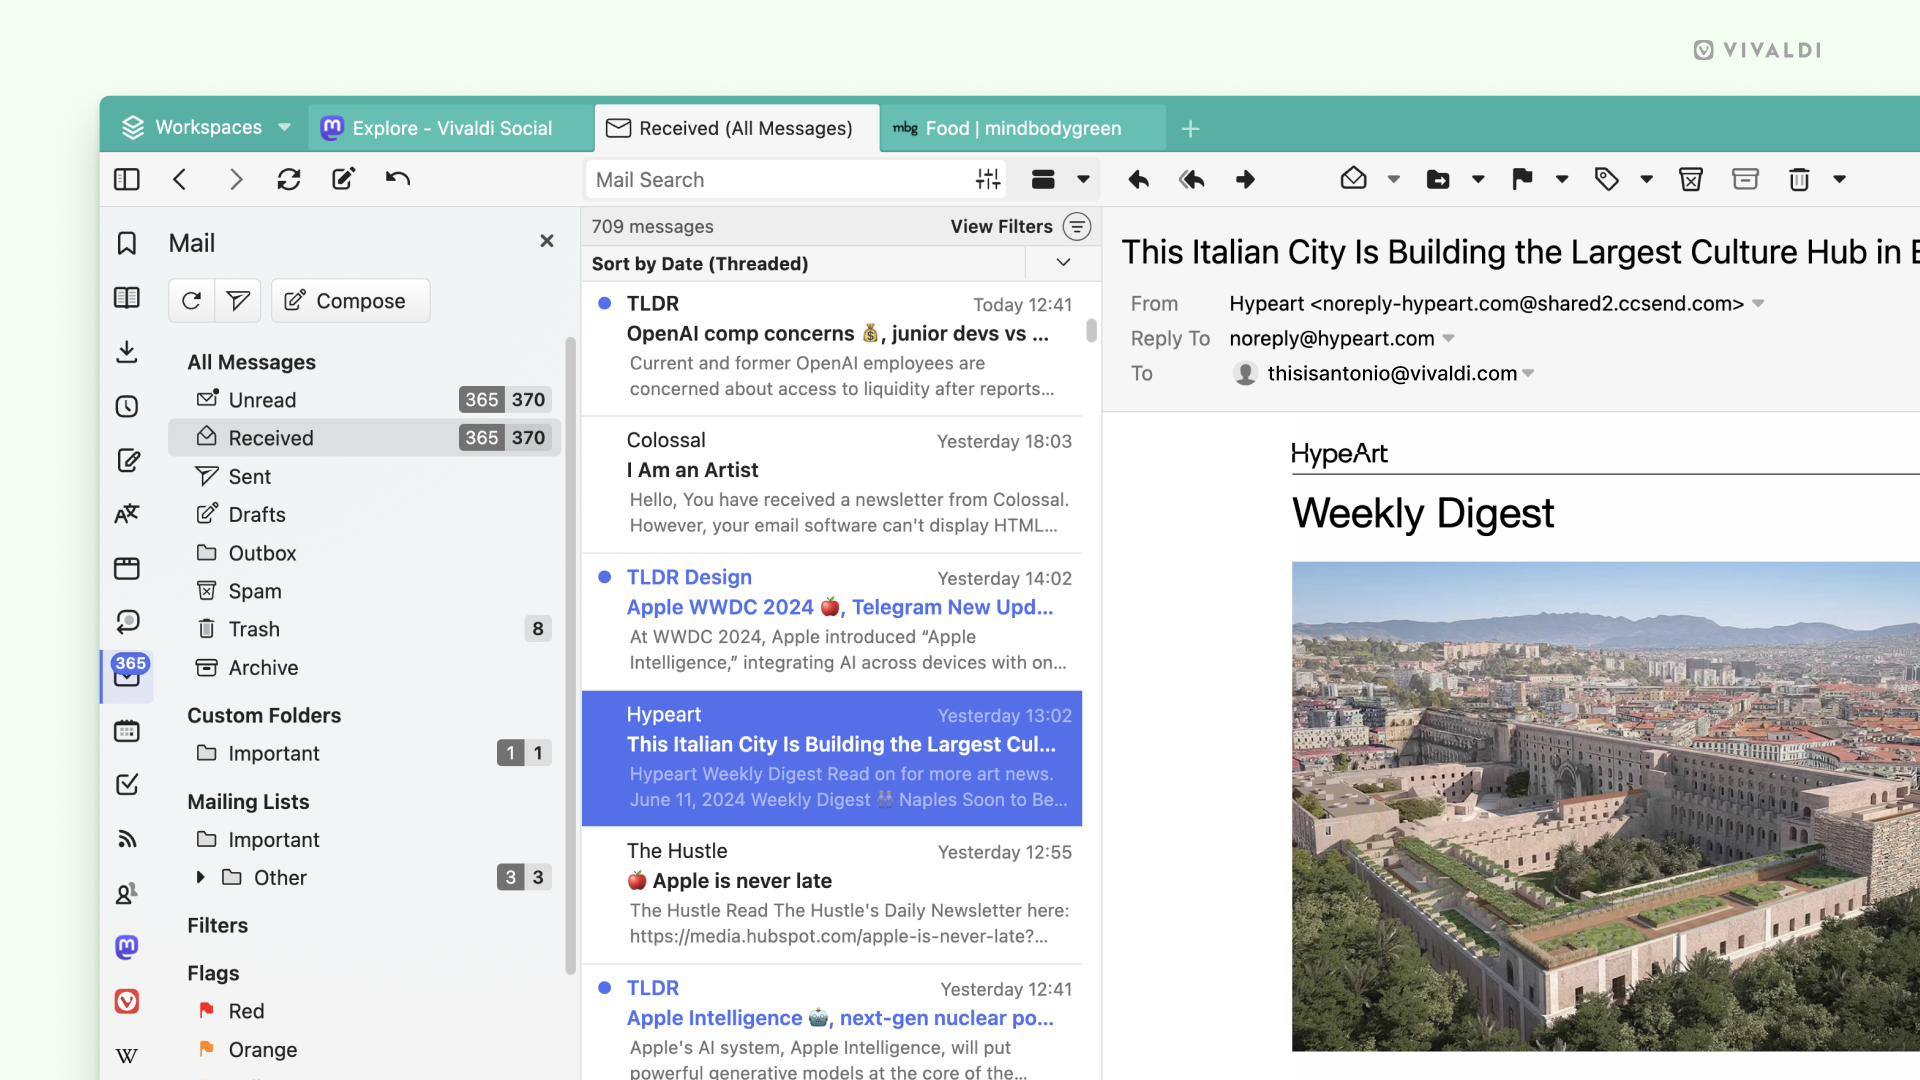
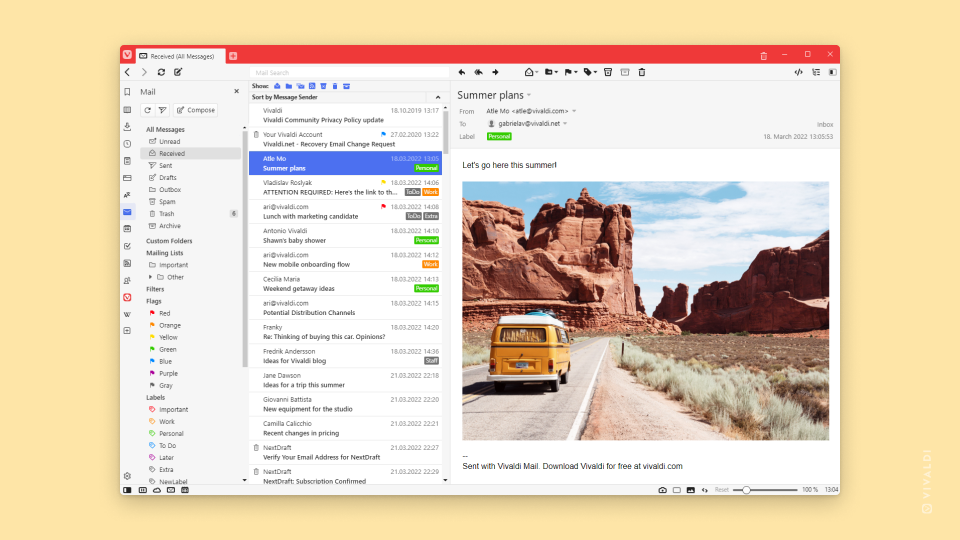
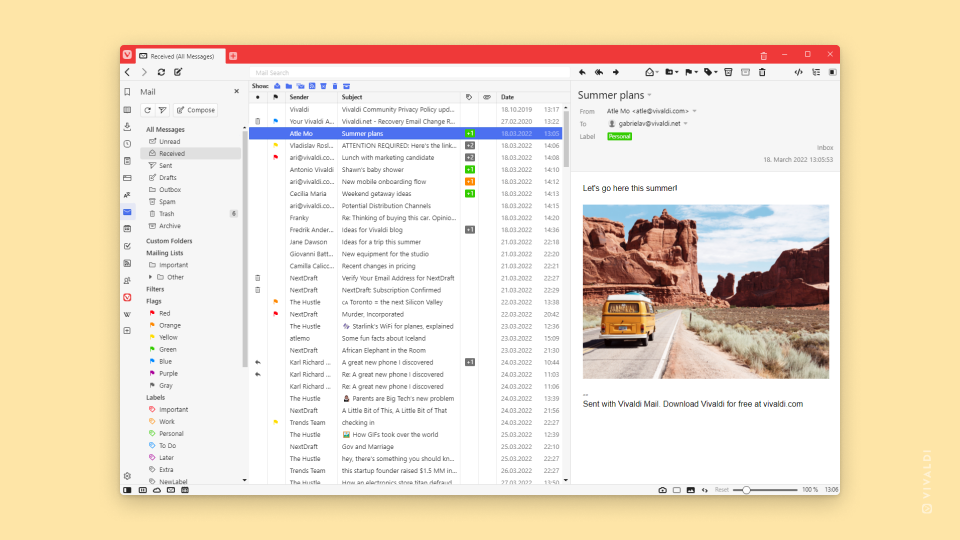
 Toggle View button in the top right corner of the Mail tab.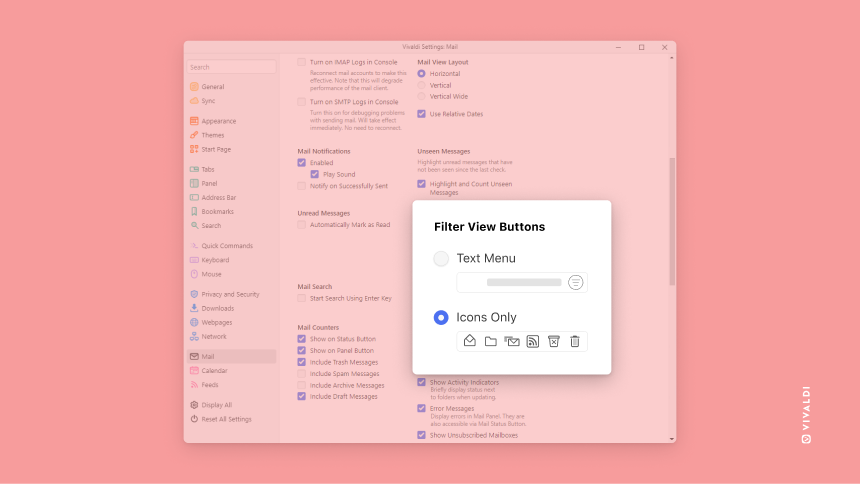
 Show/Hide Message Threads button in the top right corner of the Mail tab.
 Compose on the Mail Panel toolbar;
 Add Attachment on the message toolbar above the composer;
 Send on the message toolbar above the message composer;
 Reply or
  Reply to All on the message toolbar.
 Forward on the message toolbar;
 Edit on the message toolbar.
 Discard Draft on the message toolbar.
 Delete on the message toolbar,
 Mail button on the
  Check All Accounts on the Mail Panel toolbar.
 Check for mail on the Mail toolbar in the top left corner of the window.
 Mark Read/Unread,
 Move to Folder,
 Mark message as Spam,
 Move to Archive (if supported by the email service provider),
 /
/  Show Messages as Text/HTML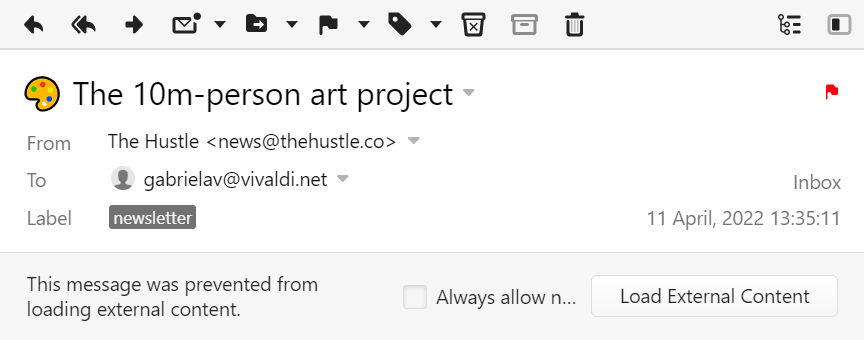



 Mark Read button in the message toolbar above the message.
 Mark Unread button in the message toolbar above the message.
 Show Read
 Show messages from Custom IMAP folders
 Show Mailing Lists
 Show Feeds
 Show Trashed Items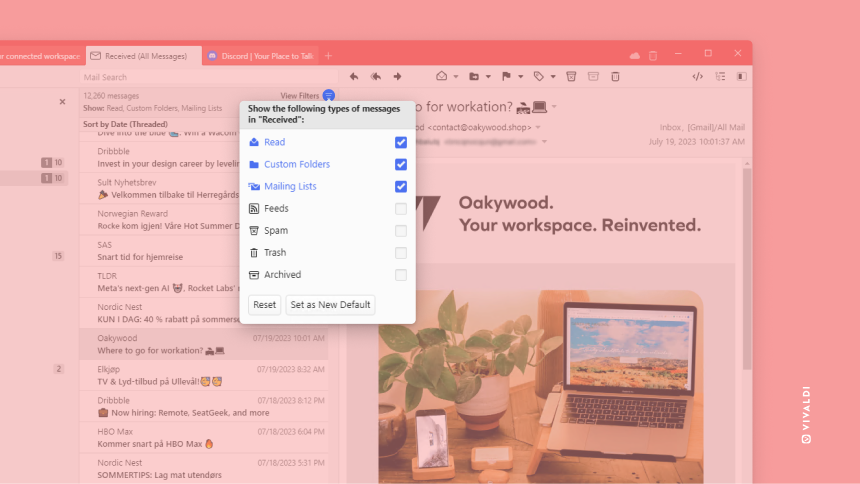

 Move to Archive on the message toolbar.

 Add Calendar below the list of calendars.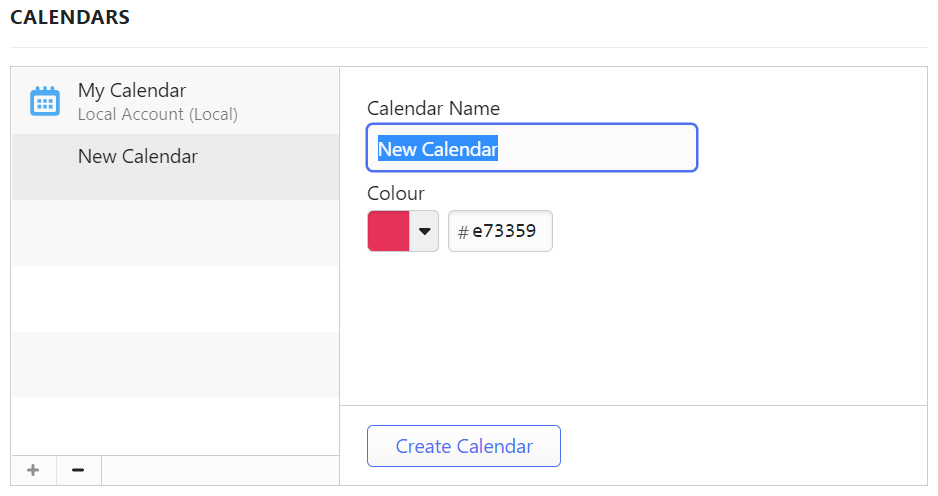
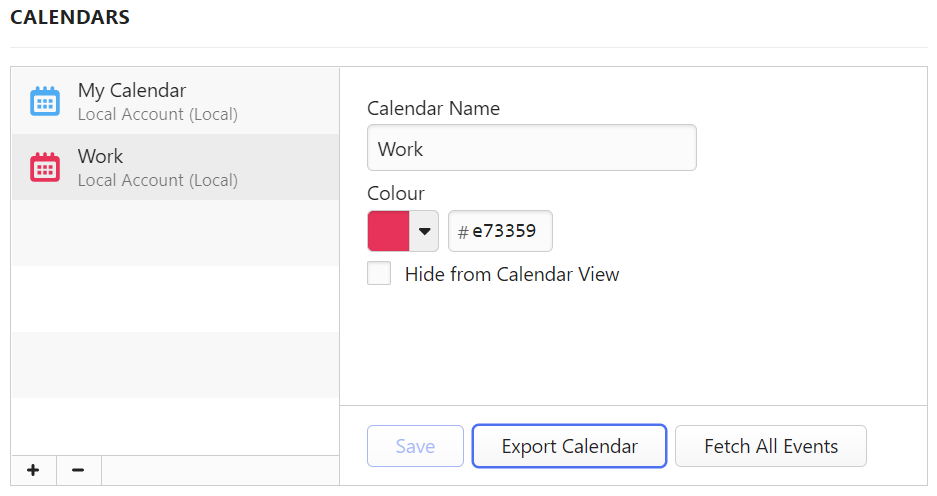
 Delete calendar below the list of calendars.