Some permissions in the app are enabled by default, others are blocked and in many cases a website will ask for your permission, for example, to access your device’s camera and microphone, to show you notifications, etc.
To review and adjust your preferences for each of the settings:
Tap on the permission in the list to see your options.
If a website has asked for permission, it will be listed on the permission’s page, from where you can adjust your choice by tapping on the domain name. In many cases you can also add exceptions to the default setting.
Settings and permissions in Vivaldi on Android
Cookies Choose your blocking level:
Allow cookies
Block third-party cookies in incognito, aka private windows
Block third-party cookies
Block all cookies (not recommended)
Location
Camera
Microphone
Motion sensors
Notifications
JavaScript
Pop-ups and redirects
Intrusive or misleading ads
Background sync
Automatic downloads
Protected content Choose whether to allow (recommended), block or have each website ask whether to play copyrighted media content.
Sound
Data Stored Get a detailed view of websites you’ve visited and an option to manage permissions per site. In addition, you can delete stored data of all sites or per site.
NFC devices
USB devices
Clipboard
Virtual reality
Augmented reality
Your device use
Third-party sign-in
Dark theme for sites Also accessible from Settings > Appearance > Themes.
Desktop site Also accessible from Settings > Web pages.
Autoplay Blocked by default and requires you to tap on the play button to view videos on websites. Allow Autoplay, if you have plenty of mobile data and want videos to start playing automatically whenever they appear on a web page.
Using Keyboard Shortcuts is a great way to speed up your workflow. Single Key Shortcuts allow even more speed and require less finger gymnastics to reach all relevant keys.
You can view and edit Calendar’s Keyboard Shortcuts in Settings > Keyboard > Calendar.
Available Shortcuts:
D – Day View
W – Week View
N – Multiweek View
M – Month View
Y – Year View
A – Agenda View
K or Page ↓ – View Next Period
J or Page ↑ – View Previous Period
T or Home – View Today
Alt + Page ↑ – Zoom View In
Alt + Page ↓ – Zoom View Out
C – Create Event
G – Go to Date
/ – Search in Calendar
R – Refresh Calendar
Delete – Delete Event
To disable Single Key Shortcuts in Mail and Calendar:
If you have your hand more on the mouse than on the keyboard, you can also create Mouse Gestures for all of the commands listed above. Click here to learn how to add new Mouse Gestures.
Using Keyboard Shortcuts is a great way to speed up your workflow. Single Key Shortcuts allow even more speed and require less finger gymnastics to reach all relevant keys.
You can view and edit Mail’s Keyboard Shortcuts in Settings > Keyboard > Mail.
Available Shortcuts:
N – Compose New Message
R – Reply to Message
Shift + R – Reply All
Shift + L – Reply List
F – Forward Message
Shift + Delete – Delete Permanently
K – Mark Message as Read
Shift + K – Mark Message as Unread
J – Mark Message as Spam
Shift + J – Not Spam
M – Mark Message Thread as Read
Shift + M – Mark Message Thread as Unread
E – Show Messages for Sender
L – Add Labels and Flags
T – Show Message Thread
G – Mark Message as Read and Go To Next Unread
Ctrl + Enter – Send message
Ctrl + Shift + Enter – Queue message
In addition, you can create your own shortcuts for the following commands:
Move Message to Archive
Quick Reply On/Off
Restore Message from Archive
Next Unread
Previous Unread
Mark All As Read
Add New Mail Account
Show Message as Text
Show Message as HTML
Mail Settings
Add Attachment
Discard Draft
Show Advanced Mail Info
To disable Single Key Shortcuts in Mail and Calendar:
If you have your hand more on the mouse than on the keyboard, you can also create Mouse Gestures for all of the commands listed above. Click here to learn how to add new Mouse Gestures.
Vivaldi’s Windows Panel offers an easy way to manage multiple tabs at once. Opening to the side of your main browser window, the Windows Panel will give you a tree-style view of all the open Tabs in all your open Windows.
Access the Windows Panel
Use one of the following options to open the Windows Panel:
Click on the Windows and Tabs icon on the Panels sidebar.
The active tab has a little dot in front of it and the tab title is written in bold. Tabs you’ve opened, but haven’t viewed yet have their titles displayed in italics.
Open, Switch and Close Tabs
To open a new tab from the Windows Panel, click on the New Tab button near the top right corner of the panel. Next to it you’ll also find the button to open a New Window.
To find a particular tab from the long list of tabs you have open and have recently closed, you can use the search box in the top left corner of the panel.
To switch tabs, double-click on the tab you want to open. When you enable Activate with Single Click in Windows Panel settings, you can switch tabs with just one click.
To close tabs in the active window:
With the mouse, hover over the tab you want to close.
Click on the Close button that appears on the right side.
To close tabs in any window:
Right-click on the tab you want to close.
Select Close from the context menu.
Alternatively:
Click on the tab you want to close.
Press Delete on your keyboard.
Reorder and Move Tabs
You can easily change the order of your tabs using the Windows Panel.
Click on the tab you’d like to move.
Holding the left mouse button, move the tab to a new location.
Drop the tab to a new location and release the mouse button.
If you have multiple windows open, you can move tabs from one window to another using drag and drop.
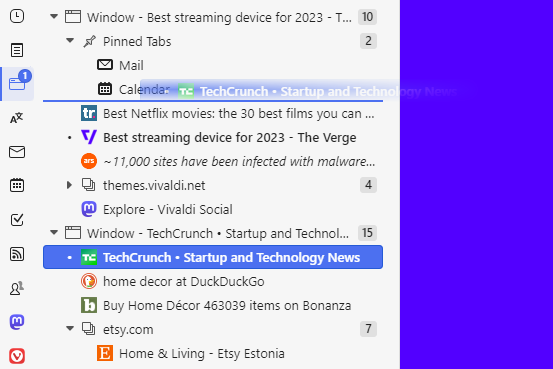
Create Tab Stacks
Windows Panel lets you easily create Tab Stacks – groups of tabs stacked together to save space and make browsing more convenient.
Option 1
Click on the tab you’d like to add to a group.
Holding the left mouse button, move and place the tab on top of another tab.
Release the mouse button – you have now created a Tab Stack.
Option 2
Select the tabs you want to stack by holding down Ctrl / ⌘ or Shift key while you click on the tabs.
Right-click on one of the selected tabs.
Select Stack # Selected Tabs from the menu.
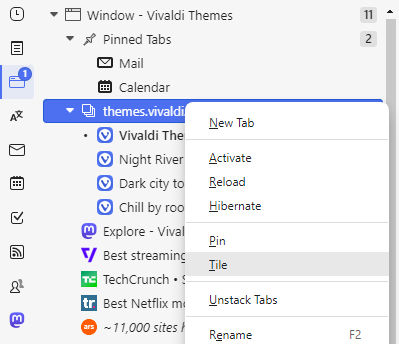
Tile Tabs
To tile tabs in order to create a side-by-side view in one browser window:
Select the tabs you want to tile by holding down Ctrl / ⌘ or Shift key while you click on the tabs.
Right-click on one of the selected tabs.
Select Tile from the menu.
You can also tile your Tab Stacks:
Right-click on the Tab Stack.
Select Tile from the menu.
Duplicate Tabs
If you have two or more tabs open with the same link, you’ll see them in the Duplicate Tabs section. It makes it easy to clean up extra tabs.
To close duplicate tabs:
Expand the Duplicate Tabs section in the Windows Panel.
Hover over the entry.
Click the Close button on the right side.
To close all duplicate tabs at once.
Expand the Duplicate Tabs section in the Windows Panel.
Click on Close All Duplicate Tabs at the end of the section.
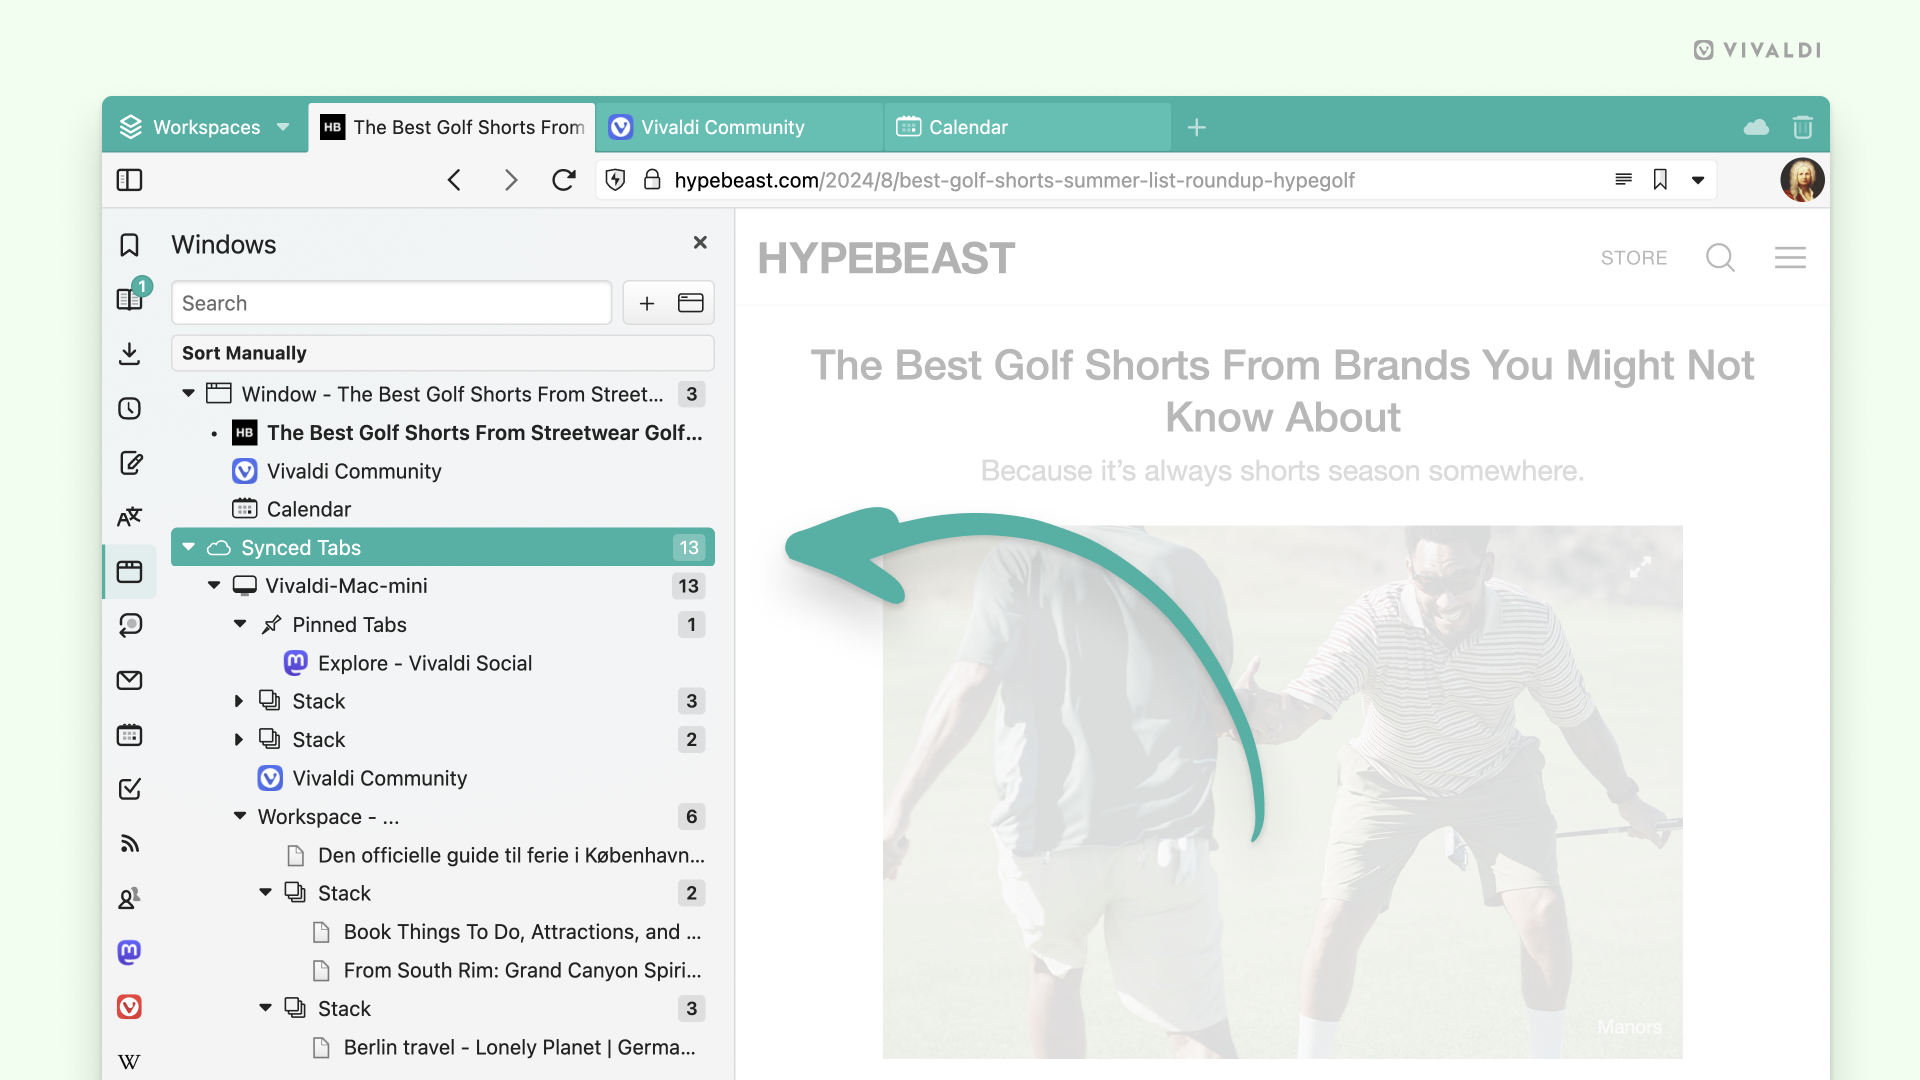
Synced Tabs
When you’re logged in to your Vivaldi account and enabled syncing of Tabs, the tabs you have open on other devices and Web Panels will be listed in their own folder in the Synced Tabs section. If you’re syncing with another desktop client, synced tabs will be organized further to reflect the Workspaces and Tab Stacks you have created.
To open a synced tab on the current device:
Double-click on the tab.
Right-click on the tab and select Open from the context menu.
Right-click on one of the selected tabs and select Open from the context menu.
Inactive Tabs
Tabs you haven’t viewed in a while will appear in the Inactive Tabs section in the Windows Panel, allowing you to review and make a call on whether you want to keep the tabs open or whether they can be closed.
Click on the - and + buttons to update the number of days.
Recently Closed Tabs
There’s a folder named Closed Tabs at the very end of the list of windows and tabs, where you can see and reopen recently closed tabs.
To reopen a tab, either:
Double-click on the tab you want to reopen.
Drag the tab out of the Closed Tabs folder and to a window you want to open it.
To clear the list of closed tabs:
Right-click on the Closed Tabs folder.
Select Clear All.
Windows Panel Settings
You can view and adjust Windows Panel settings in Settings > Panel > Window Panel.
Activate with Single Click
Normally you have to double click on a tab on the list to open it as the active tab. When you enable Activate with Single Click, it’s enough to click on the tab once to open it.
Pinned Folder
Pinned Tabs are listed at the top of the Windows Panel. You have the option to tell them apart from other tabs by grouping them into a folder or, when the setting is disabled, display a pin icon instead of the website’s favicon.
Create a Tab Stack by Drag and Drop
With drag and drop you can reorder tabs and when you drop one tab on another, you can group these tabs into a Tab Stack. To prevent accidental stacking while reordering tabs you can disable Create a Tab Stack by Drag and Drop.
Show Unread Tabs Badge
When you open new tabs in the background, then until you focus on them, they’re considered Unread Tabs. The number of unread tabs will be shown on the Windows Panel. If you don’t care for that information, you can disable Show Unread Tabs Badge.
…and much more
You can do a lot more with your tabs in the Windows Panel. To explore the possibilities, right-click on a window, a tab or a group of tabs and see the list of available actions, such as Duplicate, Hibernate and more in the menu.
Android 12 and up supports opening multiple windows of the same app. This means that if you have a newer mobile device, you can browse with Vivaldi in multiple windows just like on desktop.
Open a new window
Multiple windows are supported better on devices with larger screens, such as tablets. To open a new window on a tablet or a phone with a width larger than 600dp:
Open the Vivaldi menu.
Select New Window.
Though not as convenient, you can open a new window on a smaller screen by following these steps:
Open Vivaldi.
Open your devices app switcher.
Long-press on the Vivaldi logo above the app preview thumbnail to open a split-screen view.
Search for Vivaldi and tap on it to open a new window in the other half of the split screen.
Exit split screen view, for example, by swiping the divider all the way up or down the screen.
When checking the app switcher, you’ll see Vivaldi listed twice or more, if you’ve opened even more windows.
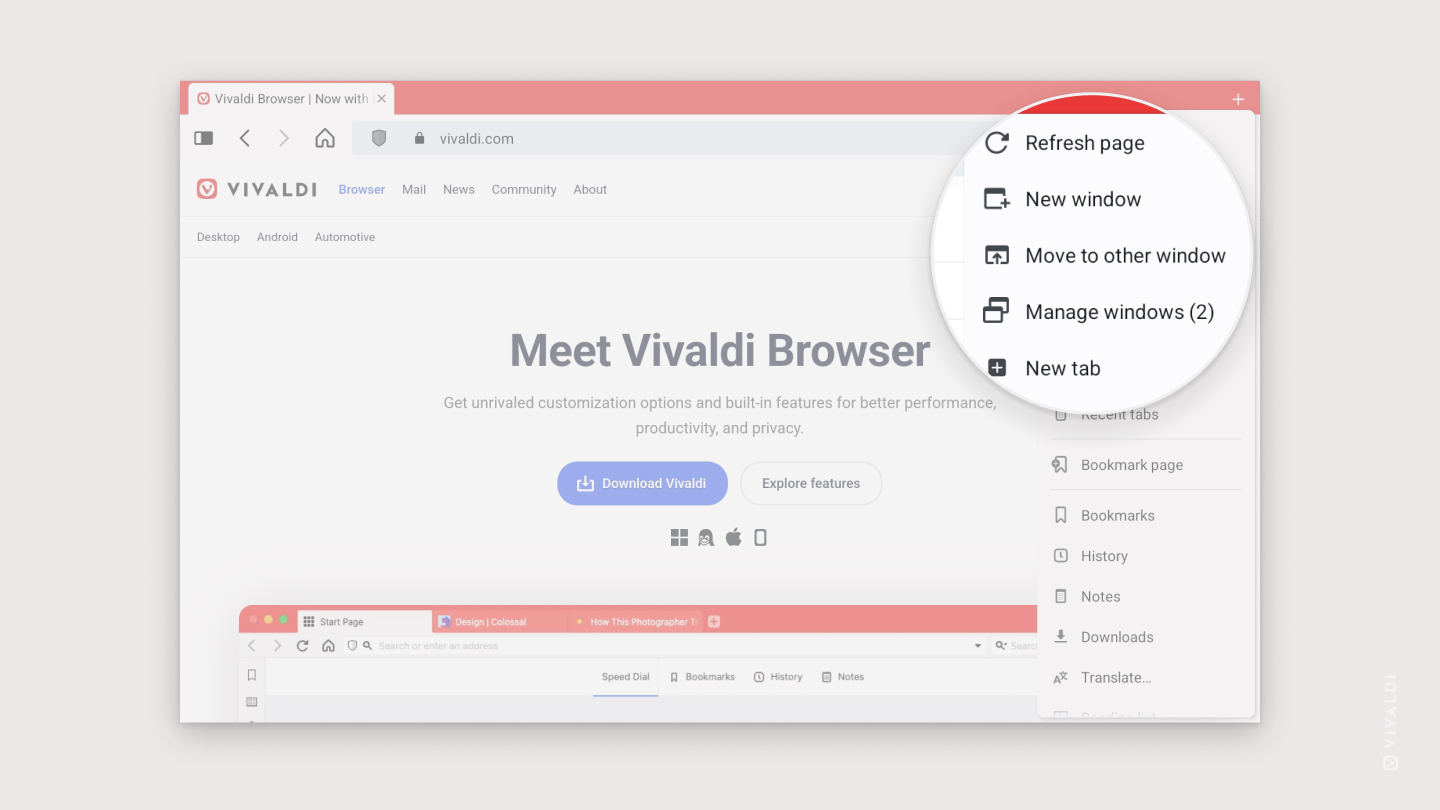
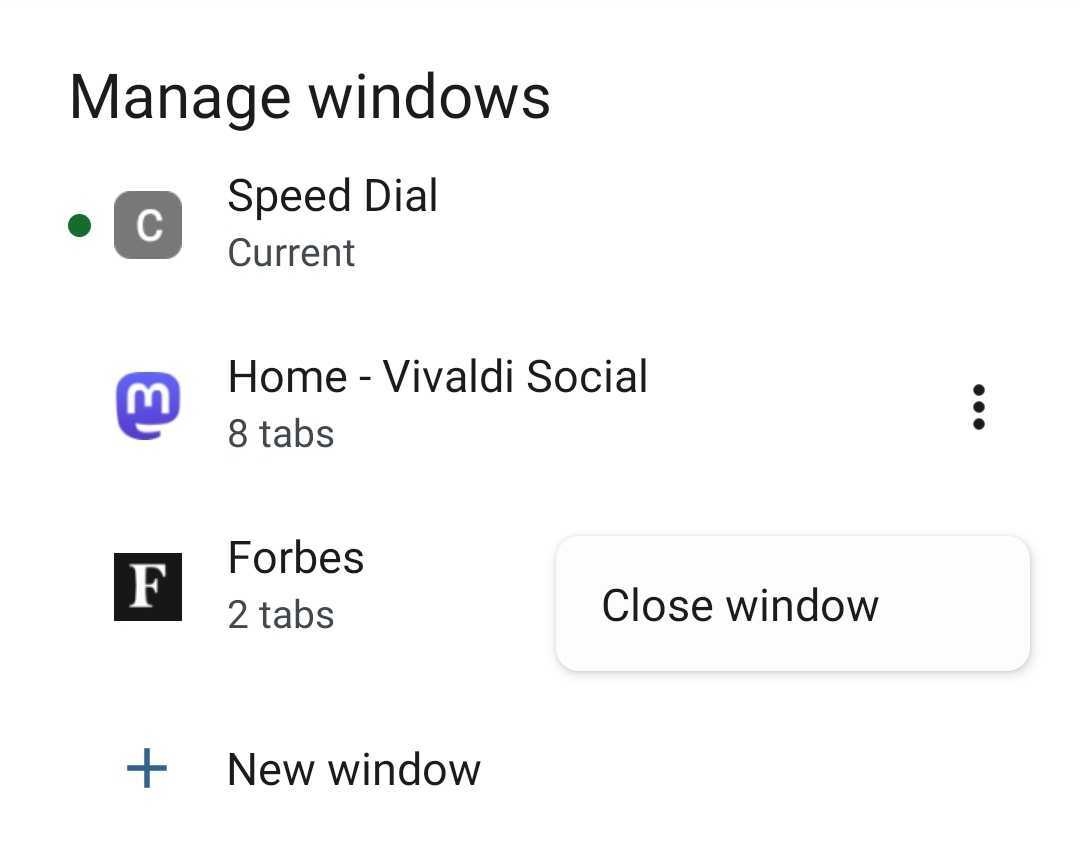
Switch windows
To switch windows:
Open the Vivaldi Menu.
Select Manage Windows.
Select the window you want to focus on.
Move a tab to another window
To move a tab you have open in one window to another window:
If there’s none open already, open a new window.
Open the tab you want to move.
Open the Vivaldi Menu.
Select Move to other window.
To move a tab you have open in one window to another window from the Tab Bar:
Main Menu in Vivaldi on Android gives you access to most of Vivaldi’s key features and tools.
Access the Main Menu
Whether you’re using the browser on a small phone screen, a large tablet screen or from your car’s center console, the menu can always be accessed from the right side of the Address Bar. Just tap on the Vivaldi logo to open it. The options available in the menu depend on whether you have open a web page or the browser’s Start Page.
To close the menu, tap on the feature you want to use or on an area outside the menu.
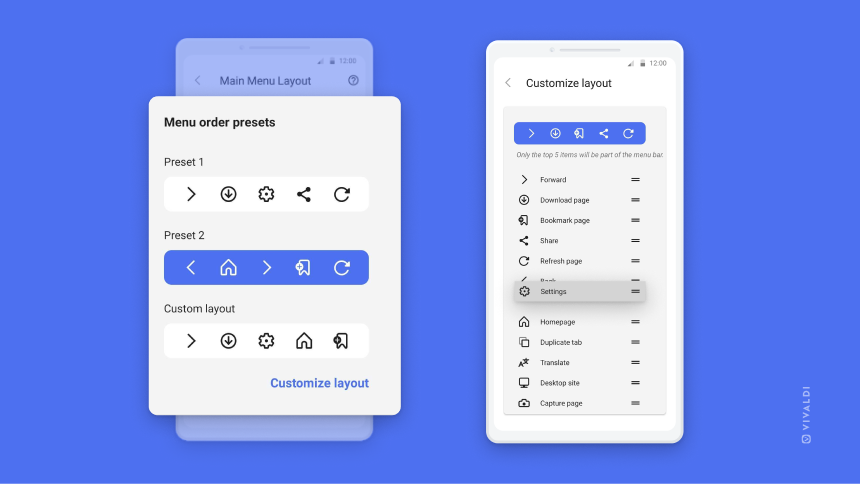
Customize the menu
On smaller screens, in the Main Menu, there’s a menu bar with 5 of the most important menu options. There’s more screen real estate on larger screens, so the menu bar is not available on tablets and the like. Since the importance depends on the person using the browser, you can customize the menu bar to fit your needs.
To customize the menu:
Go to Vivaldi Menu > Settings > General > Menu Settings.
Choose between the 2 presets or make your own menu.
To put together your own custom layout for the menu bar:
In the Main Menu Layout settings, choose the third option, Custom layout.
Move the menu items you want to see on the menu bar to the first 5 positions in the list. To reorder menu items, long press on the item you want to move and drag it to your preferred position.
On desktop, Ctrl+F / ⌘ F is a well known Keyboard Shortcut for searching through the open web page. On mobile devices, where the screens fit even less content in the visible area, being able to just search for a keyword is even more useful.
To search in Vivaldi on Android:
Open the Vivaldi menu.
Select Find in Page.
Enter your search keyword.
Search results will start showing as you type. Use the arrows in the top right corner to move to the previous and next results. Tap on the , when you’re done with your search.
To update your account information, first go to your Vivaldi account’s profile:
Hover the mouse over your username or avatar in the top right corner of the page
From the menu select Account.
Profile image
To upload a new profile image:
Click on the current image;
Choose the new image file (max size – 5MB);
Crop, if needed;
Click Done.
Updates to the account are checked during login. If you don’t see the new profile image on the forum, blogs, or Vivaldi Social, log out of the account and in again.
Name
Your name will be displayed on the Forum, Blogs and Themes if you choose to do so.
To change your name in Vivaldi webmail, go to Settings > Identities.
To update the display name on Vivaldi Social, go to Preferences > Profile.
Recovery email
To change your account’s recovery email:
Enter the new email address in the email field on your profile;
Click Save;
Head to the new recovery email’s mailbox and look for a ‘Recovery Email Change Request‘ email from Vivaldi;
Open the link in the email (the link is valid for 48 hours);
Enter your account’s login password and click Verify email address;
When you return to the profile, you’ll see the new email.
Two-Factor Authentication
To keep your account secure, consider enabling Two-Factor Verification. When enabled, in addition to the login password, you’ll be asked to verify yourself with an additional method.
Click on Change password in the bottom left corner of the page;
Enter the current password and then the new password twice;
Click Update.
Log in with the new password.
Alternatively, you can send yourself a password reset email here.
Delete account
For instructions on how to delete your Vivaldi account, please visit a separate help page here.
Trouble updating the profile?
If after clicking Update on the profile you see an error messages, for example, ‘Can’t verify the user‘, try updating the account again in a Guest Profile or a new User Profile. An Extension or some Setting may cause the issue in the browser’s main profile.
In case updating account information didn’t work in a clean profile either, please report the issue to us using the contact form below.
 Vivaldi menu >
  Settings > Web pages > Site Settings.
 Vivaldi menu.
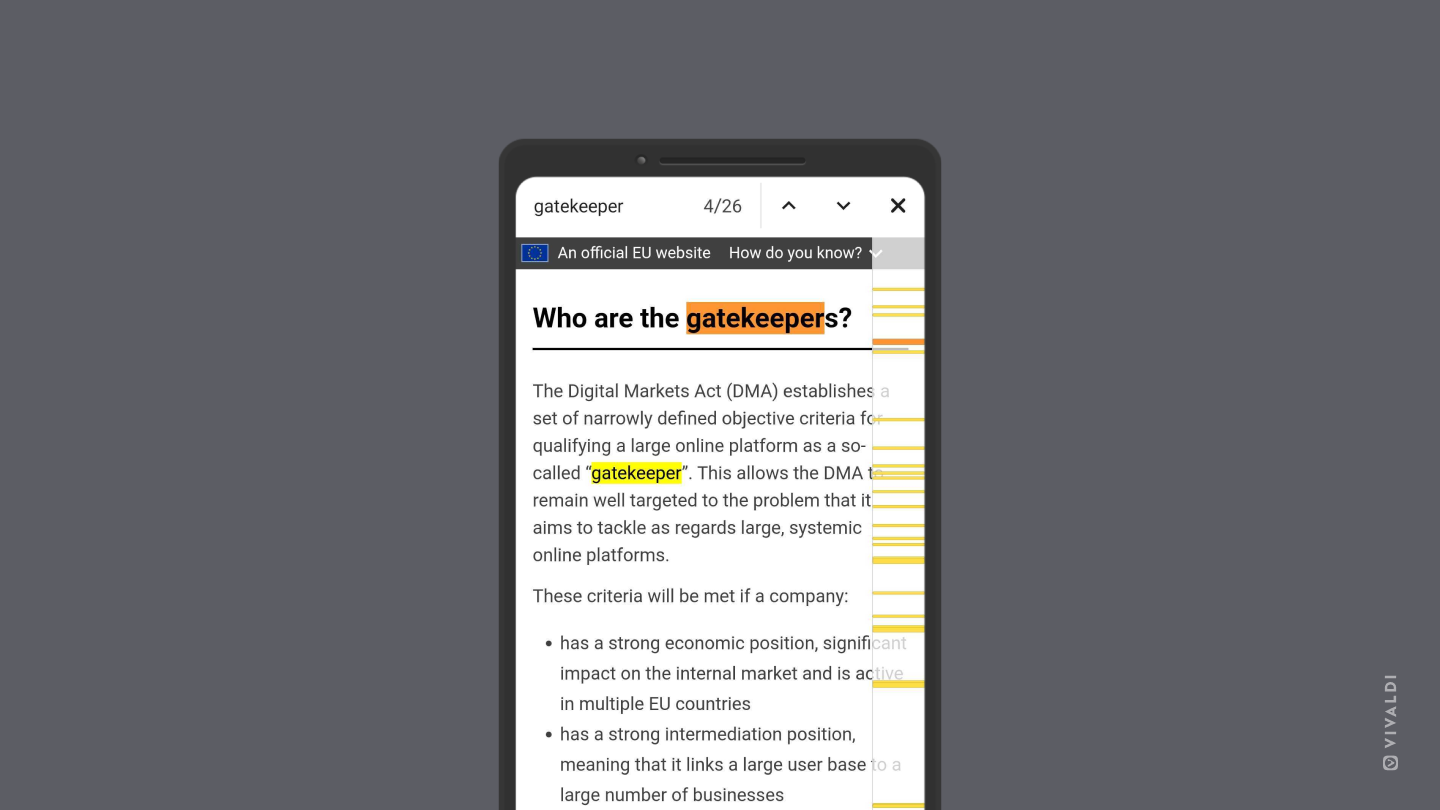