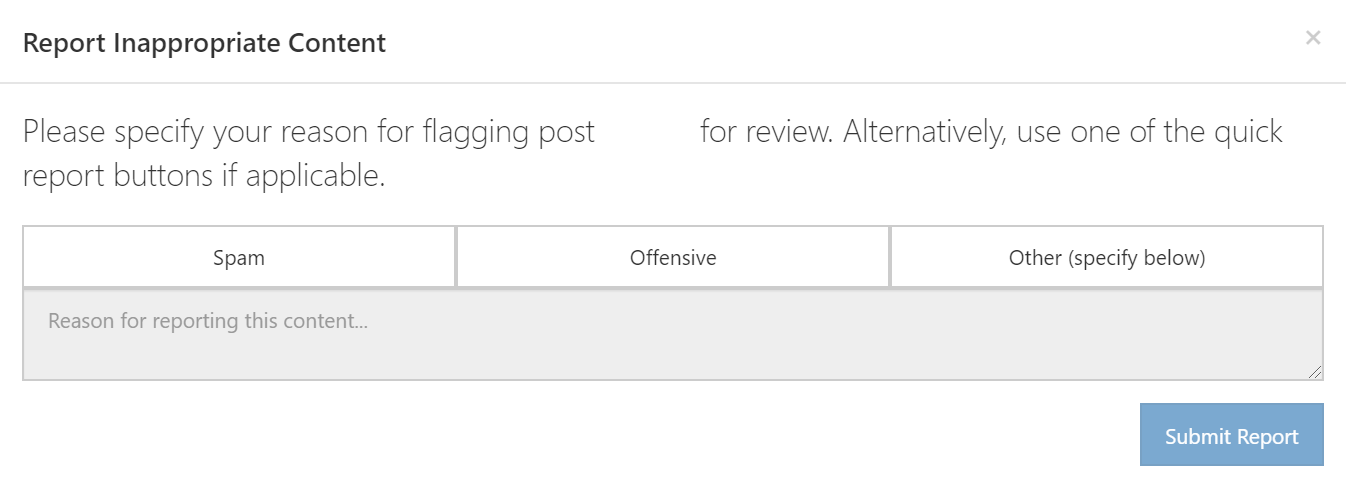
Click on the post menu on the right side of the post;
Select Flag This Post for Moderation;
Pick a category: Spam, Offensive or leave a short comment, why you think the post is inappropriate for the forum.
Click Submit Report.
Forum admins and moderators will review the flag and decide what to do next.
Moderation
The Vivaldi Forum is moderated by Community Managers (Vivaldi employees) and Moderators (volunteers). They can move your topics if there’s a better category for them and they may also edit your post to clarify a point and/or remove parts that are not in line with our Community Guidelines and Terms of Use.
Community Managers and Moderators also have the right to delete inappropriate and duplicate posts, as well as, ban users either temporarily or permanently, who have broken the aforementioned rules and guidelines.
In case you have any questions or complaints regarding moderation, please contact one of the Community Managers in a private message on the Forum or through the contact form below.
Click on New Topic in one of the forum categories above the list of topics. If you don’t see the New Topic button, you’re not allowed to post in that category (for example, Announcements);
Make sure the category you’re going to post in is fitting for the topic. Click on the drop-down menu in the top left corner to change the category;
Enter a short and clear title;
Write the content of the message;
Select tags, if available for the category.
Click Submit to publish the topic.
If you click on the small arrow on the Submit button and select Ask as question, an Unsolved tag will be added to your post title until a solution is found. Then the author and forum moderators can mark the topic as solved and highlight the best answer.
You can use simple formatting options available in the post editor, add links, images, and emojis. It’s also possible to style your post using Markdown formatting.
When reporting problems with the browser, tell us which platform and it’s version you are on, Vivaldi browser version, extensions (if any), system specification (CPU, RAM), connection type and architecture (X32 or X64), and give us the steps to reproduce your issue.
Reply to a topic
To reply to the discussion in general, click on the blue Reply button at the top or bottom of the comment thread. To start a new discussion based on that topic, click on the small arrow next to the Reply button and select Reply as Topic. If the reply is meant for specific user(s), tag them by typing @ and their username in your comment.
To reply to a specific comment, use the Reply and Quote options next to the comment.
Edit post
In case you want to add something to your comment or just want to fix an accidental typo:
Locate your post or comment;
Click on the post menu on the right (next to the upvote button);
Select Edit, which opens the post editor;
Make the changes;
Click Submit.
Delete a post or a topic
To delete your post:
Click on the post menu on the right (next to the upvote button);
Select Delete;
Confirm your choice.
Notifications
When you create or reply to a topic, you’re automatically added as a watcher to these topics and will get a notification, when someone comments in the same thread.
To stop receiving notifications:
Open the topic;
Click on Watching in the menu below the first post or after the last post;
Change to an option you prefer:
Watching – notified, when someone replies and topic appears in Unread,
Not watching – won’t get notified, but topic still appears in Unread,
Ignoring – won’t get notified and topic doesn’t appear in Unread.
To change notification settings globally:
Click on your avatar in the top right corner of the Forum;
Select Settings from the menu;
Change your preferences in Notifications & Sounds;
With thousands of topics on the Vivaldi Forum, it’s easier to use Search to find what you’re looking for rather than browse through all the categories. It’s also important to search before you post a new topic (especially a feature request) as the same question may already be discussed in a different thread.
Simple search
To do a simple search:
Click on the Search button in the top right corner of the page;
Enter the search keyword;
Browse through quick results in the drop-down menu or press Enter to see all results.
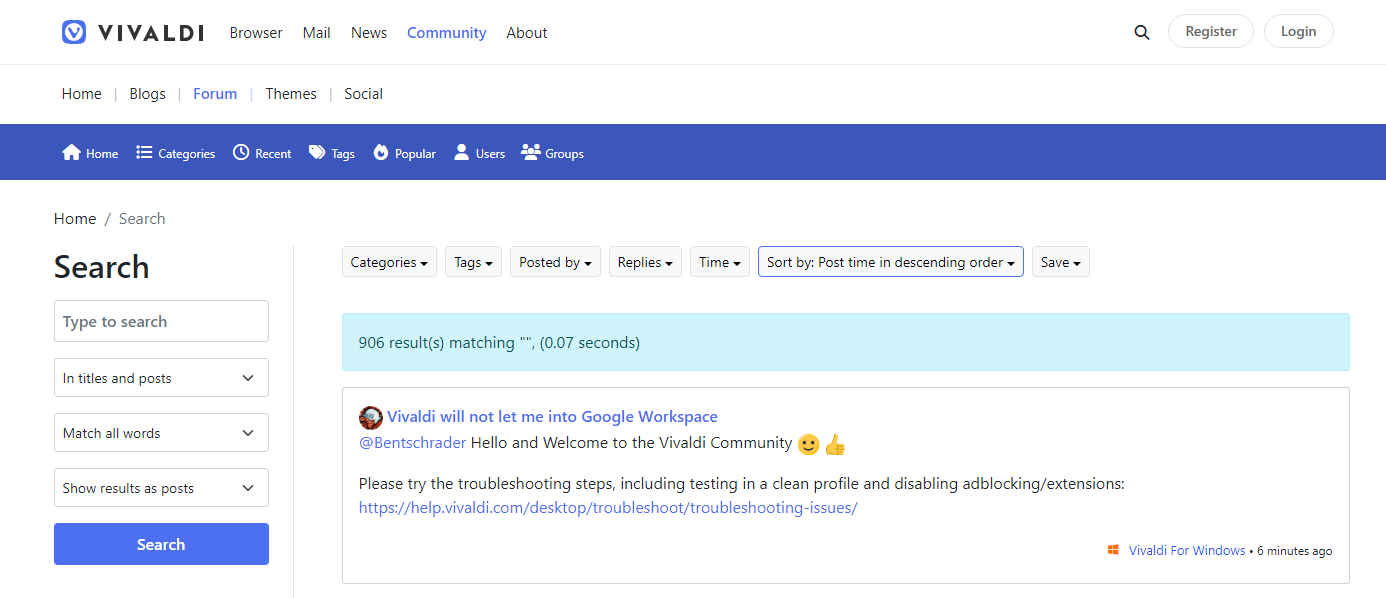
Advanced search
With Advanced Search, you can filter out irrelevant results.
To do an advanced search:
Option 1
Start with a simple search;
On the results page, click on Advanced Search;
Fine-tune the search criteria;
Click Search.
Option 2
In the search field, click on the Advanced Search button;
On the Search page, enter the search keyword;
Fine-tune the search criteria;
Click Search.
Search in mobile view
In case you’re browsing the Forum in a smaller window (phone, Web Panel) and see the mobile view of the Forum, to search:
Tap on the Search button on the blue menu bar;
Enter the search keyword;
Browse through quick results in the drop-down menu. To see all results either tap Go on your phone’s keyboard or tap on See more results below quick results.
Fine-tune the search criteria;
Tap on Search.
Search options
To get only the most relevant results, we suggest narrowing down your search using the various search options available on the Advanced Search page.
You can search:
Titles and Posts,
Titles,
Posts,
Bookmarks,
Categories,
Users,
Tags.
Choose whether the results need to match:
all words,
any word.
You can narrow the search results by:
Category,
Tags,
Post author,
Reply count,
Post time.
You can sort results in both ascending and descending order by:
Relevance,
Post time,
Votes,
Last reply time,
Topic title,
Number of replies,
Number of views,
Topic votes,
Topic start date,
Username,
Category.
You can display the results as:
Posts with content preview,
Just topic titles.
Save search preferences
In case you do similar searches often, you can speed up the process by saving your search preferences. That way, every time you do a simple or advanced search, it will use your preferences to narrow down the results.
Click on the Search button in the top right corner of the page;
Right-click in the search field;
Select Add as Search Engine from the context menu;
If you wish, edit the search engine description;
Give the new search engine a nickname. For example ‘f’ or ‘vf’.
Click Add.
To learn more about search in Vivaldi and custom search engines, take a look at the help page about Search.
Search users
To look for users, go to the Users tab on the (blue) forum menu. There you can see who’s online, who has posted the most and users with the highest reputation, as well as search for users when you know the username.
If you’re not looking for a specific user, but someone in a certain role, such as Community Managers or Moderators go to the Groups tab and browse through the groups.
To receive notifications when a user starts a new thread, follow them by going to their profile and clicking on the + button on the edge of their avatar. You can view all your followers and the people you follow on your profile from the menu on the edge of the cover image > Following / Followers.
Sometimes things go wrong and instead of achieving your goal, an error message is shown. In this article, we’ve listed common error messages shown when using Vivaldi services doesn’t go according to plans and suggestions for solving the issue.
Browse through the list to find a solution to the error you’re seeing. In case you need our assistance, use the contact form at the end of this article.
Vivaldi.net
“Login failed! Please recheck the username and password and try again.”
This error is shown when the username or password haven’t been written correctly or the account doesn’t exist. For example, the account was deleted by the owner or due to inactivity.
“Your account hasn’t been confirmed yet. Please check your email for the confirmation link. If you haven’t received it or it has been more than 48 hours since you registered, you can resend the code here.“
Before logging in to your new Vivaldi account, it needs to be activated with a code in the email that was sent to the email address you gave as the recovery email in the registration form.
When you can’t see the email in your Inbox, check also the Spam folder. In case you can’t find the email or the link has expired request a new code.
If you activated the account, but still see this error, wait a few minutes and try logging in again.
If you made a typo in the email address or gave an invalid email, please send us a message using the contact form at the end of this article, so we can fix it for you.
“Login failed. It looks like you’ve forgotten the password. Would you like to reset the password?”
In case the username is correct, but the password is not, then after the 4th failed login attempt you’ll get this error message, suggesting you to reset the password.
If you try logging in one more time and it also fails, the account will get locked for 5 minutes as a security measure.
“Your account has been temporarily locked as a result of multiple unsuccessful log in attempts. Please reset the password in 5 minutes.”
After the 5th failed login attempt the account gets locked for 5 minutes. You’ll need to wait out these few minutes, after which you can send yourself a password reset email.
“This account has been locked.”
Seeing this error means that the account was most likely locked for breaking Vivaldi’s Terms of Use.
Some blocking, for example due to misbehaviour on the Forum, is done manually by Forum admins and moderators. Other, such as spamming in Webmail, is mostly done automatically by our antispam filters.
If you believe the account was locked in error, please send us a message using the contact form at the end of this article.
“Can’t verify the user. Something went wrong. If this error keeps appearing, please contact us.”
We’ve confirmed that an extension called Dark Reader breaks functionality on Vivaldi.net’s account related pages, resulting in this error message being shown. If you use this extension or any others, please disable them temporarily (you might also have to restart the browser) and try again.
If you don’t use extensions or the error persists, please try the same action in a Private Window or Guest Profile to rule out other browser settings causing this issue. If that doesn’t help either, please send us a message using the contact form at the end of this article.
Webmail
Access denied. More info here.
In some mail clients the message is:
Your account does not have permission to access mail services.
Vivaldi Webmail is a service for active Vivaldi Community members using Vivaldi’s services. This means that new users, who registered their account after the 4th of May 2023, first need to build up a reputation to be granted access to the Webmail service.
Reputation is built by actively using other Vivaldi.net services – the Forum, Vivaldi Social, Blogs, Themes, and the browser’s Sync feature.
The reputation system is replacing the previous requirement to verify an account via one’s phone, which was set up to limit the number of spam accounts. For additional information, read our blog post on the topic.
Login failed
This error is shown when the username or password have been written wrong or the account doesn’t exist. For example, the user deleted the account or it was deleted due to inactivity.
Your account is locked. Contact support if you believe this to be in error.
Seeing this error means that the account was most likely locked for breaking Vivaldi’s Terms of Use.
If you believe the account was locked in error, please send us a message using the contact form at the end of this article.
Your account has been locked due to numerous failed login attempts. Please reset your password to continue.
Some mail clients, like Vivaldi Mail, show more detailed error messages.
Occasionally, the spam prevention tool, Akismet, doesn’t like something and refuses to publish the post.
In case you haven’t posted before, try leaving a comment in an existing discussion before starting a new topic. Also, try not to include many, if any links in the post.
As a last resort, you could also try from a different device and/or from a different internet connection.
Blogs
Sorry, but this blog has been marked as spam as defined in our Terms of Service. If you believe this decision was made in error you may contact us with your detailed reasons using the form below:
Some blogs are marked as spam manually by the Vivaldi team, who review the blogs to make sure inappropriate content isn’t posted on Vivaldi.net.
We also use an automatic spam prevention tool, that can mark blogs as spam. In rare cases, the tool can mark an innocent blog as spam.
In case your blog has been marked as spam and you’ve followed our Terms of Use, please get in touch with us using the space below the error message or the contact form at the end of this article.
Sync
Vivaldi.net rejected your credentials: Authentication failed for YourUsername (400).
This error is shown when the username or password have been written wrong or the account doesn’t exist. For example, the user deleted the account or it was deleted due to inactivity.
Vivaldi.net rejected your credentials: 17003 User account is locked for user: YourUsername. cannot log in until the account is unlocked (400).
This error message could mean the following:
The account got locked for 5 minutes after the 5th failed login attempt. After the account is unlocked, reset the password or try logging in again, if you’re certain you’ve got the correct password this time.
You’re trying to log in to a new account that hasn’t been activated yet.
The account is locked for some other reason. For example, for breaking Vivaldi’s Terms of Use.
In case you need our help accessing your account, please send us a message using the contact form below.
QR (Quick Response) Codes are an easy way to share links and other information. With Vivaldi’s QR Code scanner on Android you can quickly scan QR Codes and barcodes to open links, menus, payment screens, apps and get specific information unique to the code without the need to type anything. In addition to scanning, you can also create codes to share links.
Open the QR Code scanner
There are three ways to access the QR Code scanner:
From the right side of the URL field;
Through the search widget;
By long pressing on the app icon and selecting Scan QR Code.
Scan a QR Code
To scan a QR code:
Open the QR Code scanner using one of the methods mentioned above;
On first use, grant Vivaldi access to your phone’s camera;
Place the frame on the phone’s screen over the QR Code or barcode;
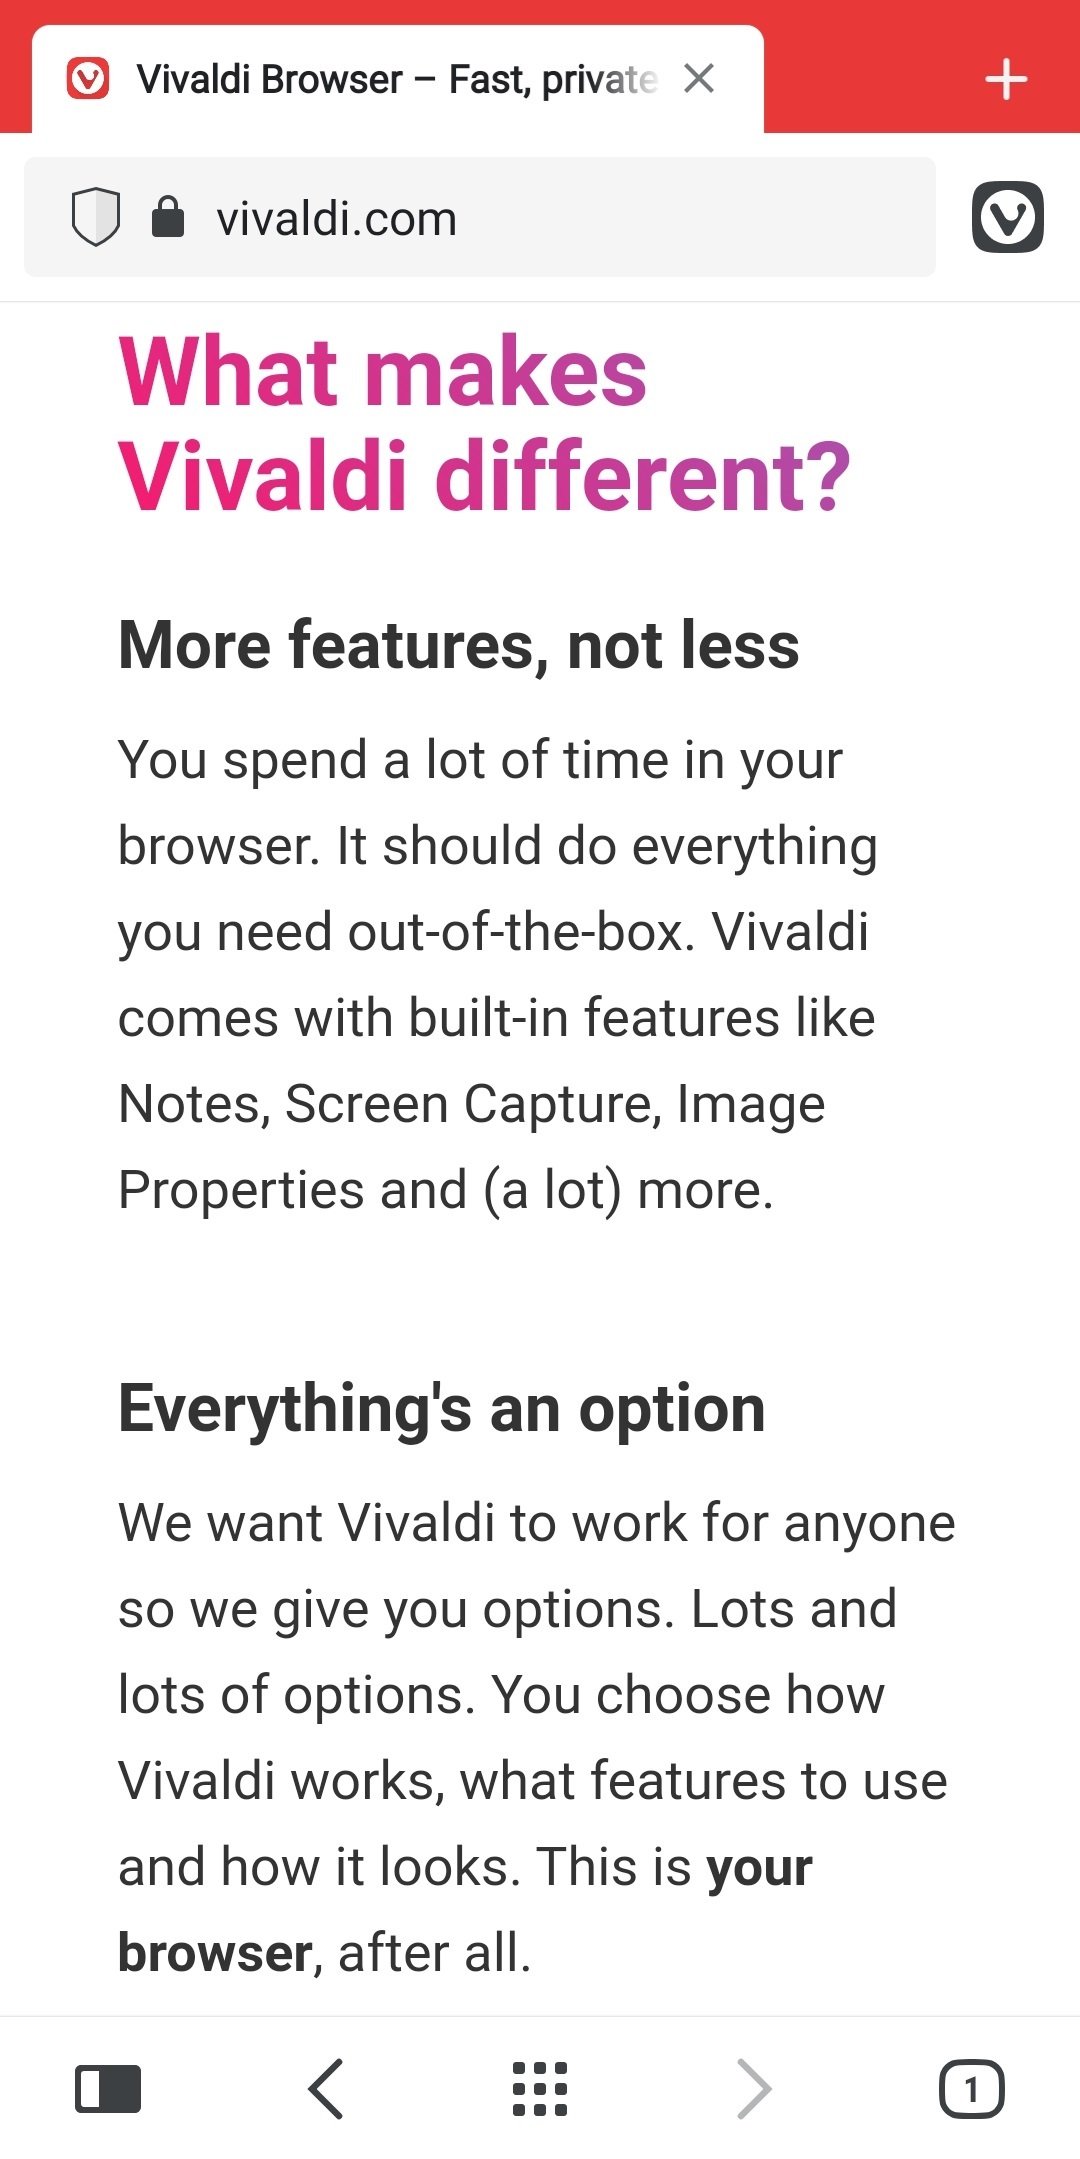
If the scanner detects a URL, it’ll automatically open the link in a new tab. In case it detects some other information, it offers to copy the information or to do a search with it.
Create a QR code
To create a QR code:
Open the web page you want to share;
Go to Vivaldi menu > Share;
Select QR code;
Show your phone to someone, so they could scan the code or download the QR code as an image.
If you’d like to use Vivaldi Mail, Calendar and Feeds separately from your main browser, we suggest setting your mail and calendar accounts up in a new User Profile. Alternatively, you can also install a second Vivaldi as a Standalone version.
Add a new Profile
Click on the Profile button in the top right corner of the browser window and select Manage People. Alternatively, go to Settings > Address Bar > Profile Management and click on Manage People.
Click on Add Person at the bottom of the popout menu.
Pick a name for the new profile, select or upload an avatar and decide whether you want a Desktop shortcut for the profile or not.
Click on Add Person.
Once you’ve created the new profile, you can always open it from Vivaldi’s profile menu. You can also open the second profile from the desktop shortcut, if you created one. On Windows, while the second profile is open, you can also pin the profile button to the taskbar.
Set up your accounts
To use Vivaldi Calendar, make sure you’ve enabled Mail, Calendar and Feeds from Settings > General > Productivity Features. On a brand new installation or in a new User Profile, choose the “Fully Loaded” option in the welcome flow.
Go to Settings > Mail and Settings > Calendar to set up your accounts. For detailed instructions have a look at the following help pages:
To open links from your Mail profile in your main browser profile:
Option 1
Make sure the other profile is open;
Right-click on the link in the Mail profile;
Select Open link as (profile name).
Option 2
Have two windows open in a way that both are visible;
Hover the mouse cursor over the link;
Click and start dragging the mouse cursor downwards;
While dragging, move the link to the second window, for example, to the Address Field, over the Open a new tab button or to a text field.
Release the mouse button to place the link.
Copy content from one profile to another
Unfortunately, it’s not possible to highlight text on a web page and use Send by Mail and Save as Calendar Event features across profiles.
But, in addition to the classic Copy and Paste option, there is another way to move content from one profile to another.
Have two windows open in a way that both are visible;
Hover the mouse cursor over highlighted text, link or image;
Click and start dragging. ;
While dragging, move the content to the second window, for example, to the email composer or calendar description.
Custom taskbar icon
On Windows, each profile gets it’s own Task Bar icon when open. To differentiate the main browser profile from the Mail, Calendar and Feeds profile, you can assign a custom icon for the Task Bar button. To do that:
Open the second profile;
Right-click on the taskbar button and select Pin to taskbar;
Right-click on the taskbar button again;
Right-click on Vivaldi (above Unpin from taskbar) and select Properties;
In the Shortcut tab, click on Change icon;
Browse for your custom icon (has to be in an Icon file (.ico)) and click Open;
Click Ok first in the Change Icon dialog and a second time in the Properties dialog.
Unfortunately, macOS and Linux don’t support separate profile buttons on their dock/taskbar.
In Vivaldi you can easily create a QR code linking to a web page and share it with others.
Start using the QR code generator
To show the QR code generator button on the Address Bar:
Go to Settings > Address Bar > Address Field Options;
Enable QR Code Generator.
Create a new QR code
Option 1
Open the web page you want to share;
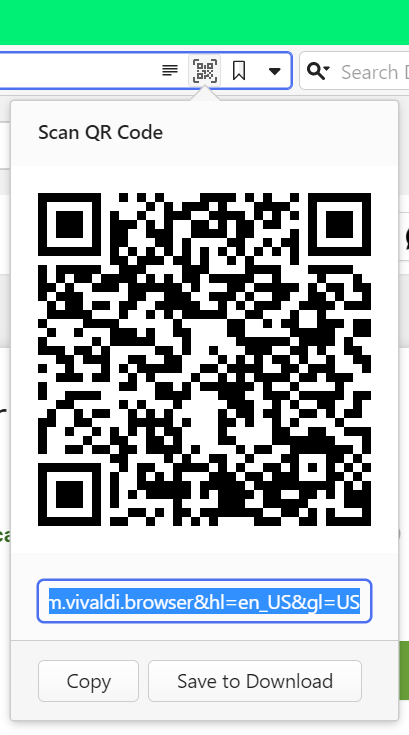
Click on Share page with QR Code button on the right side of the address field, between the Reader View (if available on the page) and Add Bookmark button.
Option 2
Click on Share page with QR Code button on the right side of the address field, between the Reader View (if available on the page) and Add Bookmark button.
Type or paste the URL you want to create the QR code for.
Option 3
Open the web page you want to share;
Right-click on the page to open the context menu;
Select Create QR Code for This Page.
Option 4
Open the web page you want to share;
In Quick Commands type “Create QR Code for Active Page“.
When you’ve tried logging in and it fails with an error message saying that the account is locked, these could be the reasons.
Account hasn’t been activated
Before logging in for the first time, you need to activate the account with a code from an email we sent to the email address you gave as the recovery email during registration.
Please check your mailbox (including the Spam folder) for the email and activate the account. Then try logging in again.
If you know you made a typo in the recovery email or gave an invalid email address, please reach out to us using the contact form at the end of this article.
Vivaldi Webmail
Vivaldi Webmail is a service for active Vivaldi Community members using Vivaldi’s services. This means that new users, who registered their account after 4th of May 2023, and users who registered between October 2019 and May 2023, but never verified their phone number, first need to build up a reputation to be granted access to the Webmail service.
The reputation system is replacing the previous requirement to verify an account via one’s phone, that was set up to limit the number of spam accounts. For additional information, read our blog post on the topic.
Used the wrong password too many times
In case you’ve forgotten your password and have tried logging in with the wrong password at least 5 times, the account will get locked for 5 minutes as a security measure. When the 5 minutes have passed, reset the login password to access your account again.
Account got locked for breaking Vivaldi’s Terms of Use
When you’re breaking Vivaldi’s Terms of Use on any of our services, the whole account will be locked and logging in to Vivaldi services will no longer be possible. Some blocking, for example due to misbehaviour on the Forum, is done manually by Forum admins and moderators. Other, such as spamming in Webmail, is mostly done automatically by our antispam filters.
If you feel this blocking has been done in error, please reach out to us and explain what happened. We’ll look into the issue.


 post menu on the right (next to the upvote button);

 Search button in the top right corner of the page;
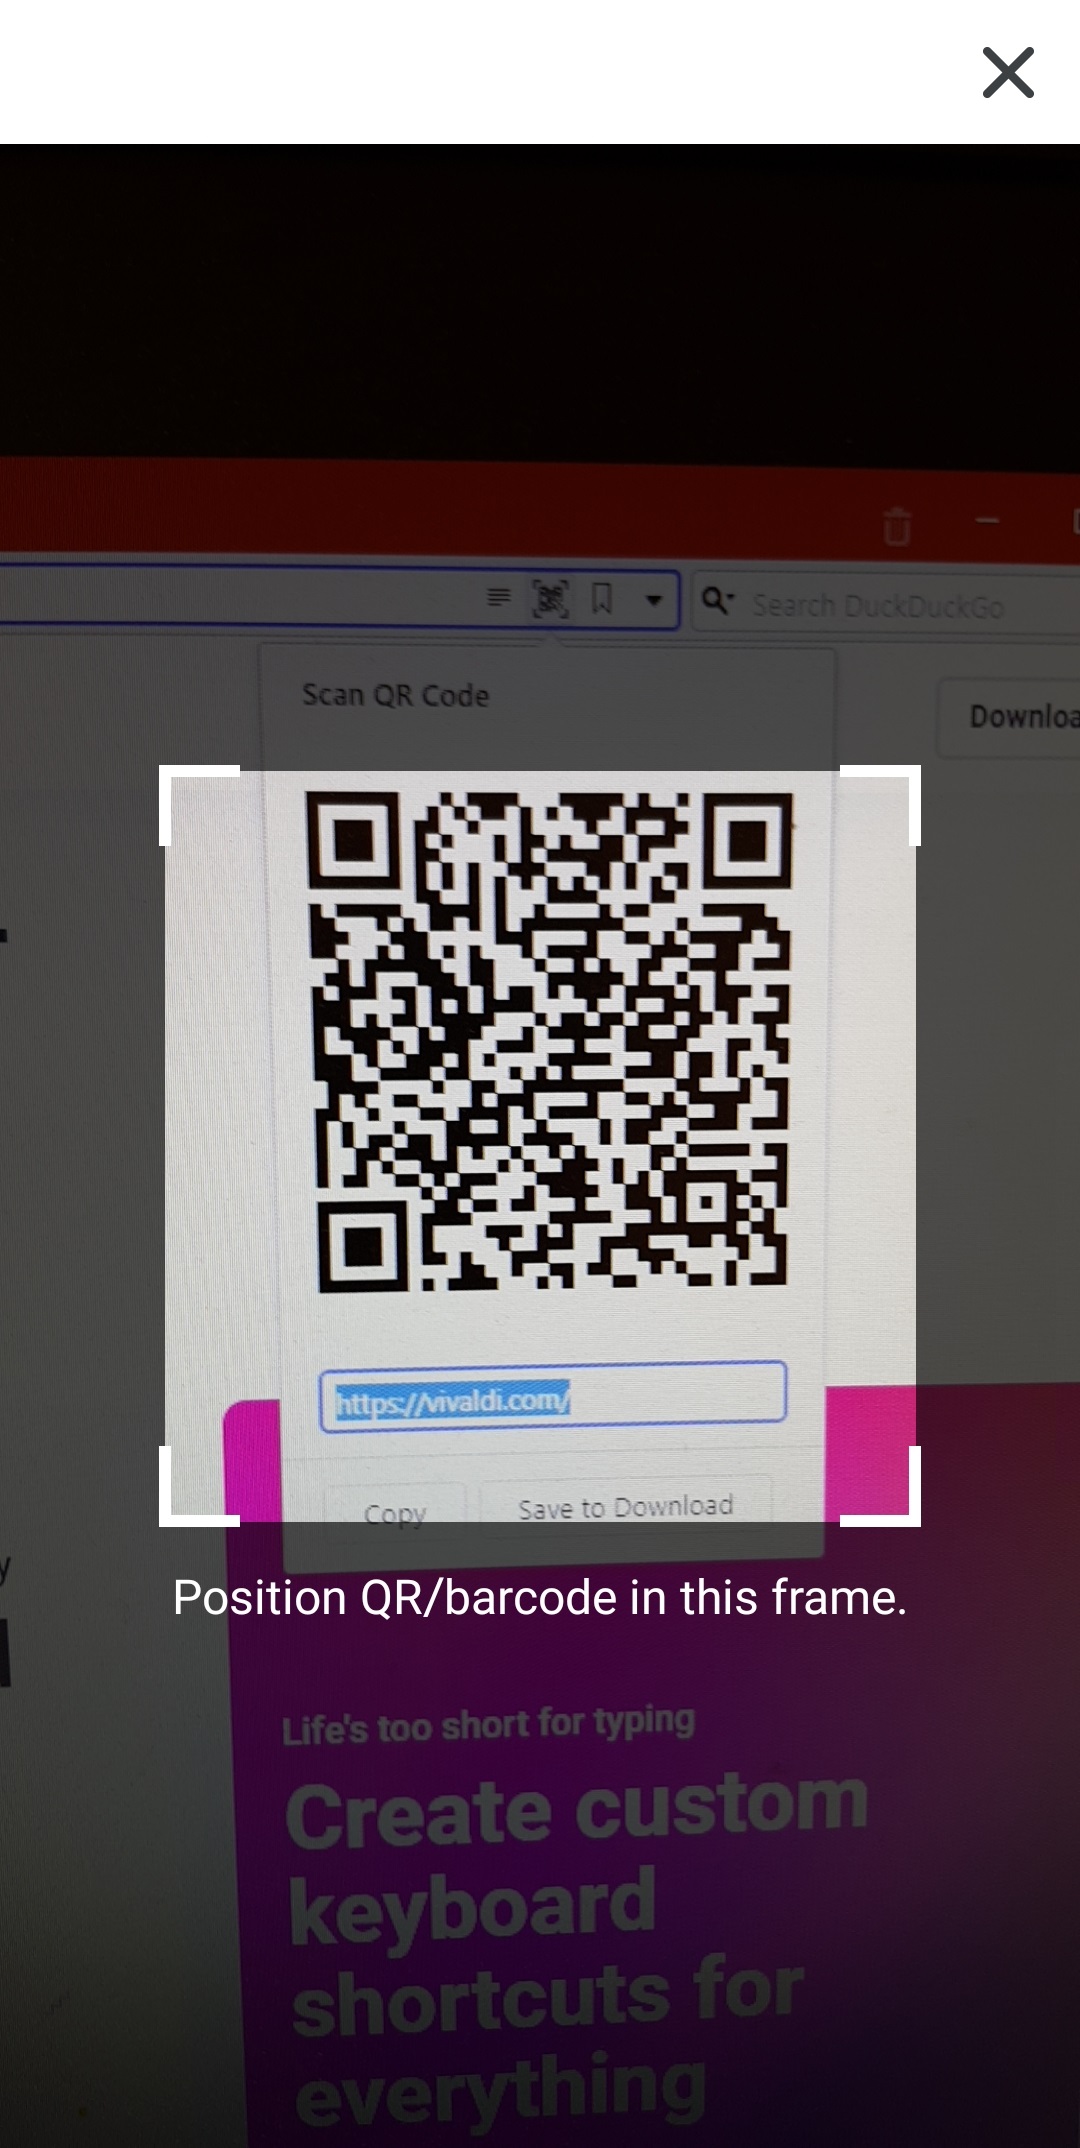
 Vivaldi menu > Page Actions;
 Share page with QR Code button on the right side of the address field, between the