Met Vivaldi kun je je huidige open tabs onder een eigen naam opslaan als een sessie om ze later weer te kunnen bereiken. Hiermee kun je de verzameling tabs in een sessie met één klik bereiken wanneer je ze maar nodig hebt, of elke keer dat de browser start.
Een sessie opslaan
Om alle open tabs in één of meer vensters als een sessie op te slaan, kun je:
gaan naar het Vivaldi-menu > Bestand > Open tabs opslaan als sessie;
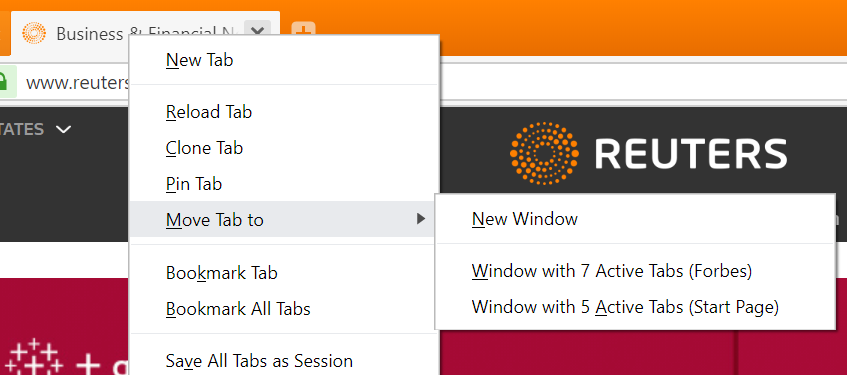
rechtsklikken op de tabbalk > en Alle tabs opslaan als sessie selecteren;
“Open tabs opslaan als sessie” intikken in snelcommando’s.
Om alleen bepaalde tabs als sessie op te slaan, gebruik je de Ctrl/⌘/Shift-toets om een selectie te maken en:
Rechtsklik je op een van de geselecteerde tabs en kies je # geselecteerde tabs opslaan als sessie uit het contextmenu;
Tik je “Geselecteerde tabs opslaan als sessie” in Snelcommando’s;
Met Vivaldi’s snelcommando’s kun je in een handomdraai allerlei berekeningen uitvoeren.
Open snelcommando’s met de F2-toets op je toetsenbord en tik de vergelijking in. De uitkomst zal onder het invoerveld verschijnen. Als je op Enter drukt, wordt de uitkomst automatisch gekopieerd naar je klembord.
Op het ogenblik zijn de volgende berekeningen beschikbaar:
Optellen (x+y)
Aftrekken (x-y)
Vermenigvuldigen (y*z of y x z)
Delen (x/y)
Rest (x%y)
Machtsverheffen (x^y)
Wortel (sqrt x)
Faculteit (x!)
Logaritmen (lnx, log x, log10 x)
Goniometrische functies (sin x, cos x, tan x)
Inverse goniometrische functies (asin x, acos x, atan x)
In Vivaldi kun je de meeste dingen met alleen het toetsenbord doen, zoals tabs openen, sluiten of wisselen, interface-elementen aan of uit zetten en notities aanmaken.
Sneltoetsen toevoegen of bewerken
Ga naar Instellingen > Toetsenbord om sneltoetsen toe te voegen of te bewerken.
Om een sneltoets te verwijderen zweef je met de muis boven de sneltoets en klik je rechts van het invoerveld op de knop Sneltoets wissen.
Om een sneltoets te bewerken plaats je de cursor in het invoerveld en voer je de gewenste toetsencombinatie uit.
Om de standaardsneltoets te herstellen, zweef je boven de sneltoets en klik je op Standaardtoetsen herstellen.
Tijdens het internetten kun je de sneltoets Ctrl+F1 / ⌘ F1 gebruiken om een spiekbriefje met alle beschikbare sneltoetsen te bekijken.
Om meer te weten te komen over toegangstoetsen in webpagina’s, kun je deze helppagina raadplegen.
Wijzigingstoetsen
Er zijn veel handige acties die je kunt uitvoeren met muis en toetsenbord gecombineerd. Een paar voorbeelden:
Ctrl / ⌘ en muisklikken op een koppeling opent deze in een nieuwe achtergrondtab.
Shift en muisklikken op een koppeling opent deze in een nieuwe voorgrondtab.
Ctrl / ⌘ + Shift en muisklikken op een koppeling opent deze in een nieuw venster.
Met Ctrl / ⌘ en het muiswiel kun je de pagina in- of uitzoomen.
Met Alt en het muiswiel kun je tussen tabs wisselen.
Tip
Probeer eens met sneltoetsen een schermopname te maken in Vivaldi
Heb je problemen met het synchroniseren van je gegevens?
Als je je aanmeldgegevens hebt ingevoerd en op Synchronisatie beginnen klikt maar de browser kan niet verbinden, zal deze voortdurend blijven proberen met Vivaldi’s synchronisatieservers te verbinden. Vaak helpt het om je af- en aan te melden bij je account. Als synchronisatie al meer dan 6 uur geen verbinding heeft kunnen maken, dan kun je een bugmelding indienen met de volgende gegevens:
gebruikersnaam van het account waarmee je wilt synchroniseren,
getoonde foutmeldingen, indien van toepassing,
een schermopname van vivaldi://sync-internals en de pagina met synchronisatie-instellingen op vivaldi://settings/sync/ kan nuttig zijn; (je kunt ook Vivaldi’s schermopnamefunctie gebruiken om de schermopname te maken). Je kunt ook klikken op Dump status op vivaldi://sync-internals en ons de inhoud sturen die verschijnt in het kleine vak onder de knop.
de tijd waarop het gebeurde,
gedetailleerde stappen om het probleem opnieuw te laten optreden (oftewel: op welk punt ging het synchroniseren mis?).
Sessies-op-afstand verschijnen niet op gesynchroniseerde computers?
Dit zou kunnen gebeuren als je handmatig het profiel van de ene Vivaldi-installatie naar de andere kopieert en daarna synchroniseert.
Om dit op te lossen:
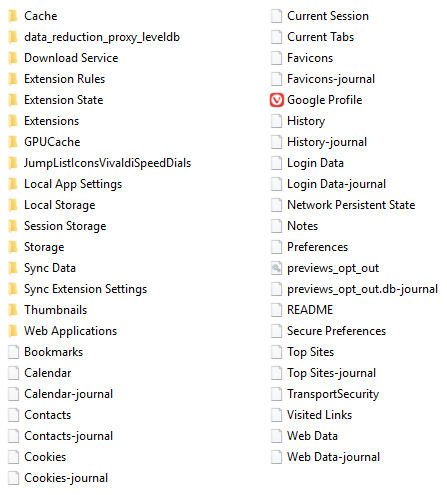
Open vivaldi://about en ga naar het aangegeven Profielpad zodat je uitkomt in de map Default.
Sluit de browser af.
Open het bestand Preferences.
Zoek naar cache_guid en session_sync_guid en verander een letter in deze GUID’s. Laat de ==code> tekens op het eind ongemoeid. Bijvoorbeeld: "session_sync_guid":"session_synckqt9eRVoaHbyEH/lVV1exA==" >>> "session_sync_guid":"session_synckqt9eRVoaHbyEH/lVV1exB=="
Sla het bestand op en herstart de browser.
Als je de sessies-op-afstand nog steeds niet ziet, dan kun je een bugmelding indienen met de instructies hierboven.
Vivaldi’s Windows Panel offers an easy way to manage multiple tabs at once. Opening to the side of your main browser window, the Windows Panel will give you a tree-style view of all the open Tabs in all your open Windows.
Access the Windows Panel
Use one of the following options to open the Windows Panel:
Click on the Windows and Tabs icon on the Panels sidebar.
The active tab has a little dot in front of it and the tab title is written in bold. Tabs you’ve opened, but haven’t viewed yet have their titles displayed in italics.
Open, Switch and Close Tabs
To open a new tab from the Windows Panel, click on the New Tab button near the top right corner of the panel. Next to it you’ll also find the button to open a New Window.
To find a particular tab from the long list of tabs you have open and have recently closed, you can use the search box in the top left corner of the panel.
To switch tabs, double-click on the tab you want to open. When you enable Activate with Single Click in Windows Panel settings, you can switch tabs with just one click.
To close tabs in the active window:
With the mouse, hover over the tab you want to close.
Click on the Close button that appears on the right side.
To close tabs in any window:
Right-click on the tab you want to close.
Select Close from the context menu.
Alternatively:
Click on the tab you want to close.
Press Delete on your keyboard.
Reorder and Move Tabs
You can easily change the order of your tabs using the Windows Panel.
Click on the tab you’d like to move.
Holding the left mouse button, move the tab to a new location.
Drop the tab to a new location and release the mouse button.
If you have multiple windows open, you can move tabs from one window to another using drag and drop.
Create Tab Stacks
Windows Panel lets you easily create Tab Stacks – groups of tabs stacked together to save space and make browsing more convenient.
Option 1
Click on the tab you’d like to add to a group.
Holding the left mouse button, move and place the tab on top of another tab.
Release the mouse button – you have now created a Tab Stack.
Option 2
Select the tabs you want to stack by holding down Ctrl / ⌘ or Shift key while you click on the tabs.
Right-click on one of the selected tabs.
Select Stack # Selected Tabs from the menu.
Tile Tabs
To tile tabs in order to create a side-by-side view in one browser window:
Select the tabs you want to tile by holding down Ctrl / ⌘ or Shift key while you click on the tabs.
Right-click on one of the selected tabs.
Select Tile from the menu.
You can also tile your Tab Stacks:
Right-click on the Tab Stack.
Select Tile from the menu.
Duplicate Tabs
If you have two or more tabs open with the same link, you’ll see them in the Duplicate Tabs section. It makes it easy to clean up extra tabs.
To close duplicate tabs:
Expand the Duplicate Tabs section in the Windows Panel.
Hover over the entry.
Click the Close button on the right side.
To close all duplicate tabs at once.
Expand the Duplicate Tabs section in the Windows Panel.
Click on Close All Duplicate Tabs at the end of the section.
Synced Tabs
When you’re logged in to your Vivaldi account and enabled syncing of Tabs, the tabs you have open on other devices and Web Panels will be listed in their own folder in the Synced Tabs section. If you’re syncing with another desktop client, synced tabs will be organized further to reflect the Workspaces and Tab Stacks you have created.
To open a synced tab on the current device:
Double-click on the tab.
Right-click on the tab and select Open from the context menu.
Right-click on one of the selected tabs and select Open from the context menu.
Inactive Tabs
Tabs you haven’t viewed in a while will appear in the Inactive Tabs section in the Windows Panel, allowing you to review and make a call on whether you want to keep the tabs open or whether they can be closed.
Click on the - and + buttons to update the number of days.
Recently Closed Tabs
There’s a folder named Closed Tabs at the very end of the list of windows and tabs, where you can see and reopen recently closed tabs.
To reopen a tab, either:
Double-click on the tab you want to reopen.
Drag the tab out of the Closed Tabs folder and to a window you want to open it.
To clear the list of closed tabs:
Right-click on the Closed Tabs folder.
Select Clear All.
Windows Panel Settings
You can view and adjust Windows Panel settings in Settings > Panel > Window Panel.
Activate with Single Click
Normally you have to double click on a tab on the list to open it as the active tab. When you enable Activate with Single Click, it’s enough to click on the tab once to open it.
Pinned Folder
Pinned Tabs are listed at the top of the Windows Panel. You have the option to tell them apart from other tabs by grouping them into a folder or, when the setting is disabled, display a pin icon instead of the website’s favicon.
Create a Tab Stack by Drag and Drop
With drag and drop you can reorder tabs and when you drop one tab on another, you can group these tabs into a Tab Stack. To prevent accidental stacking while reordering tabs you can disable Create a Tab Stack by Drag and Drop.
Show Unread Tabs Badge
When you open new tabs in the background, then until you focus on them, they’re considered Unread Tabs. The number of unread tabs will be shown on the Windows Panel. If you don’t care for that information, you can disable Show Unread Tabs Badge.
…and much more
You can do a lot more with your tabs in the Windows Panel. To explore the possibilities, right-click on a window, a tab or a group of tabs and see the list of available actions, such as Duplicate, Hibernate and more in the menu.
Kies de apparaten die je met Vivaldi wilt synchroniseren.
Als Chroma-integratie is ingeschakeld in Vivaldi, maar de apparaatkleuren komen niet overeen met de browser, controleer dan Razer’sSynapse > Connect > Apps en zorg ervoor dat Vivaldi is ingeschakeld en bovenaan de lijst staat.
Als Accentkleur van huidige pagina is ingeschakeld in Instellingen > Thema’s > Thema bewerken > Themavoorkeuren, zullen de Chroma-apparaten hun kleur wijzigen samen met de webpaginakleur van de huidige tab. Als dit is uitgeschakeld, wordt de accentkleur van je thema gebruikt.
Als je Thema’s op tijdschema hebt ingericht, zullen de Chroma-kleuren tegelijk wijzigen met het thema.
Het beschermen van de privacy van onze gebruikers is een topprioriteit voor ons. De recentste privacyinformatie kun je nalezen op onze privacypagina op vivaldi.com/privacy.
Neem in geval van vragen of onduidelijkheden contact met ons op.
Om er zeker van te zijn dat je een officiële versie van Vivaldi hebt, tik je “https://vivaldi.com/download/” in en druk je op “Enter”. Als je deze website bereikt, hoor je een groen slotje te zien in het adresveld met daarin de naam “Vivaldi Technologies [NO]”. In bijna alle browsers kun je op dit pictogram klikken voor meer details over het certificaat.
Handtekeningen controleren
Alle officiële installatiepakketten van Vivaldi zijn ondertekend. Je kunt de handtekeningen van deze pakketten als volgt controleren:
Windows
Rechtsklik op het installatiepakket en kies “Eigenschappen > Digitale handtekeningen”. Hier hoort “Vivaldi Technologies AS” te zijn vermeld. Als je hierop klikt en “Details” kiest, hoor je een venster te krijgen met de tekst “Deze digitale handtekening is in orde”. Voor nog meer details klik je op “Certificaat weergeven”.
macOS
Pak Vivaldi uit uit het .dmg installatiepakket en plaats het in “Applicaties”.
Open de Terminal-applicatie en voer het volgende in :
In het resulterende venster mogen geen fouten staan over ontbrekende handtekeningen en de regels met “Autoriteit” moeten “Apple Root CA”, “Developer ID Certification Authority” en “Developer ID Application: Vivaldi Technologies AS (4XF3XNRN6Y)” bevatten.
Je kunt ook controleren of de applicatiebundel door je systeem vertrouwd wordt met de volgende opdracht:
In tegenstelling tot Windows en macOS zijn Linux-pakketten zelfondertekend. De publieke ondertekeningssleutel wordt meegeleverd met het pakket en automatisch geconfigureerd bij de eerste installatie, zodat je systeem een controle uitvoert als je de applicatie probeert bij te werken (via onze officiële pakketbron) en alleen doorgaat als de handtekening geldig is. Mocht je de pakketondertekeningen zelf willen controleren, dan dien je de publieke sleutel eerst zelf te downloaden en installeren.
Debian/Ubuntu
Open een terminalvenster en voer de volgende opdracht uit om onze publieke sleutel veilig over https binnen te halen:
Als alles in orde is, hoor je een resultaat te zien te krijgen met daarin “GOODSIG” en een key ID van 41 tekens, eindigend op “EFB20B23”. Oudere pakketten zijn ondertekend met “C3401E12”.