Notes Manager
This post is also available in:
![]()
![]()
![]()
![]()
![]()
![]()
![]()
![]()
![]()
![]()
![]()
Write down ideas or gather information snippets with Vivaldi Notes.
Accessing Notes
For quick access, Notes are available in the side Panel of Vivaldi. To access the full window Notes Manager, either:
- Click on Notes on the Start Page navigation menu;
- Type vivaldi://notes in the Address Field; or
- Right-click on a note in the Notes Panel and select Open in Tab.
Notes Manager layout
By default, the notes are displayed in a horizontal layout with the list of notes on top and the note content displayed at the bottom. To switch to a vertical layout, with notes listed on the left and the content on the right, click on ![]() Toggle Layout in the top right corner of the notes list section.
Toggle Layout in the top right corner of the notes list section.
Managing Notes
Adding Notes
To create a new note in the Notes Manager:
- Click on the
 New Note button in the top right corner of the page. You can also right-click on the list of notes and select New Note from the context menu.
 - Write and format the note content.
All new notes and changes to existing notes are saved automatically.
Copy to Note
To add a note from a web page:
- Highlight the text.
- Right-click on the highlighted text to open the context menu.
- Select Copy to note from the menu.
Alternatively,- Use the Keyboard Shortcut Ctrl+Shift+C / ⌥ ⌘ C,
- Type “Copy Selected Text to Note” in Quick Commands.
- Create a Mouse gesture for the action.
By default, the link and screenshot of the web page is attached to the note. You can disable automatic screenshots from Settings > Panel > Notes Panel.
Append to Note
While Copy to Note creates a new note with the text you’ve selected on a web page, Append to Note will add the text to an existing note of your choice.
To add text to a note:
- Select the text.
- Right-click on the highlighted text to open the context menu.
- Select Copy to note from the menu.
Alternatively:- Type “Append Selected Text to Note” in Quick Commands.
- Create a Keyboard Shortcut or Mouse Gesture for the action.
- Select the note you want to add the text to.
- Click Add to Note.
New Note with Capture Page
In addition to text, you can take screenshots and save them as Notes. To save a screenshot as a note:
- Click on
 Capture Page on the Status Bar;
 - Select whether you want to capture the full page or just a part of it;
- For Format select Create Note With…;
- Click Capture.
The note will be added with the capture as an attachment, the webpage link, and the creation date. You can add a title and note about the screenshot.
Editing Notes
To edit a note:
- Click on the note in the list of notes;
- Update the content in the editor. All changes to notes are saved automatically.
To rename a note:
- Right-click on the note;
- Select Rename;
- Update the title and press Enter or click somewhere else on the page.
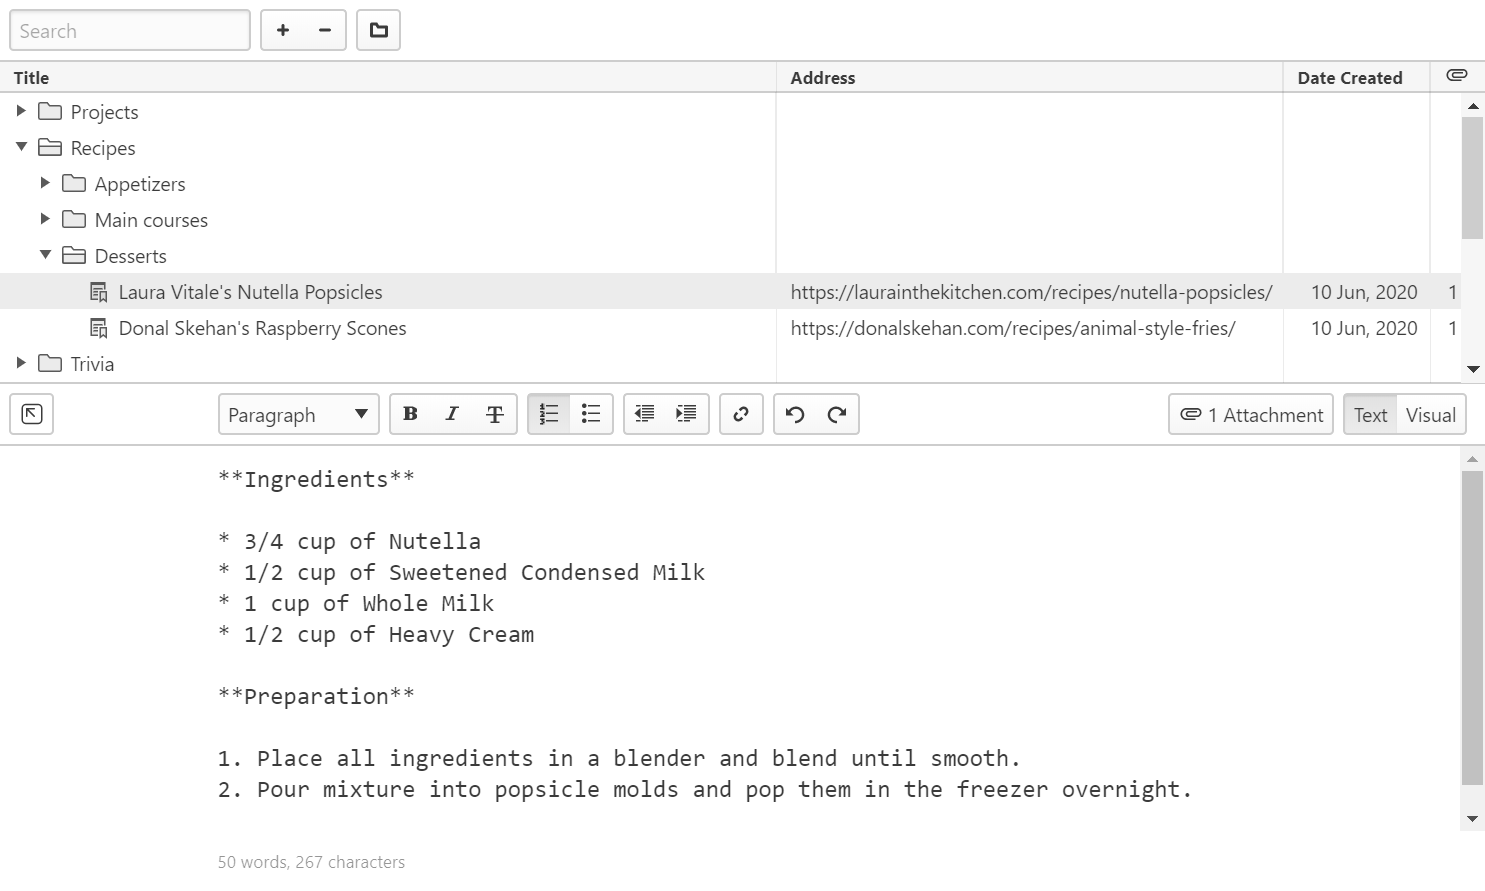
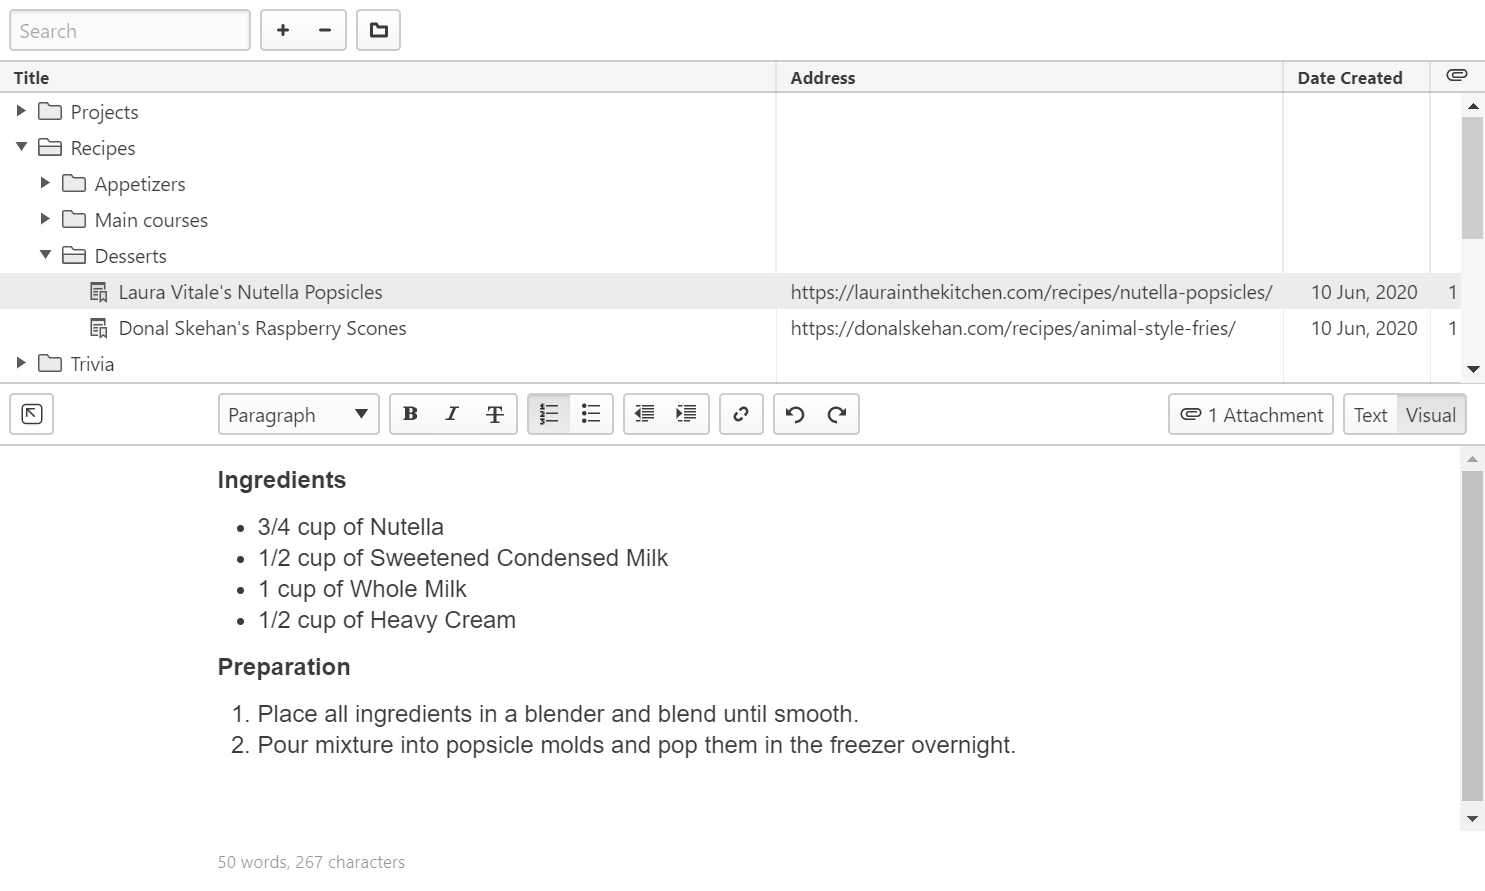
You can choose between two editor types:
- Text editor, where you can use Markdown formatting, HTML formatting options available in the editor menu, and common keyboard shortcuts.
- Visual editor, where you can use the HTML formatting options available in the editor menu and common keyboard shortcuts.
To have more space for writing longer notes, hide the list of notes by clicking Enter Full View in the top left corner of the note editor. Click the same button to exit full view.
Attachments
To add images to notes:
- Click on Attachments > Add attachment in the top right corner of the note editor;
- Find the file and add it as an attachment.
To view attachments:
- Click on # Attachment(s) in the top right corner of the note editor;
- Click on the image thumbnail. The image will open in the same tab.
To delete an attachment:
- Click on # Attachment(s) in the top right corner of the note editor;
- Hover over the image file;
- Click on
 Remove attachment.
Sorting Notes
Notes can be sorted by Title, Address, Date Created, and Attachments. To sort notes, click on the column title according to which you want to sort your notes. Click again to reverse the order or to return to manual sorting.
With manual sorting, you can reorder notes using drag and drop.
Deleting Notes
To delete a note select it and:
- Press Delete on your keyboard;
- Click on
 Delete above the list of notes;
 - Right-click on the note and select Delete from the context menu.
Hold down Shift or Ctrl / ⌘ key to select multiple notes.
Notes Folders
To create a new notes folder, either:
- click on the
 New Folder button in the top left of the page, or
 - right-click in the page and select New Folder from the context menu.
To create a new sub-folder, select the parent folder and then either:
- click on the New Folder button, or
- right-click on the parent folder and select New Folder from the context menu.
Use drag and drop to move notes from one folder to another.
Right-click on the list of notes and select Expand all folders to see all notes and folders or Collapse all folders to view only the top-level notes and folders.
Hold down the Alt key and click on the ![]() arrow in front of the folder name to expand/collapse all sub-folders in the folder tree.
arrow in front of the folder name to expand/collapse all sub-folders in the folder tree.
Searching Notes
To find a specific note, enter the keyword in the Search field in the top left corner of the page.
Search results can be displayed either in a Flat search, where only found notes are listed, or in a Tree search, where also the folders the notes are in are shown. To change the view:
- Right-click on the list of notes;
- Hover over Settings;
- Select either Flat Search or Tree Search.
Insert Notes
Instead of opening the Notes Panel or Notes Manager, looking for the note and copying its contents, you can insert notes on web pages, in Vivaldi Mail and other places in the browser directly from the text field’s context menu.
To insert a note:
- Right-click on the text input field.
- Hover over Insert Note in the context menu.
- Select the note you want to use.
Export and Import Notes
Exporting Notes
To export your notes:
- Go to the
 Vivaldi menu > File > Export > Export Notes.
 - Select the destination folder.
Alternatively:
- Type “Export Notes“ in Quick Commands (F2 / ⌘ E).
- Create a Keyboard Shortcut or Mouse Gesture for the action.
All notes will be saved as separate text (.txt) or markdown (.md) files.
Importing Notes
To import notes:
- Make sure all notes you want to import are in one folder and saved as a text or markdown file.
- Go to the Vivaldi menu > File > Import from Applications or Files.
- From the drop-down menu select Notes Folder.
- Click Choose a Notes Folder.
- Select the source folder.
Alternatively:
- Type “Import Notes“ in Quick Commands (F2 / ⌘ E).
- Create a Keyboard Shortcut or Mouse Gesture for the action.
All applicable files in the folder will be imported as notes to Vivaldi.