Tab Stacks on Android
Tab Stacks let you organize your tabs into various groups to keep related tabs together and to declutter your Tab Bar and Tab Switcher.
Tab Stacks let you organize your tabs into various groups to keep related tabs together and to declutter your Tab Bar and Tab Switcher.
A Command Chain is a group of commands executed in a sequence. For example, instead of toggling on first the Reader View and then Fullscreen Mode to focus on what you’re reading, with Command Chains you can do it with a single shortcut in one go.
You can trigger a chain from Quick Commands, assign it a custom Keyboard Shortcut or a Mouse Gesture, or add a button to one of the Toolbars.
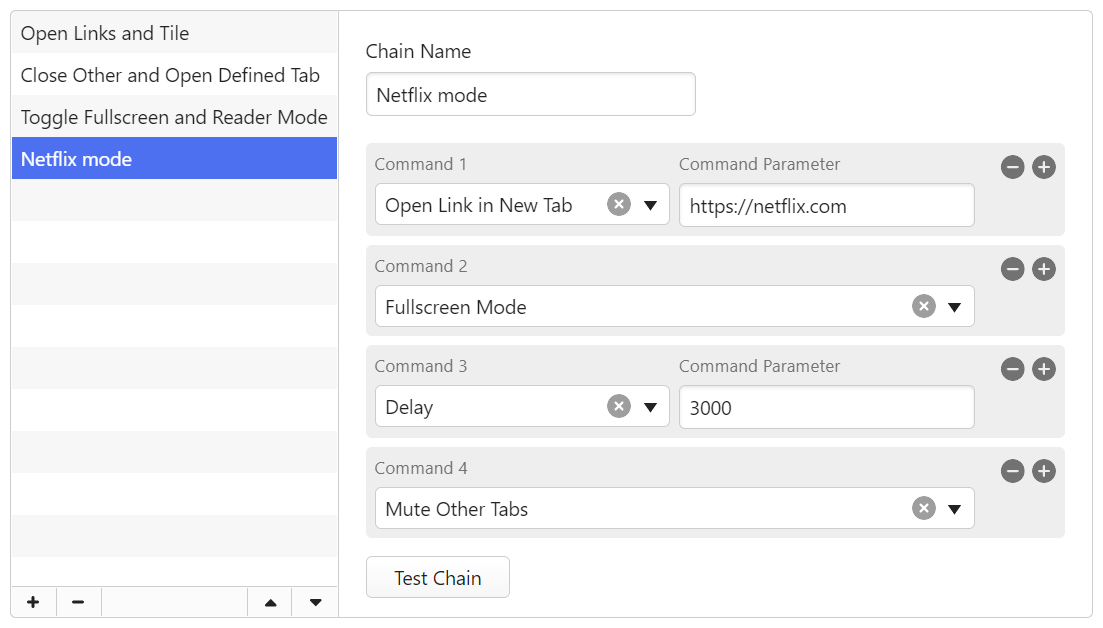
Use the command Delay between other commands to give the previous command time to be executed before applying the next command. Delay time is measured in milliseconds and can be adjusted.
To reorder commands in the chain:
When you want to create a new chain which is very similar to an existing one, you can clone the chain and edit it to make a new Command Chain.
Once a new Command Chain has been created you can immediately execute it from Quick Commands.
Before you can execute a Command Chain using a Keyboard Shortcut, you’ll need to assign a new shortcut for the new chain.
Once the chain is assigned a keyboard shortcut, you can use it anywhere to run the sequence of commands.
Before you can execute a Command Chain using a Mouse Gesture, you’ll need to assign a new gesture for the new chain.
Once the chain is assigned a Mouse Gesture, you can use it anywhere to run the sequence of commands.
To add a Command Chain as a button to a toolbar, so you can execute it with one click:
To update a chain:
The chain will be updated automatically.
To delete a chain:

To get some inspiration for what kind of chains you can set up, check out the Command Chains Vivaldi Community members have shared on the Forum – Command Chain Recipes.
If you’ve been using Opera’s old mail client M2, you can import your mail and contacts from there to Vivaldi.
Depending on the mail profile size, fetching all messages may take some time. You can check the progress from the Status Bar.
In case Opera’s profile isn’t in the default profile location:
With Vivaldi Translate, you can translate full web pages with just a click of a button. No Extensions needed.
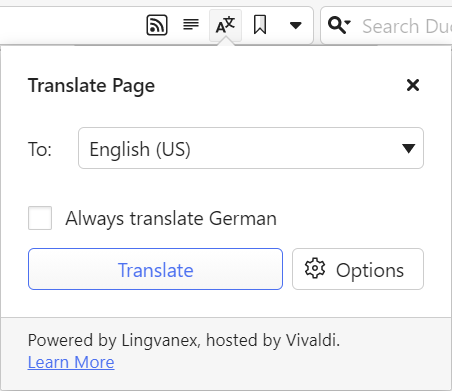
When a website you’re viewing is in a language different from your browser’s user interface language, Vivaldi offers to translate it for you. A banner will be shown just above the bottom toolbar for every language you haven’t made a decision about. The original language of the page is on the left and the translation language on the right. To translate the page to your default language, simply tap on the language on the banner.
To show the page in its original language again, tap on the original language on the banner.
In case, you closed the banner or it didn’t open after the page finished loading, open it from ![]() Vivaldi menu > Translate.
Vivaldi menu > Translate.

In addition to translating the page to your browser’s default language, you can choose to translate into any of the supported languages. To change the translation language:
Option 1
Option 2
 Vivaldi menu > Settings > General > Language settings > Translation Settings > Advanced.
To eliminate extra steps for future translations, you can enable or disable translation of certain languages and sites.
To change your preferences:
 .menu button on the Translation Banner.
Available options:
To disable or re-enable the automatic translation banner:
You’ll still be able to translate web pages from Vivaldi menu > Translate.
To review languages that you’ve chosen always and never to translate:
Vivaldi menu > Settings > General > Language settings > Translation Settings > Advanced. menu button next to a language already on the list to remove it.To reset a setting for a specific language or site:
When translation doesn’t work as expected, first reset the settings as instructed in the previous paragraph. If that doesn’t help, discuss the issue with the Team and Community on the Forum, to see if others can reproduce the bug or have suggestions for a fix.
To report a bug to the browser developers:
With Vivaldi Translate, you can translate full web pages with just a click of a button. No Extensions needed.
When a website you’re viewing is in a language different from your browser’s user interface language, Vivaldi offers to translate it for you by displaying a ![]() Translate Page button on the right side of the Address Field.
Translate Page button on the right side of the Address Field.
To translate the page to your default language:
To display the content of the web page in its original language again:
To translate just a small block of text:
Once the text has been highlighted, you can also type “Translate selection” into Quick Commands. In addition, you can create a Keyboard Shortcut or a Mouse Gesture for the action.
In the translation overlay, you can change both the source language and translation language.
To display translations of selected text in the panel instead of the overlay popup:
If you prefer the popup dialog, disable the setting.
To learn more, take a look at the Help page about Translate Panel.
In addition to translating the page to your browser’s default language, you can choose to translate into any of the supported languages. To change the translation language:
To eliminate extra steps for future translations, you can enable or disable translation of certain languages and sites.
To change your preferences:
Available options:
To reset all settings:
To reset a setting for a specific language or site:
When translation doesn’t work as expected, first reset the settings as instructed in the previous paragraph. If that doesn’t help, discuss the issue with the Team and Community on the Forum, to see if others can reproduce the bug or have suggestions for a fix.
To report a bug to the browser developers:
If you wish, you can receive notifications on the forum, to your account’s recovery email or both when:
On the forum, to view the latest notifications, click on the bell icon in the top right corner of the page to see the latest notifications.
Click on the notification to open the topic/chat/profile/etc. Click Unread to filter out already viewed notifications. Click the little blue dot to mark a specific notification read. Click Mark all read to dismiss the notification without e.g. going to the topic. Click All notifications to go to the full page view of all notifications.

To change, which notifications to receive and where, go to your account menu > Settings and apply your preference in the Notifications and Sounds sections.
In addition to notifications, you can receive a Digest email with the latest topics. Adjust the frequency in Settings > Email.
Digest emails will be sent to your account’s recovery email.
When someone has sent you a private message, you’ll get an unread chat message notification in the top right corner of the forum page. Unread messages will have a pale yellow background.

To send private messages to a community member:
Alternatively, go to the user’s profile, click on the menu below the cover image and select Continue Chat With… .
To start a group discussion:

If you wish to continue browsing the forum while chatting, opt for the pop-up chat window by clicking on the ![]() window toggle in the top right corner. Minimise chat windows to browse the forum. Minimised chats (discussion partner’s avatars or chat bubbles for group chats) will appear in the bottom right corner of the page.
window toggle in the top right corner. Minimise chat windows to browse the forum. Minimised chats (discussion partner’s avatars or chat bubbles for group chats) will appear in the bottom right corner of the page.
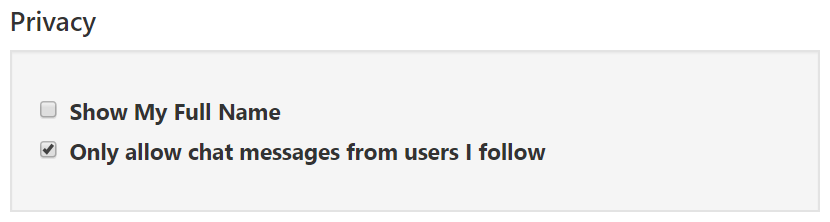
By default, you can only receive chat messages from users that you follow. To be able to receive private messages from everyone, go to your account menu > Settings > Privacy and untick Only allow chat messages from users I follow.
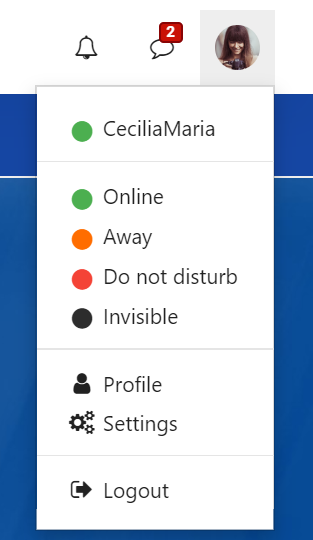
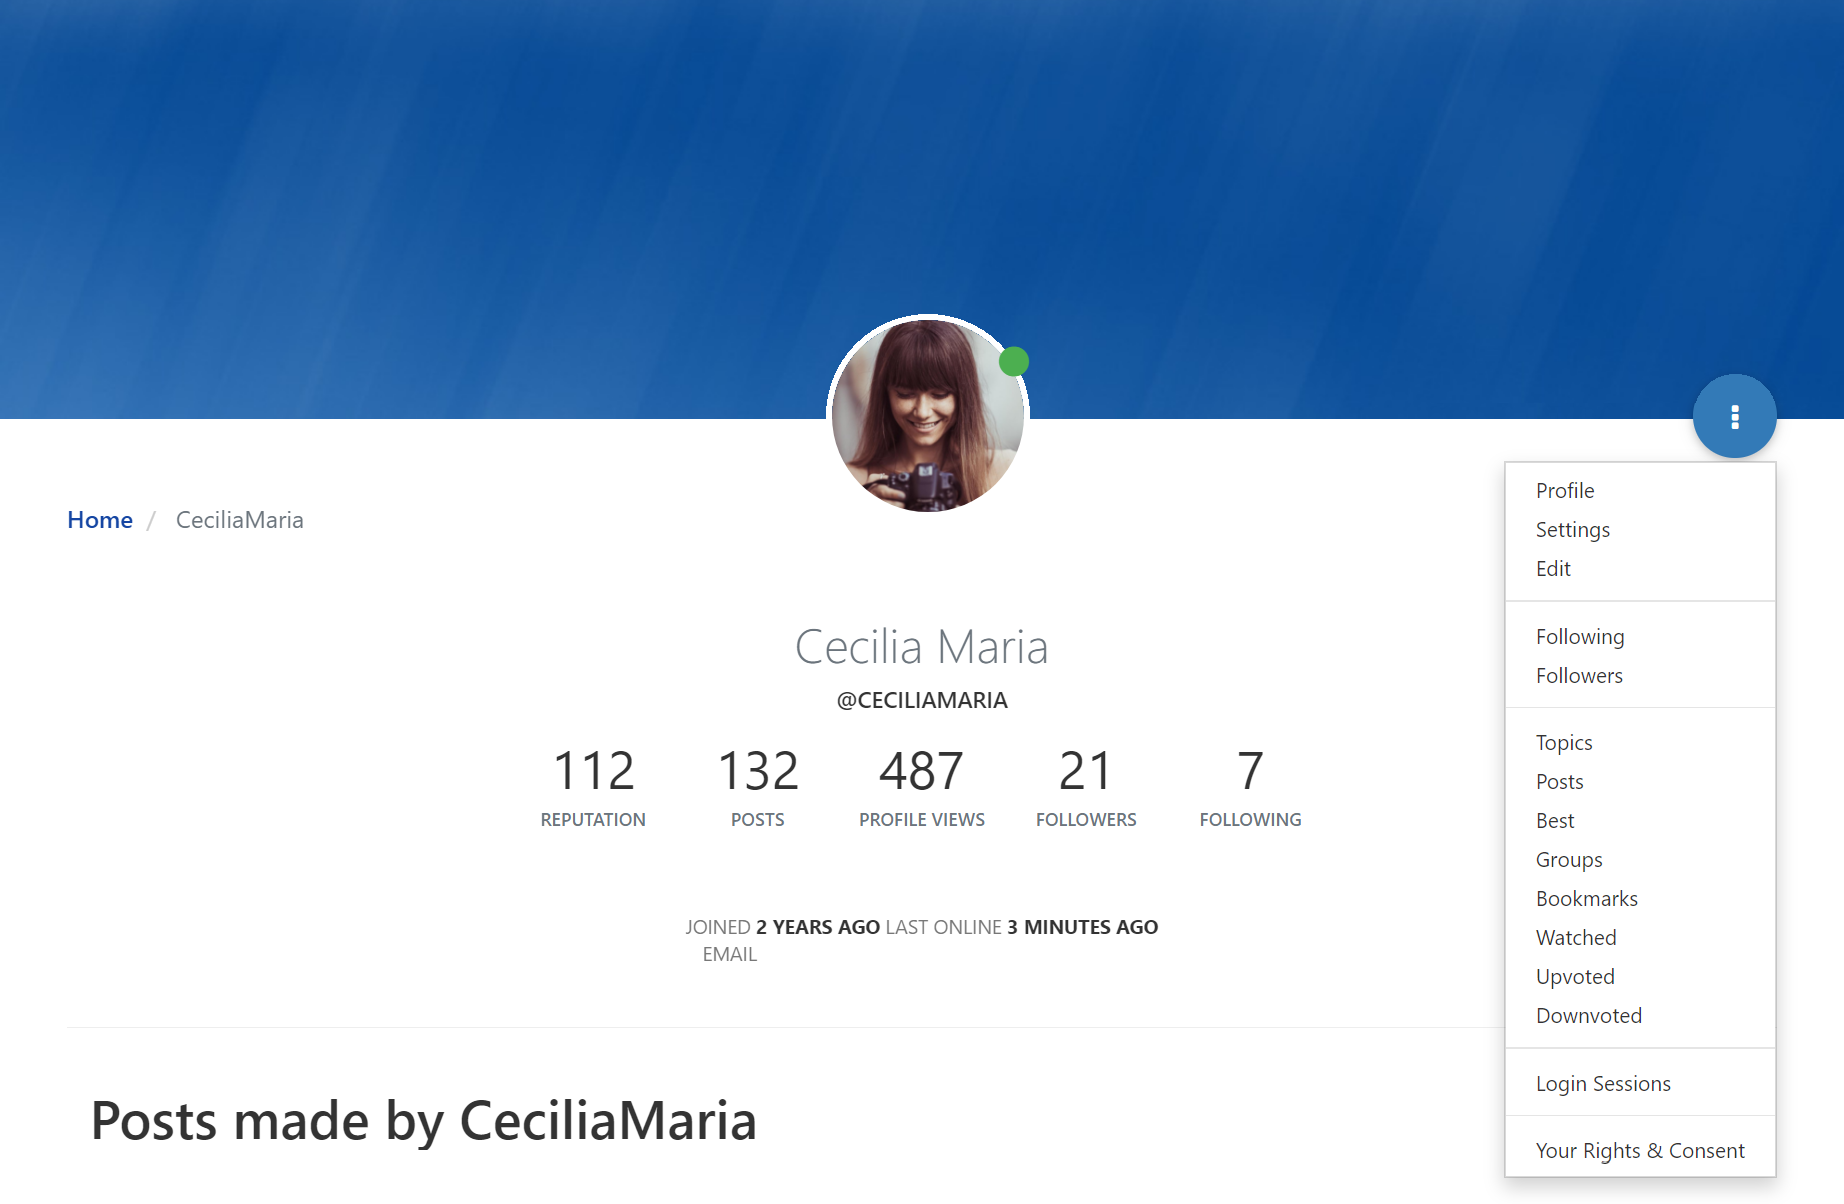
To view your account’s profile, click on the avatar (username’s first letter if you haven’t uploaded an image) in the top right corner of the forum and select your username. You can change your online status and access other pages from the same menu.
Alternatively, go to the following link while you’re logged in – https://forum.vivaldi.net/me or click on your username in one of the topics you’ve posted to.
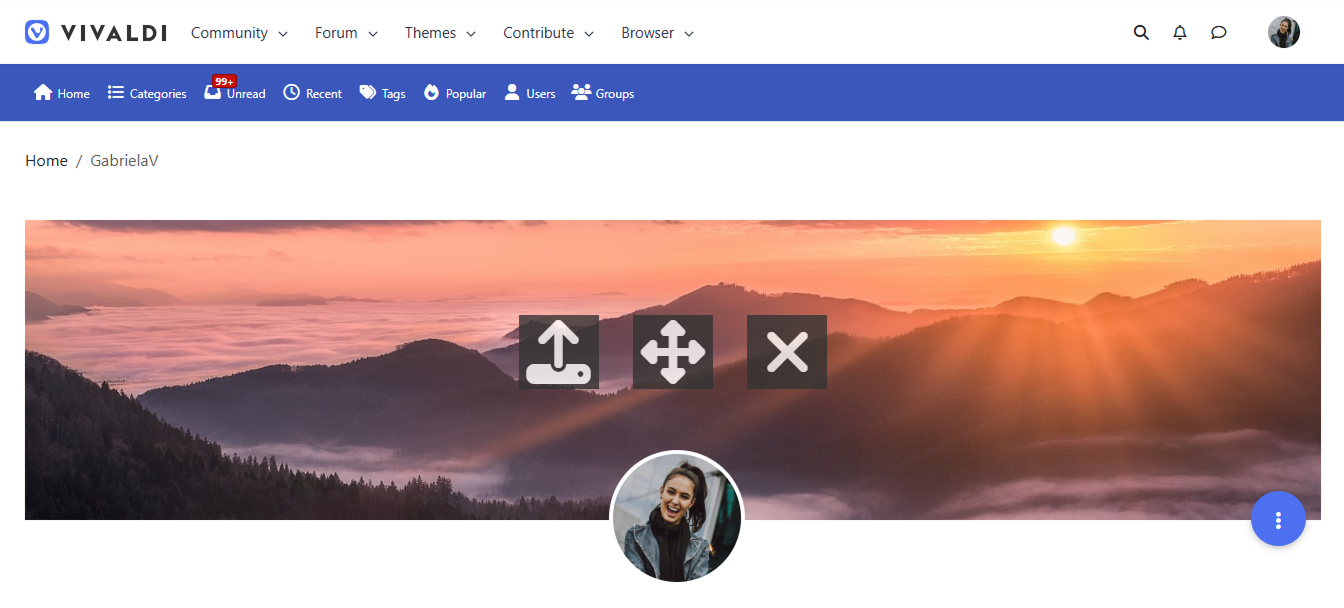
On your profile, you’ll see various information about your account. To access some of it, click on the circular button on the edge of the profile cover image to open the menu (see image below).
To change your profile’s cover image, hover over the image and click on the leftmost button to upload a new image, middle button to reposition the current image and on the right to remove the image.
To view and change your account information, open the account menu from your avatar and select Edit Profile. On the page, once you have at least 2 reputation points, you can fill in the About me section and add a signature to your posts. Clicking the options Change picture/email/password in the left column, will take you to the main Vivaldi account profile page.
For more information about your Vivaldi account, browse the help pages in the Account category.
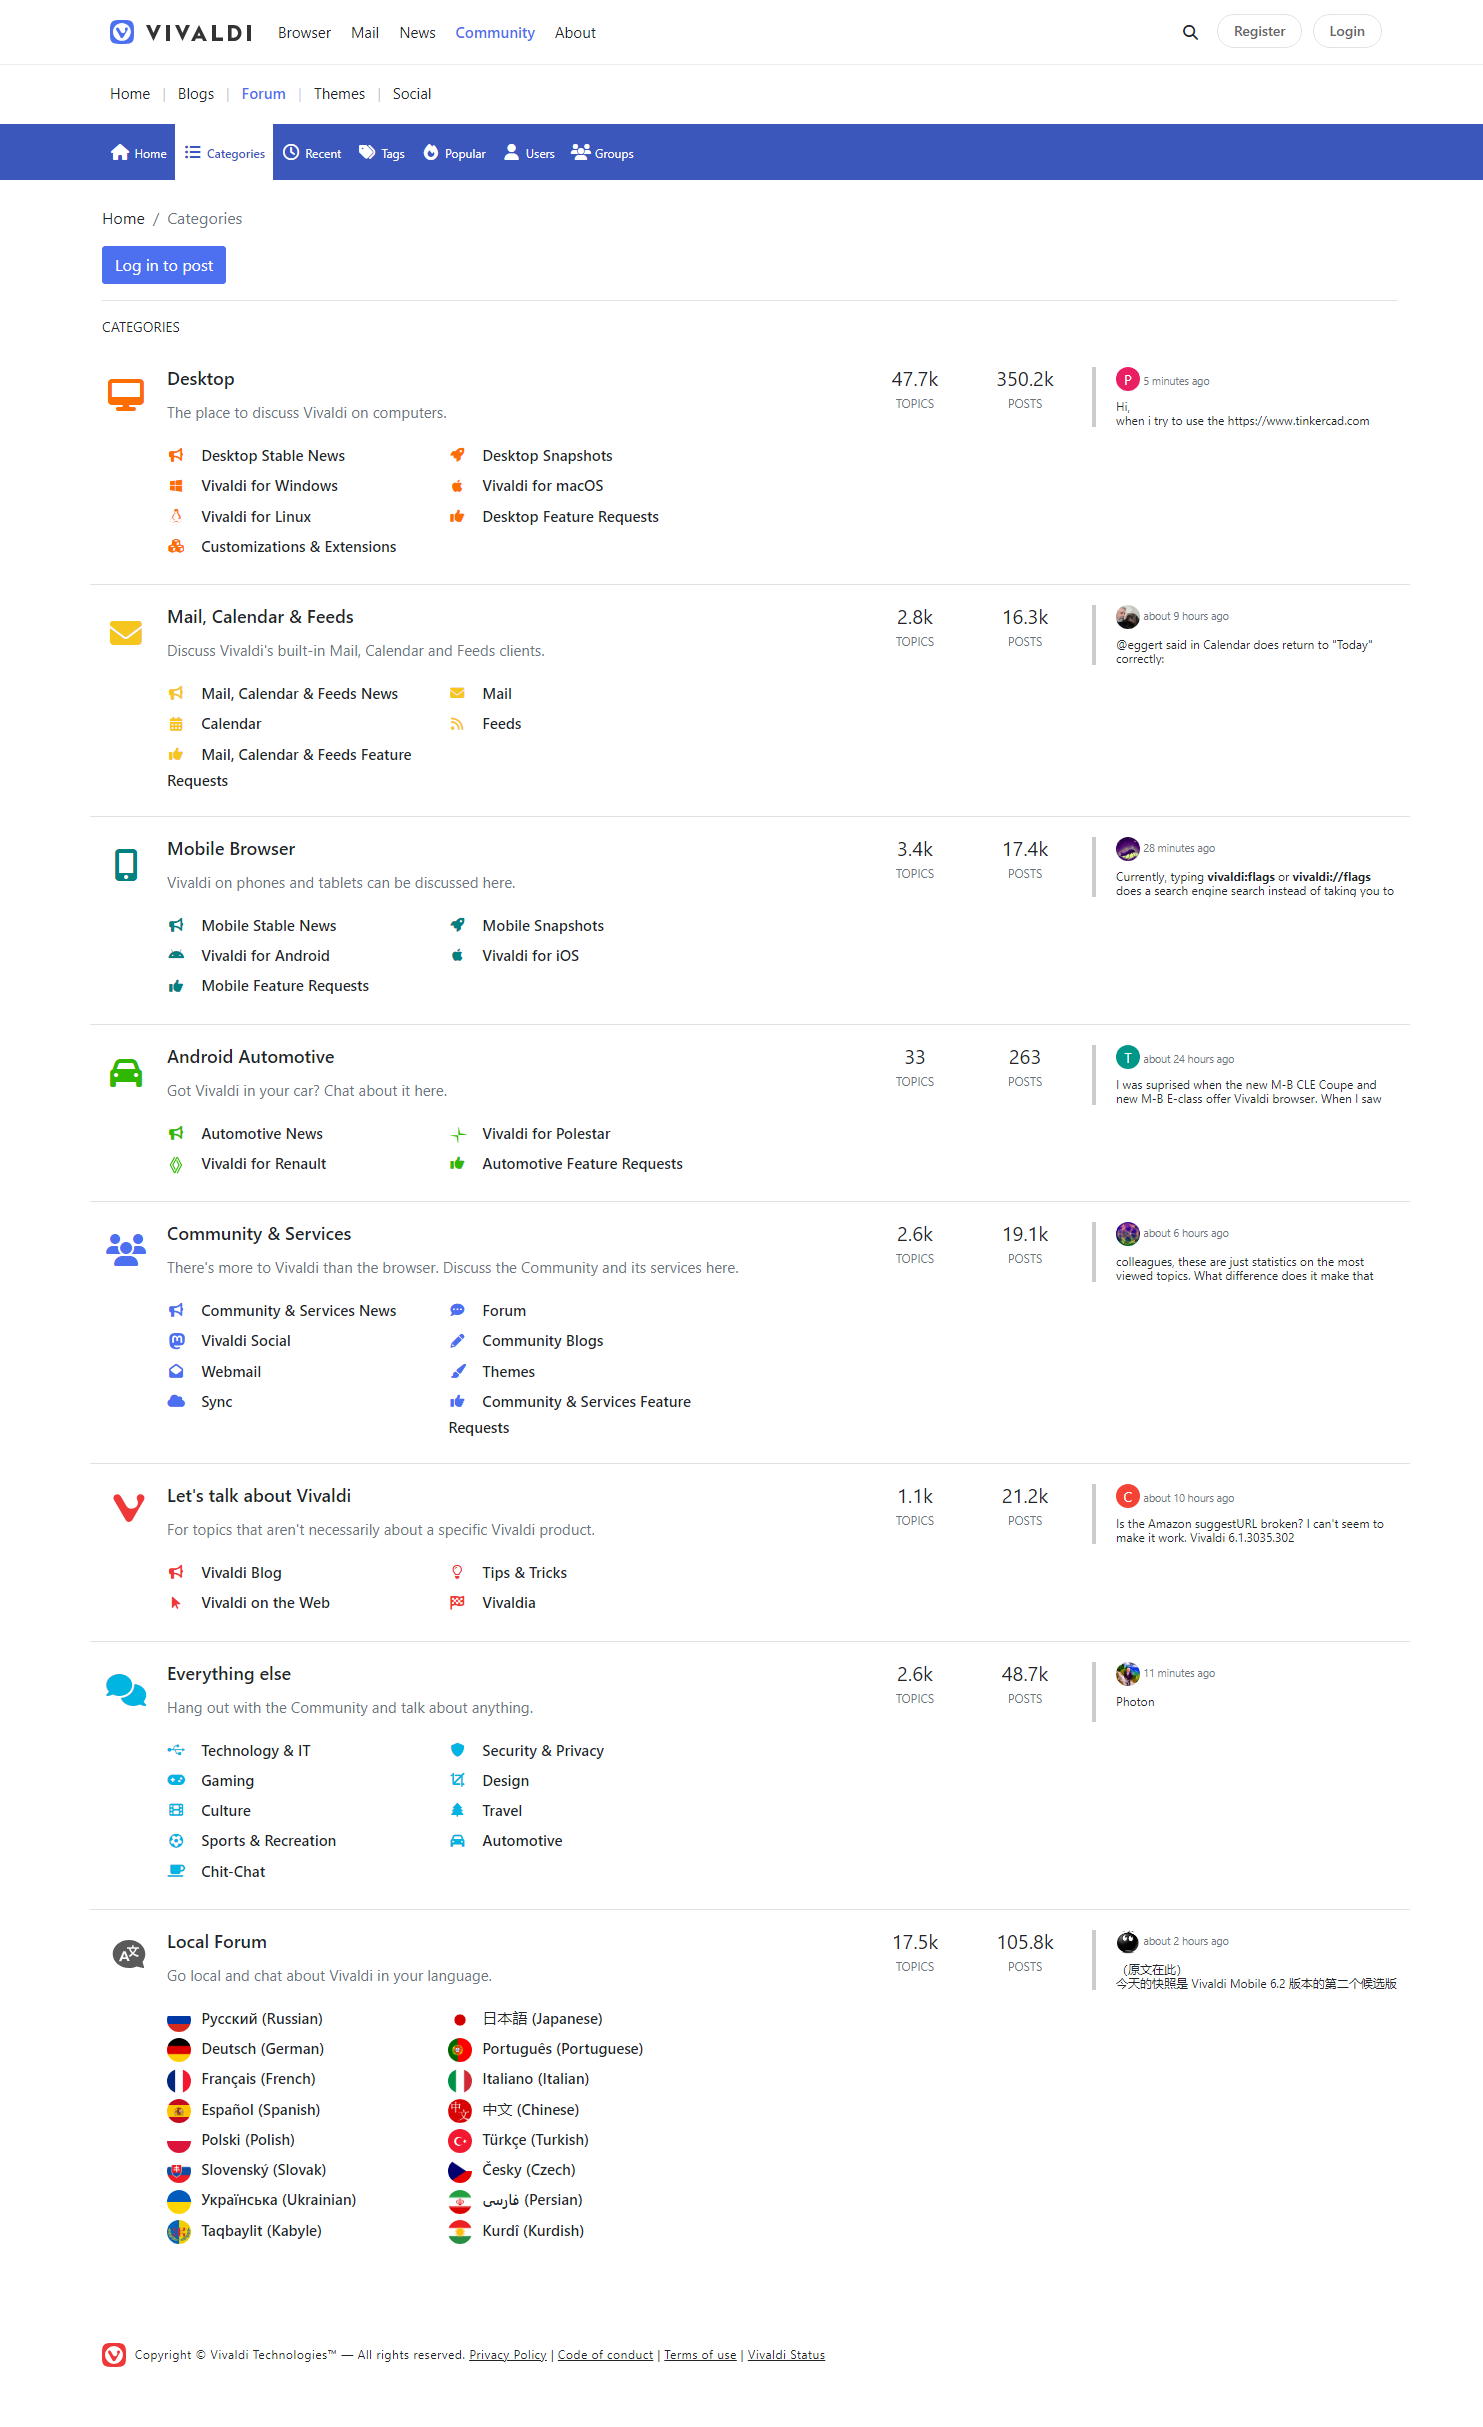
The Vivaldi forum is a place to talk about the browser, share customization ideas and clever tricks, troubleshoot bugs, shape the browser’s development, and, why not, just talk about tech with like-minded people from around the world.
Topics are divided into 8 main categories with many subcategories.
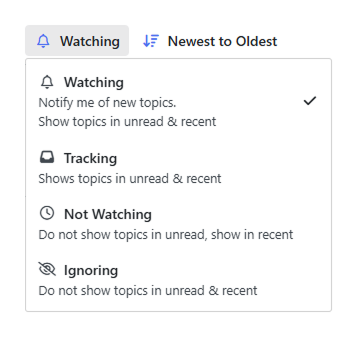
To follow or unfollow a category, open it and select your preferred option, Watching or Ignoring, from the drop-down menu above the list of topics. In case the category has subcategories, the menu is between subcategory folders and topics. In addition to watching/ignoring the current category, the change will also apply to all subcategories.
To follow or unfollow a specific topic, look for the same menu in an open topic (see image below). In addition to just Watching and Ignoring, there’s also an option Not Watching.
All your Watched topics are listed on https://forum.vivaldi.net/me/watched. You can access it on your profile from the menu on the edge of your cover image > Watched.
New posts in categories that you watch but haven’t seen before will appear in the Unread section. Fresh watched posts, both read and unread, are listed in the Recent section.
Tags are another good way to find discussions related to topics you’re interested in. When you create a topic, you can also add tags. Please use the existing ones as much as possible.
Most discussed topics of the day / week / month and all time can be found there.
If you like or agree with a post you can upvote it.
Voting is most used in the Feature Requests category. The Vivaldi team uses upvotes to gauge the community’s interest in specific features.

The button will turn green once you’ve cast your vote. You can view the posts you’ve upvoted on https://forum.vivaldi.net/me/upvoted. It is also available under your profile page if you click on the blue menu button below the cover image.
Every time a post or comment is upvoted, the author’s reputation increases by one point.
In Vivaldi, you can customize the commands in the main application menu as well as in various context menus to fit your workflow.