Change the language in the browser and for the services
Vivaldi comes in many languages. Find out how to switch languages in the browser and on our websites.
Vivaldi Browser on desktop
To change the desktop browser’s user interface language:
- Go to Settings > General > Language > User interface Language.
- Select your preferred language from the drop-down menu.
- Click Save Language below the drop-down menu.
- Confirm your decision by clicking Save Language and Restart in the pop-up dialog.
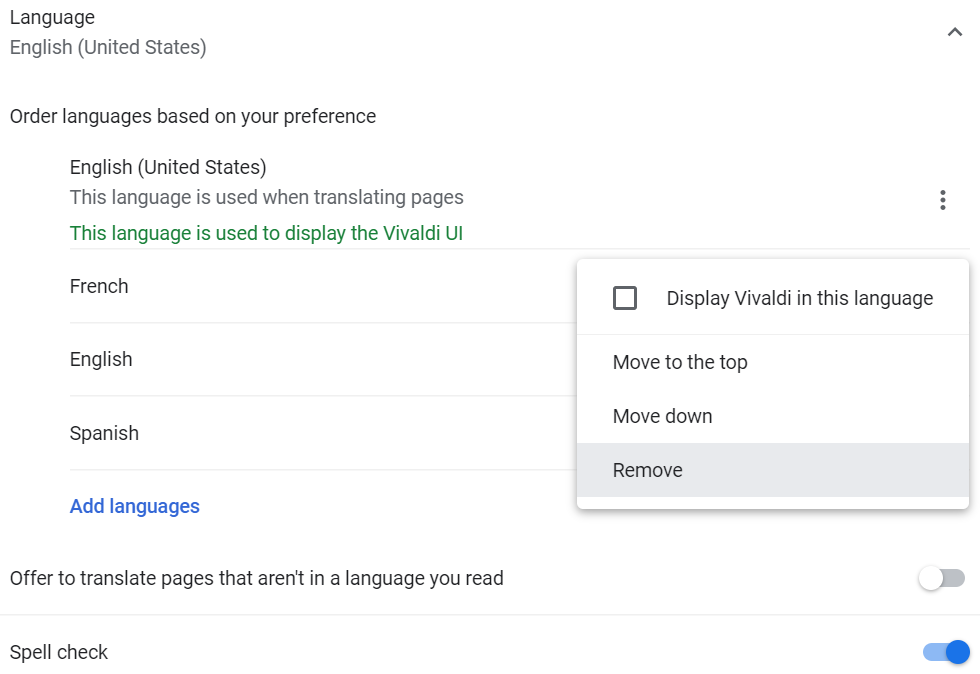
In addition to the user interface language, you can choose in which languages you prefer the content to be displayed in, in case they’re available in multiple languages.
To add a new language:
- Go to Settings > General > Language > Accepted Languages.
- Click on Add Language.
- Select a language from the menu.
You can change the order of priority using the up and down arrows below the list.
Vivaldi Browser on Android
To change the Android browser’s user interface language:
- Go to
 Vivaldi menu > Settings > General > Language settings > App language.
 - Select your preferred language from the menu.
- Tap Relaunch now.
In addition to the user interface language, you can choose in which languages you prefer the content to be displayed in, in case they’re available in multiple languages.
To add a new language:
- Go to Vivaldi menu > Settings > General > Language settings > Preferred languages.
- Tap on Add Language.
- Select a language from the menu.
You can change the order of priority by tapping on the = symbol in front of the language name and dragging it up or down in the list.
Vivaldi Browser on iOS
Vivaldi’s user interface language on your iPhone and iPad is linked to the operating system’s language. To change the user interface language on iOS:
- Go to your mobile device’s Settings > General > Language & Region > Preferred Languages.
- Add or reorder your languages and set the language you want Vivaldi and other apps’ language to be in.
In addition to the user interface language, you can choose in which languages you prefer the content to be displayed in, in case they’re available in multiple languages.
To add a new language:
- Go to Vivaldi menu > Settings > General > Accept Languages.
- Tap on Add Language.
- Select a language from the menu.
Vivaldi.com
To view Vivaldi Browser’s website in another language:
- Scroll to the bottom of the page.
- Select your preferred language from the drop-down menu in the bottom right corner.
Vivaldi.net
Profile
To change the profile page’s language on Vivaldi.net:
- Click on your user avatar in the top right corner of the page.
- Select Profile.
- Select your preferred language from the drop-down menu in the bottom right corner of the page.
Blogs
To change your Vivaldi blog‘s language:
- Click on your user avatar in the top right corner of the page.
- Select My Blog.
- Then go to your-username.vivaldi.net > Dashboard > Settings > General > Site Language.
- Select your preferred language from the drop-down menu.
- Click Save Changes.
To change the language for the backend:
- Click on your user avatar in the top right corner of the page.
- Select My Blog.
- Then go to your-username.vivaldi.net > Dashboard > Users > Your Profile > Language.
- Select your preferred language from the drop-down menu.
- Click Update Profile.
Webmail
To change the user interface language in Vivaldi Webmail:
- Go to Settings > Preferences > User Interface > Main Options > Language.
- Select your preferred language from the drop-down menu.
- Click Save.
Forum
To change the Forum language:
- Click on your user avatar in the top right corner of the page.
- Go to Settings > Language.
- Select your preferred language from the drop-down menu.
- Click Save Changes.
Please note that the content will still be in English. For posts in other languages, check out our Local Forums.
Vivaldi Social
To change the interface language on Vivaldi Social:
- Go to Preferences > Appearance > Interface Language.
- Select your preferred language from the drop-down menu.
- Click Save Changes.
To filter content in public timelines by language, go to Preferences > Other > Public Timelines.
We depend on volunteers’ help to translate Vivaldi. If you’d like to contribute, let us know about it on the Join Vivaldi Translation Team thread on the Forum and we’ll get in touch with you. Alternatively, send a private message to our Translations Manager.