Standalone version of Vivaldi
A standalone version can be used for testing a specific setup or version, without touching the system wide settings (profile). It can also be used to create an almost fully portable installation of Vivaldi that you could store on an external disk, for sharing between computers.
Important! Since passwords and extensions are encrypted with a key which is unique to the user profile on each computer, they cannot be transferred.
The following instructions are for Windows. If you are on Linux or macOS, you can run the Snapshot and Stable versions side by side, without having to take extra steps during installation.
Installing Vivaldi as a standalone on Windows
To install Vivaldi as a standalone version:
- Go to:
- Vivaldi.com/download to install the stable version or
- Vivaldi.com/blog/snapshots/ to the (most recent) blog post to download the Snapshot.
- Open the installer from the Downloads Panel or from the folder you downloaded it to.
- In the installation window select Advanced.
- Under Installation type select Install Standalone.
- Set a destination folder (anywhere except the Program Files folder)
- Click Accept and Install to finish the installation.
To open the browser go to the destination folder > Application > vivaldi. To access the browser easily save a shortcut to your Desktop or pin it to the Start Menu or Task Bar.
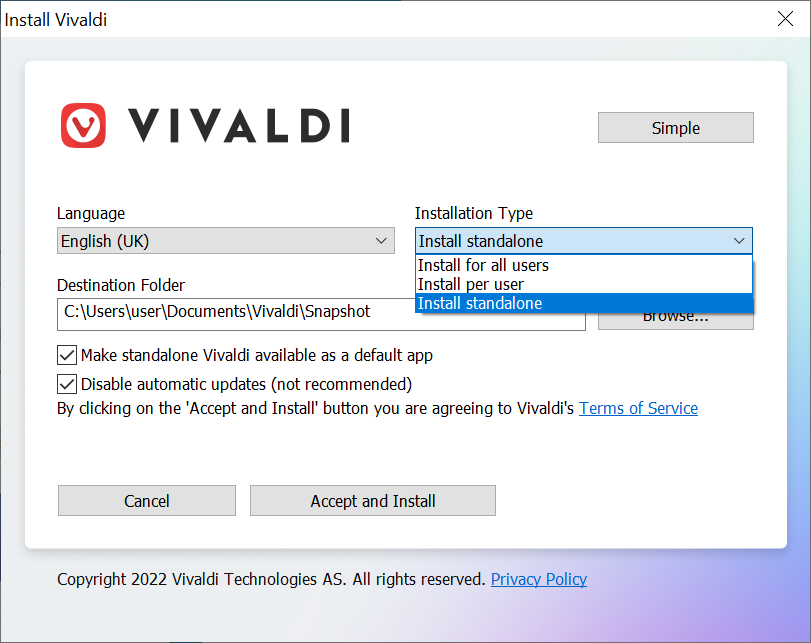
We recommend that you tick the additional dialogue box “Register standalone Vivaldi” (see above). This will make the standalone version appear in the Default apps list and will be added as an entry in the Registry of the operating system.
Also, we recommend keeping the option for automatic updates enabled, to make sure you get the latest security updates, newest features and most recent bug fixes.
Updating the standalone version
If you have automatic updates enabled in Settings > General > Updates, the update will be downloaded automatically and installed on the next browser restart. ![]() Update ready message will also appear on the right side of the Address Bar when an update has been downloaded. Click on it and then on Restart to complete the update.
Update ready message will also appear on the right side of the Address Bar when an update has been downloaded. Click on it and then on Restart to complete the update.
To check for updates manually go to ![]() Vivaldi menu > Help > Check for Updates and then Install Update.
Vivaldi menu > Help > Check for Updates and then Install Update.
You can also download the latest update from the website. Just save it to the same folder to keep the settings or create a new folder to have a clean install.
Uninstalling the standalone version
- Go to the folder where you saved the Vivaldi standalone folder. If you can’t remember or can’t find it, go to
 Vivaldi menu > Help > About and take note of the Executable Path.
 - Close all Vivaldi windows
- Delete the folder containing the Vivaldi standalone.
- In case you registered the standalone version as a default app, registry keys and update notifiers (if enabled) need to be deleted manually.