Log in on Vivaldi.net and go to your profile (top right corner);
Click on ‘Delete account’ in the lower half of the profile page (next to ‘Change password’ and ‘Export data’);
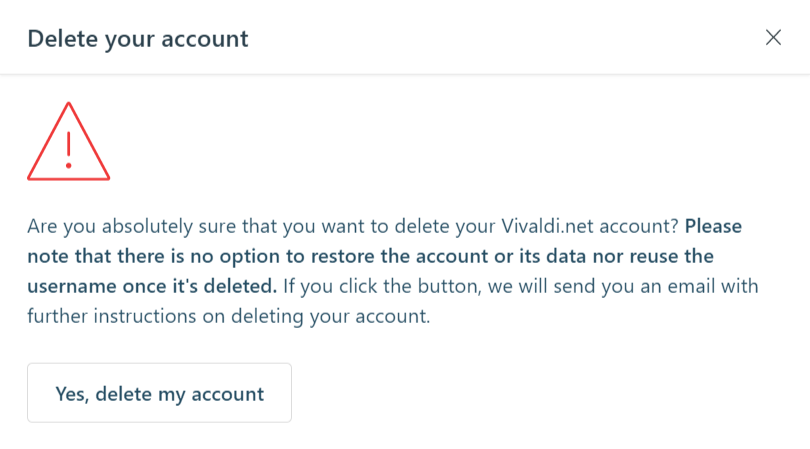
If you’re certain that you want to delete the account, click on ‘Yes, delete my account’;
An email is sent to your account’s recovery email address, so head on to that mailbox and open the link sent in the email;
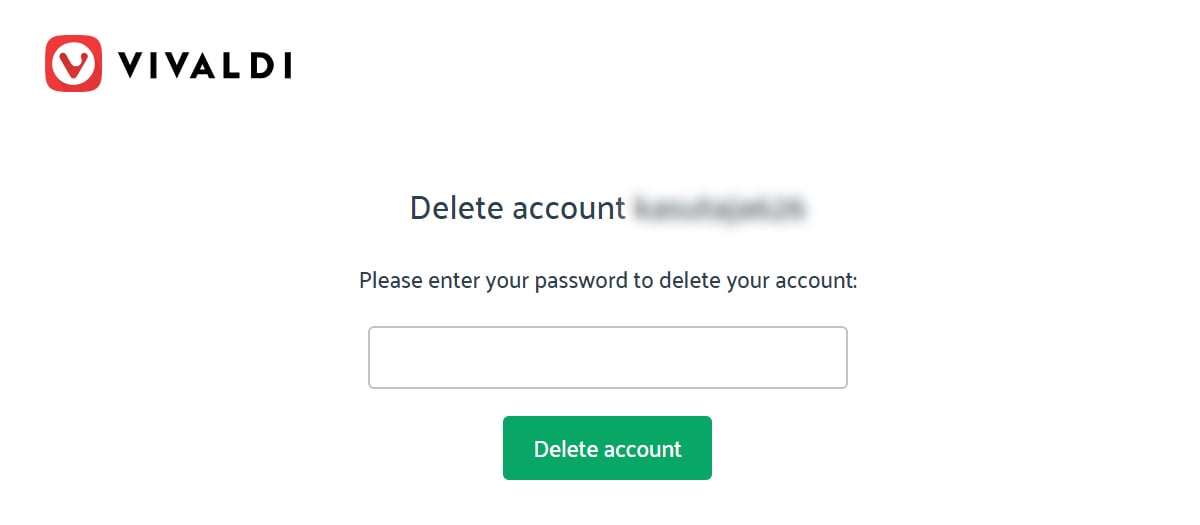
Confirm your decision by entering your account’s password.
Important
Please note that after the password has been entered and submitted, there’s no option to restore the account and its data. Also, it won’t be possible to register with the same username again.
If you are deleting your account in order to sign up with a different username, you may need to wait a few minutes before signing up again, as it may take some time to delete the data from all our databases.
If you are happy with the username but wish to have a different recovery email address, don’t delete the account. Instead, go to your profile on Vivaldi.net and update the recovery email there.
If you no longer have access to the recovery email or have trouble deleting the account, please send us a message below and we’ll do our best to help you.
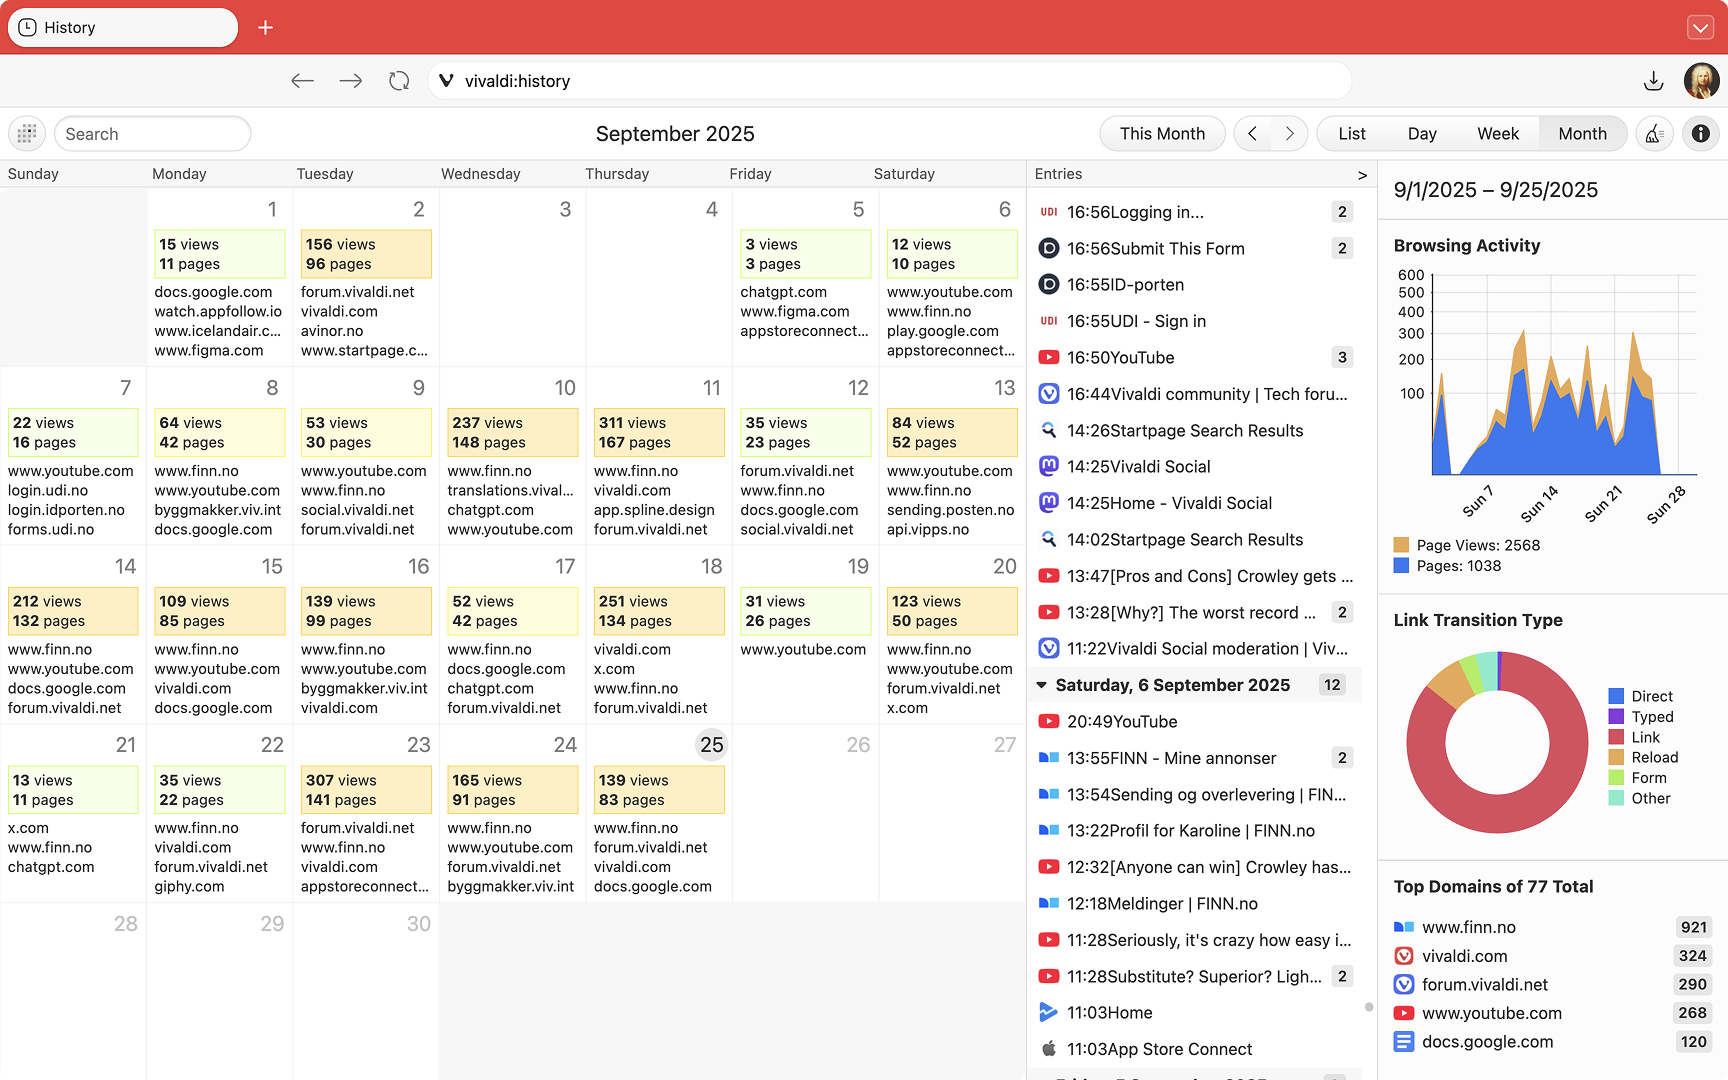
The History tool in Vivaldi is somewhat different than in a typical browser – instead, Vivaldi’s History is a detailed overview backed by statistics and presented in a fresh, visual way. It was built to give users a powerful and useful tool to explore their browsing patterns and to make finding previously visited sites easier than ever.
Accessing History
To open the History page:
Click on History on the top menu of the Start Page (vivaldi://startpage);
Create a Mouse Gesture for opening the History manager
Searching visited pages
To search specific History entries, enter the page’s title or URL in one of the following places:
History Manager’s search field in the top left corner of the page.
History Panel‘s search field at the top of the panel.
In the Address Field, type “@history” followed by a space and your search keyword to see results only from History.
Using History in Vivaldi
History offers a number of different views and ways to filter your browsing history data in Vivaldi. Get an overview and a few examples with the video below:
Delete browsing history
Clearing browsing data can be done from the History page by clicking the Clear Browsing Data button in the top-right of the History page.
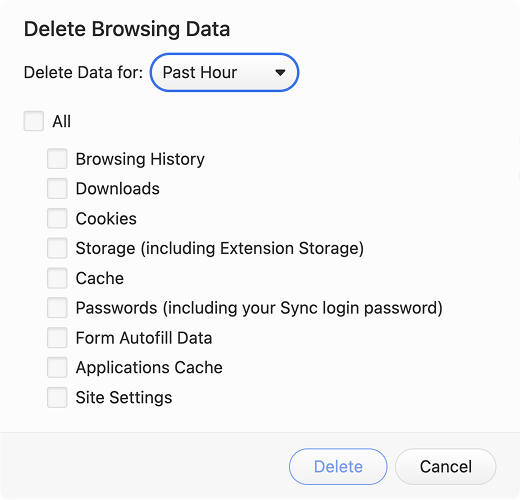
Alternatively, open the Delete Browsing Data window:
From Vivaldi menu > Tools > Delete Browsing Data;
By clicking the Clear Browsing Data button in the top-right corner of the History Panel;
Session Only – meaning your history will be deleted every time you exit the browser.
One Day
One Week
One Month
Three Months (the default)
Six Months
One Year
Forever
Restart the browser.
Privacy
History data is strictly private and stored locally to individual Vivaldi installations – Vivaldi Technologies does not collect any History data from browser users. Find out more about Vivaldi’s Privacy policies and terms here.
If you have issues uninstalling Vivaldi while using Windows 10, Windows 10 provides two different UIs to add/remove programs: the old style UI, and a new modern look (see screenshots below). Only the older style UI will allow a non-admin user to uninstall a single user installed program.
Older add/remove program Windows UI
New add/remove programs UI in Windows 10.
To uninstall Vivaldi from Windows 10, make sure that you are using the old add/remove UI.
To ensure that you are, follow these steps:
Use ⊞ WinKey+R to open the Run dialog,
Type: control appwiz.cpl,
Press OK,
Scroll down to the “Vivaldi” entry and double click it.
Alternatively, you can also uninstall the browser by using the setup.exe we include with Vivaldi and calling it directly, e.g. assuming the version number is 1.7.735.29, start the run dialog and then issue the following:
Vivaldi’s built-in Capture tool lets you capture either a Full Page screenshot, or a Selection of the screen that you define. It can be accessed in a number of ways through the Vivaldi UI to give you flexibility in how you implement the tool.
Types of Capture
Full Page
A Full Page capture is a screenshot of the full length of a website (max 30 000 pixels). Whether you’re giving feedback on a design, gathering inspiration, or just want to share an interesting site with a friend, this is a great way to get a bird’s eye view in a single image.
Selection
Capturing a Selection lets you focus in on a particular piece of your screen for more precision. After doing an initial selection, you can resize the capture area, before taking the screenshot.
Output of Capture
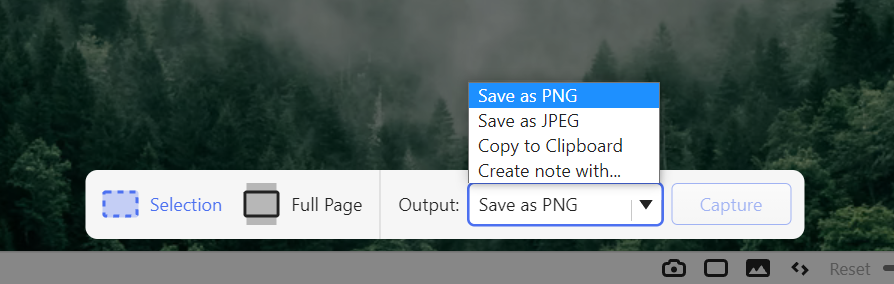
Whether capturing a Full Page or a Selection, you can choose to save the new snap to your disk for later use, or copy it to your clipboard to share it instantly.
Save to Disk
In the Capture tool you are given options to “Save as JPEG” or “Save as PNG“. When choosing these options, your new screenshot will be saved immediately to your local disk.
Copy to Clipboard
A newly captured screenshot can be copied as an image to your system’s clipboard. This makes it easy to share your new screenshot in other applications and documents immediately; once a screenshot is copied to your clipboard, simply Paste in place to insert the image into the desired location.
Create a new note from the capture
When you save the capture as a note, the screenshot will be saved with the capture date and page URL. The note won’t have a title or any text content, so go to the Notes Panel or Notes Manager to add it.
Access the Capture tool
Vivaldi lets you choose how to use its features, giving you several ways to get something done. Capturing screenshots is no exception. Below we describe the ways which you can access the Capture functionality in your browser.
Status Bar
Capture can be accessed in your Status Bar via the camera icon. Clicking on the icon will bring up your options for capturing a new screenshot: Full Page vs Selection, “Save as…” and “Copy to Clipboard“.
Keyboard Shortcuts
Capture functionality can be activated using Keyboard Shortcuts in Vivaldi. This means that pressing a pre-defined combination of keys will fire the associated action (e.g. capturing a Selection screenshot).
To map a custom keyboard shortcut to your preferred Capture method open your Settings and search for “Capture”. The available actions that can be mapped to a keyboard shortcut will display in the search results.
Click into the action you’d like to work with, and type your custom shortcut. The command is available immediately.
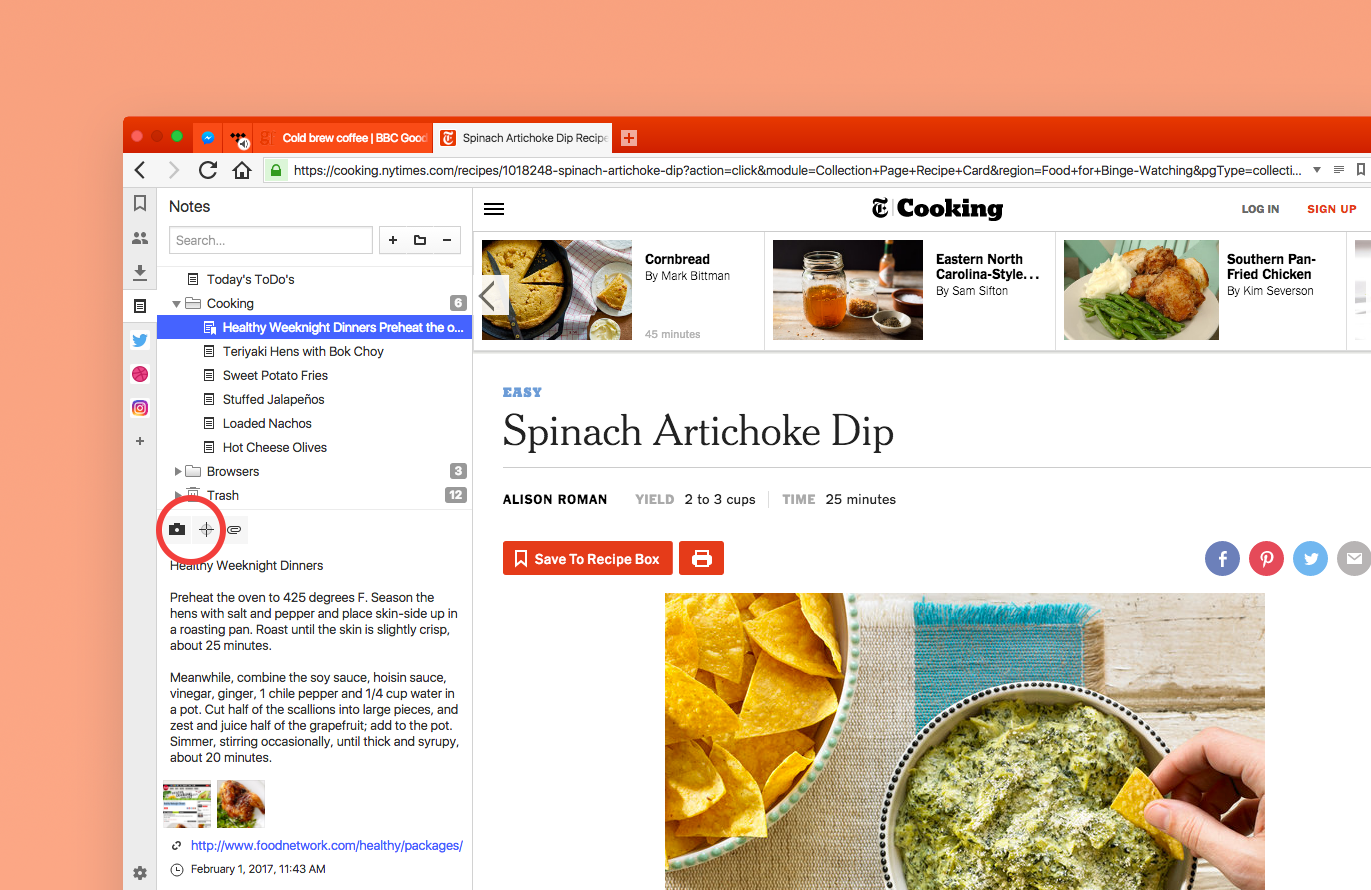
Vivaldi has a built-in Notes tool which allows you to capture thoughts and ideas while you browse. The Capture tool is integrated directly in the Notes Panel, allowing you to attach screenshots to your notes.
Quick Commands
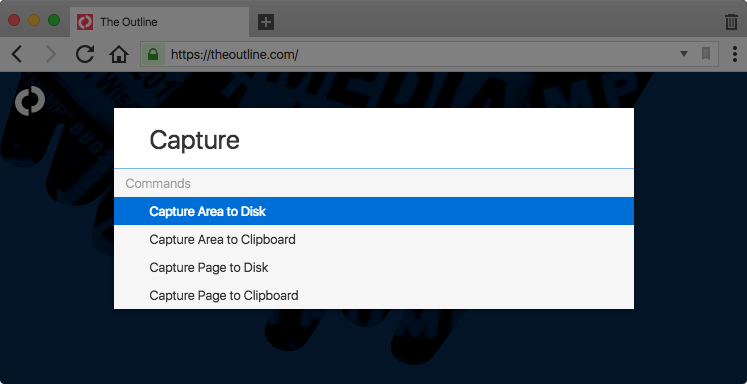
Quick Commands is a tool for users that like to keep their hands on the keyboard. To access the Capture tool via Quick Commands:
Open Quick Commands by pressing F2 / ⌘ E.
Enter “Capture” to filter the list of available commands.
Use ↓↑ arrow keys to navigate the list of Capture commands.
Press Enter to issue selected command, or
Close Quick Commands by pressing Escape key.
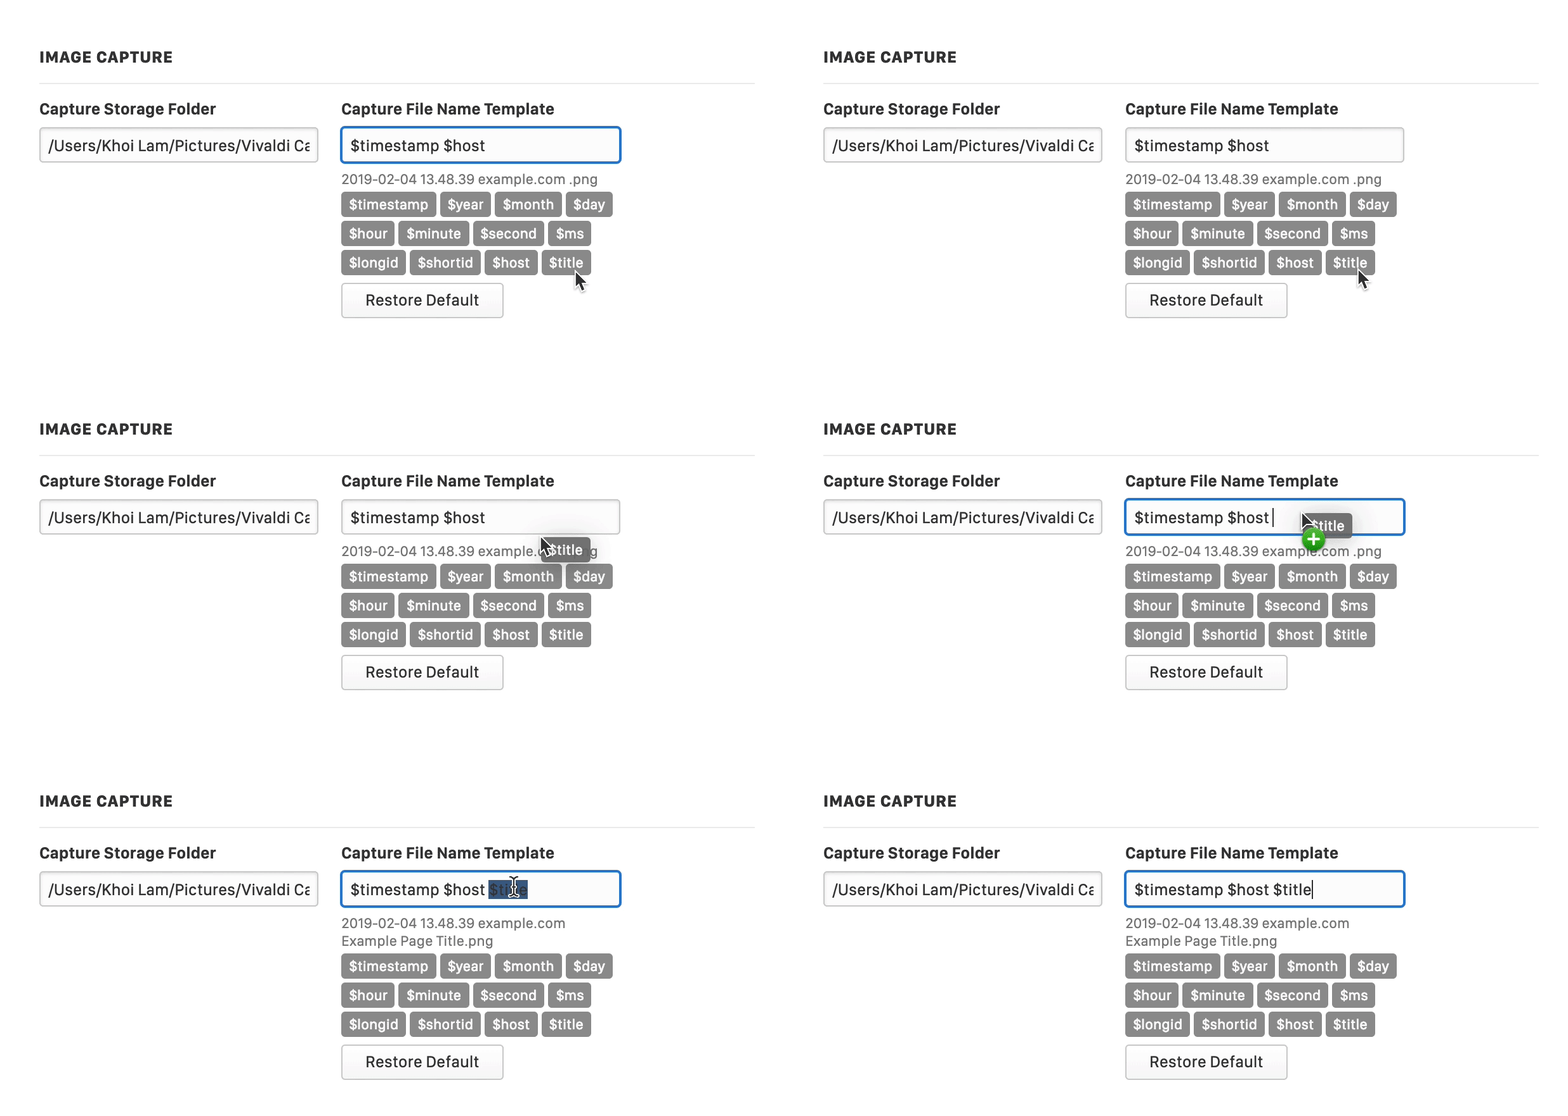
Change the location of saved captures
When you select the option to “Save as PNG” or “Save as JPG“, your capture will be stored at the directory specified in Settings. The location where your captures will be saved can be edited in Settings > Webpages > Image Capture > Capture Storage Folder.
Naming the Capture
Captures will be named automatically, but you can define the format in Settings > Webpages > Image Capture > Capture File Name Template.
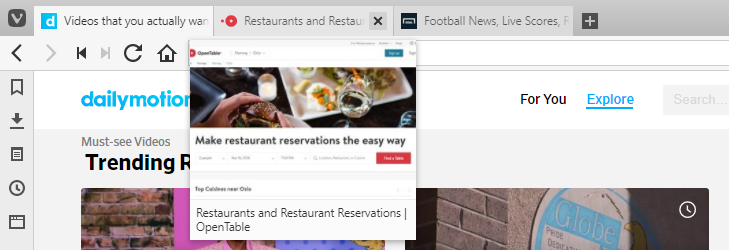
Previewing tabs lets you find the page you’re looking for easily by showing you a screenshot of the page in a thumbnail.
Pop-up thumbnails
To preview a tab, move your mouse pointer over the tab in the Tab Bar. A visual preview of the tab’s contents will appear below. This feature can be enabled/disabled in Settings > Tabs > Tab Display > Tab Options > Show Pop-up Thumbnails.
Pop-up thumbnails for Tab Stacks
When you’ve grouped tabs into a Tab Stack, hovering over the stack on the Tab Bar will show you the thumbnails for all tabs in the stack. You can close tabs from there and drag tabs out of the stack to the Tab Bar or new Window. Alternatively, right-click on the thumbnail and select Close Tab or Remove from Tab Stack from the context menu.
Tab Bar thumbnails
To enable or disable more permanent tab previews:
Go to Settings > Tabs > Tab Display > Tab Options and toggleShow Tab Thumbnails on or off.
Place the mouse pointer on the edge of the Tab Bar, where it changes into a double ended arrow. Then drag (like shown on the gif below), double-click or middle mouse button click to show and hide tab thumbnails. For this option to work, Show Tab Thumbnails needs to be enabled in Settings.
IMPORTANT This article is for advanced users. Following the steps described here will result in losing all your Vivaldi data (Notes, Bookmarks, Web Panels, etc.) and settings, such as cache, history, themes and so on.
If you want to continue and fully reset Vivaldi, please make sure you have a backup of your data before you proceed.
Backup Vivaldi data
One option to back up some of your data is to Sync the data with other devices you use Vivaldi on. That way when the data is deleted on one device you can still access it on others and sync it back after the reset.
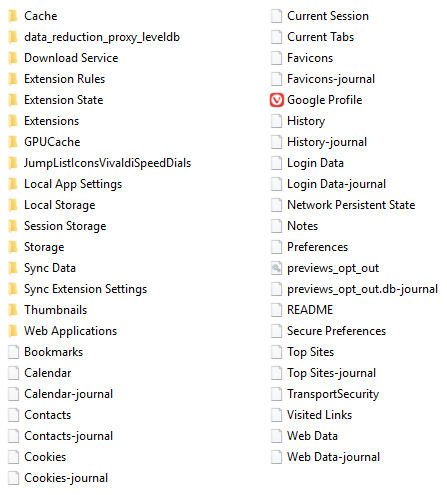
Alternatively, you can make a backup of the profile folder (follow the Profile Path on vivaldi://about), which includes some key elements of your Vivaldi setup, such as preferences, profile and settings. Most of the key components are stored within the Default folder, though you should also retain the First Run file stored alongside it. Deleting this file will make Vivaldi assume it is starting up for the first time.
Here are some of the key elements stored under the Default folder:
Bookmarks – contains bookmarks and information from Speed Dials. Notes – notes taken in the Notes Panel. Sessions – saved tabs sessions. Login Data – website passwords. Note: This file is encrypted and is only usable on the machine that created it. Preferences and Local App Settings\mpognobbkildjkofajifpdfhcoklimli – Vivaldi settings and configuration. Web Data – autofill data. Current Session – data on open tabs. History – website history. Cookies – website data. Extension Rules, Extension State, Extensions, Local Extension Settings, Local Storage, Managed Extension Storage, Extension Cookies and Secure Preferences – all extension preferences and extension data are stored here.
Make a copy of the Default folder and First Run file and paste them, for example on your Desktop or Documents.
How to reset Vivaldi settings
Go to vivaldi://about. Alternatively, open Vivaldi menu > Help > About.
Make a note of the directory listed under Profile Path.
Open a system window (File Explorer).
Go to the User Data folder.
Once you’ve located the correct folder, close the browser.
In the system window delete the entire User Data folder.
Start Vivaldi.
Go to vivaldi://about. Alternatively, open Vivaldi > About Vivaldi.
Make a note of the directory listed under Profile Path.
Open a system window (Finder).
Go to the Vivaldi folder.
Once you’ve located the correct folder, close the browser.
In the system window delete the entire Vivaldi folder.
Start Vivaldi.
Go to vivaldi://about. Alternatively, open Vivaldi menu > Help > About.
Make a note of the directory listed under Profile Path.
Open a system window (Files).
Go to the User Data folder.
Once you’ve located the correct folder, close the browser.
In the system window delete the entire User Data folder.
Start Vivaldi.
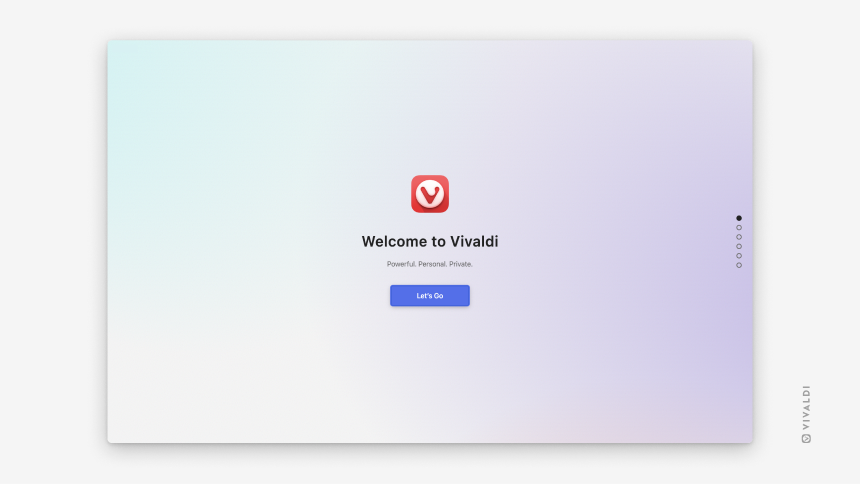
If you have completed the steps successfully, you will see the first step of the welcome tour as you start Vivaldi.
There are many ways to adjust the zoom in Vivaldi.
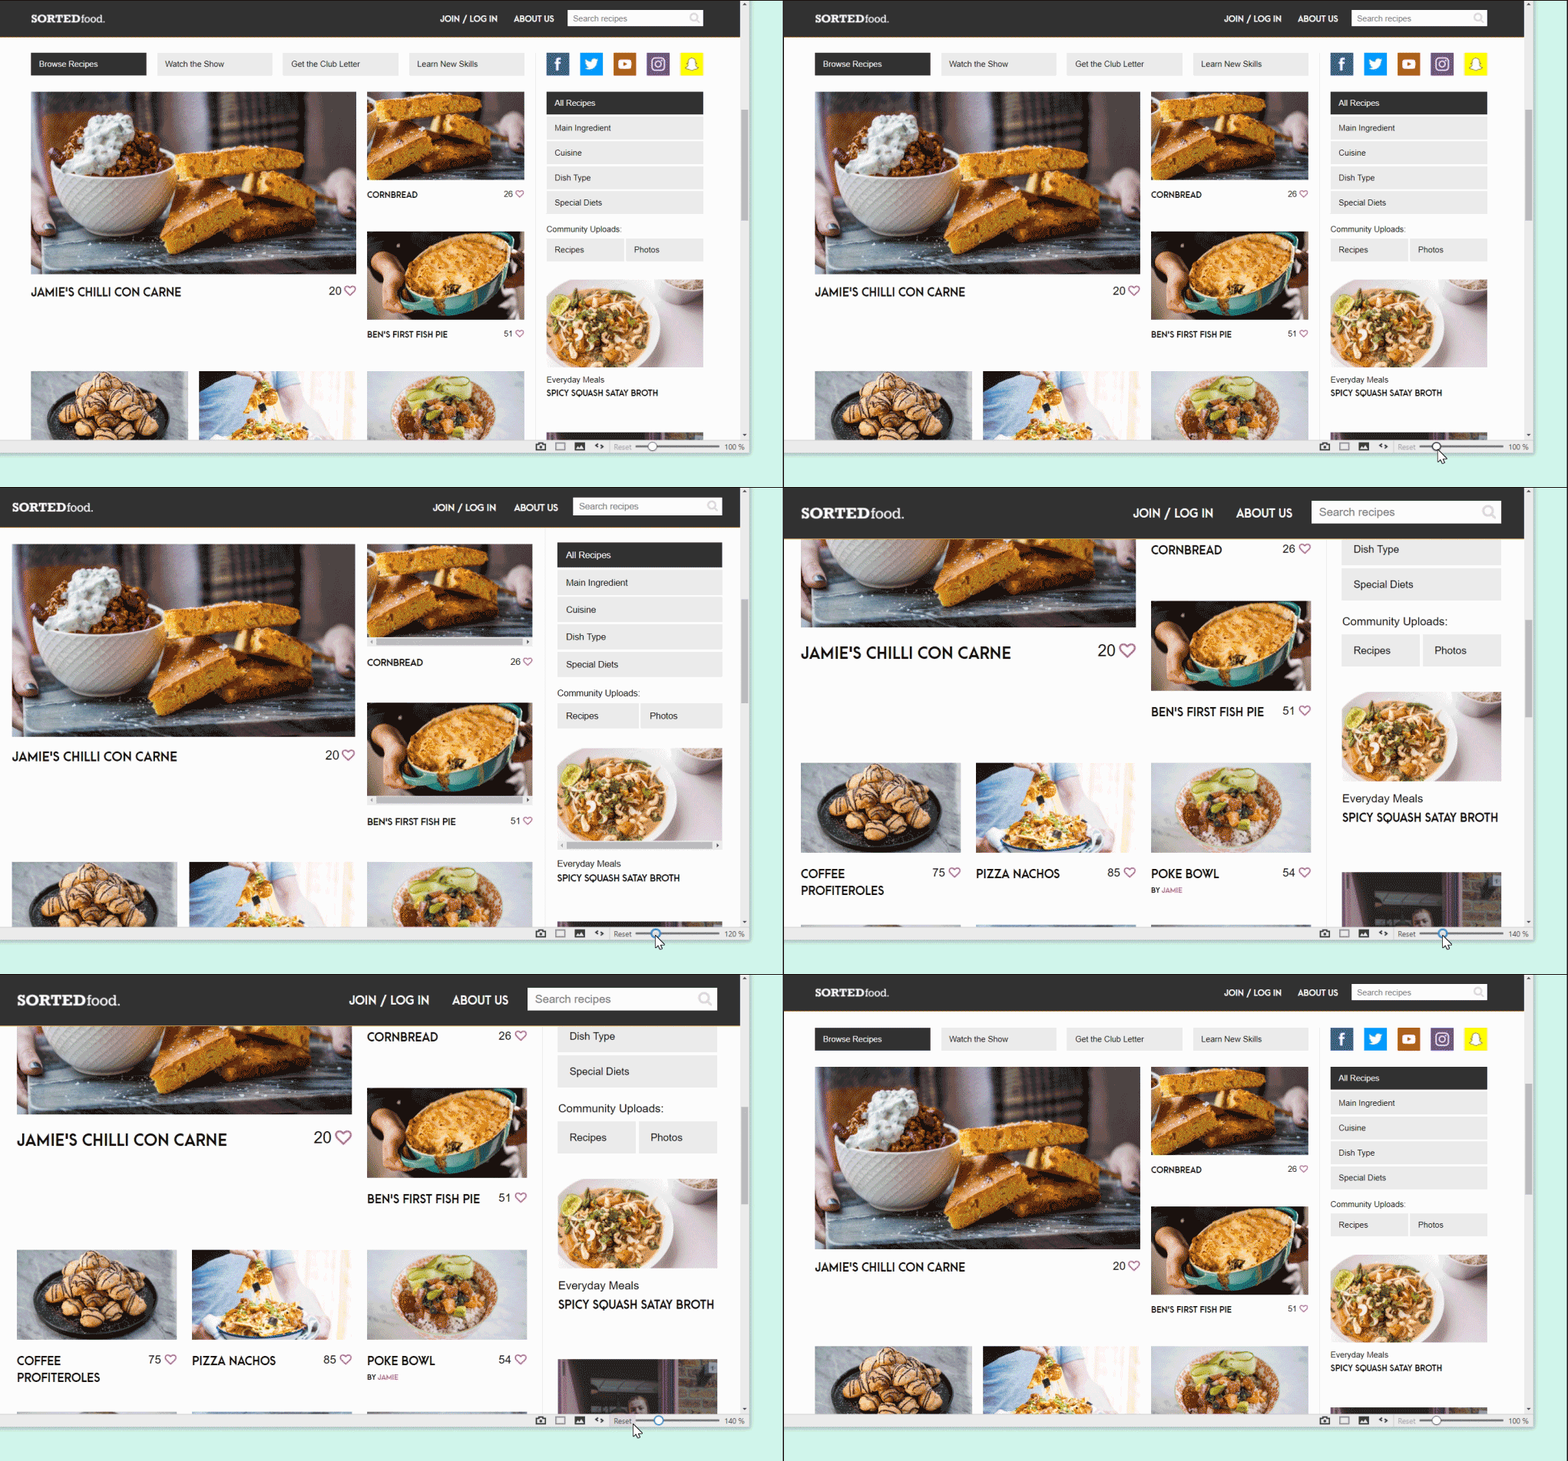
Zoom with the slider on the Status Bar
Drag the slider on the Status Bar to the right to zoom in and to the left to zoom out the active page. Click Reset to revert zoom to the default value.
You can switch the slider for buttons in Settings > Appearance > Window Appearance by ticking the box for Use Buttons in Range Controls. This will affect all range controls in the browser UI.
Zoom with keyboard shortcuts
Use the Ctrl + / ⌘ +Keyboard Shortcut to zoom in and Ctrl - / ⌘ - to zoom out of a page. The shortcuts can be edited in Settings > Keyboard > Shortcuts.
Alternatively, focus on the zoom slider on the Status Bar and use the arrow keys to change the zoom level by 10% increments or the Page Up and Page Down keys to change the zoom level by 50%.
Pressing Home or End while the slider is focused will zoom the page to the minimum or maximum value (respectively).
To reset zoom to the default value, use the shortcut Ctrl + 0 / ⌘ 0.
When you’ve enabled Single Key Shortcuts, you can zoom in and out by pressing the following numbers either above the letters on the keyboard or on the number pad:
0 – zoom in by 10%
9 – zoom out by 10%
8 – double the zoom level
7 – halve the zoom level
6 – reset the zoom level
Zoom with a mouse scroll
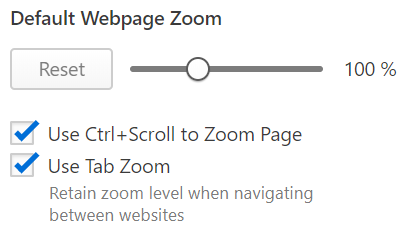
When Use Ctrl/⌘ + Scroll to Zoom Page is enabled in Settings (see image below), hold down the Ctrl / ⌘ key and use the mouse scroll to zoom. On a touchpad hold down the same key and with two fingers slide either up or down.
When Use Ctrl/⌘ + Scroll to Zoom Page is disabled, then using the pinch zooming gesture on the touchpad, instead of rearranging the page and increasing font and other element sizes, will create an effect similar to using a magnifying glass (sometimes referred to as pinch-to-zoom).
Another option is to hover over the zoom slider on the Status Bar and use your mouse scroll or two finger slide on the touchpad to zoom.
Zoom from the Vivaldi menu
From menu (on Windows and Linux) > View select whether you want to zoom the page in or out, or reset the zoom to the default value.
Zoom every page from settings
Change the default zoom level of every page you visit by using the range control in Settings > Webpages > Default Webpage Zoom.
Website Zoom vs Tab Zoom
When Use Tab Zoom is enabled in Settings > Webpages > Default Webpage Zoom, the zoom level will stay the same on all the websites you visit in that tab. The same website open in different tabs can have different zoom levels.
When Use Tab Zoom is disabled each site you visit in the tab can have a different zoom level. When you open the same website in a different tab or at a different time, it will be displayed at the zoom level you set for the site in the other tab.
Zoom in Web Panels
To increase or decrease the size of the content in Web Panels:
Right-click on a Web Panel.
Select Navigation Controls > Display Zoom Controls from the context menu.
Then click on the zoom buttons and at the top of the Web Panel to zoom in and out.
Zoom level is retained through closing and reopening of the Web Panel and browser restarts.
Zoom the user interface
Change the default zoom level by using the range control in Settings > Appearance > User Interface Zoom.
When a website has paginated content, instead of scrolling to the bottom of the page and clicking on the next page button on the web page, you can click on the Fast Forward button on the Address Bar to load the next page.
Fast Forward works, for example, on Search Engines‘ search results pages, forum topic lists pages, online (shopping) catalogues, etc.
Alternatively, you can use the Space key. Pressing Space on your keyboard will move you down the page bit by bit and once you’ve reached the end of the page, it’ll load the next page.
Rewind
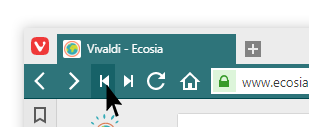
Go back in one click to the first page if you’ve browsed several pages on a same website.
For example, if you visit a Search Engine site such as DuckDuckGo or Ecosia and search for something. You look for it on Page 1, then Page 2 and then Page 3, etc. Let’s say you are on Page 5, by hitting Rewind button, you can return straight back to Page 1 in a single click.


 Clear Browsing Data button in the top-right of the History page.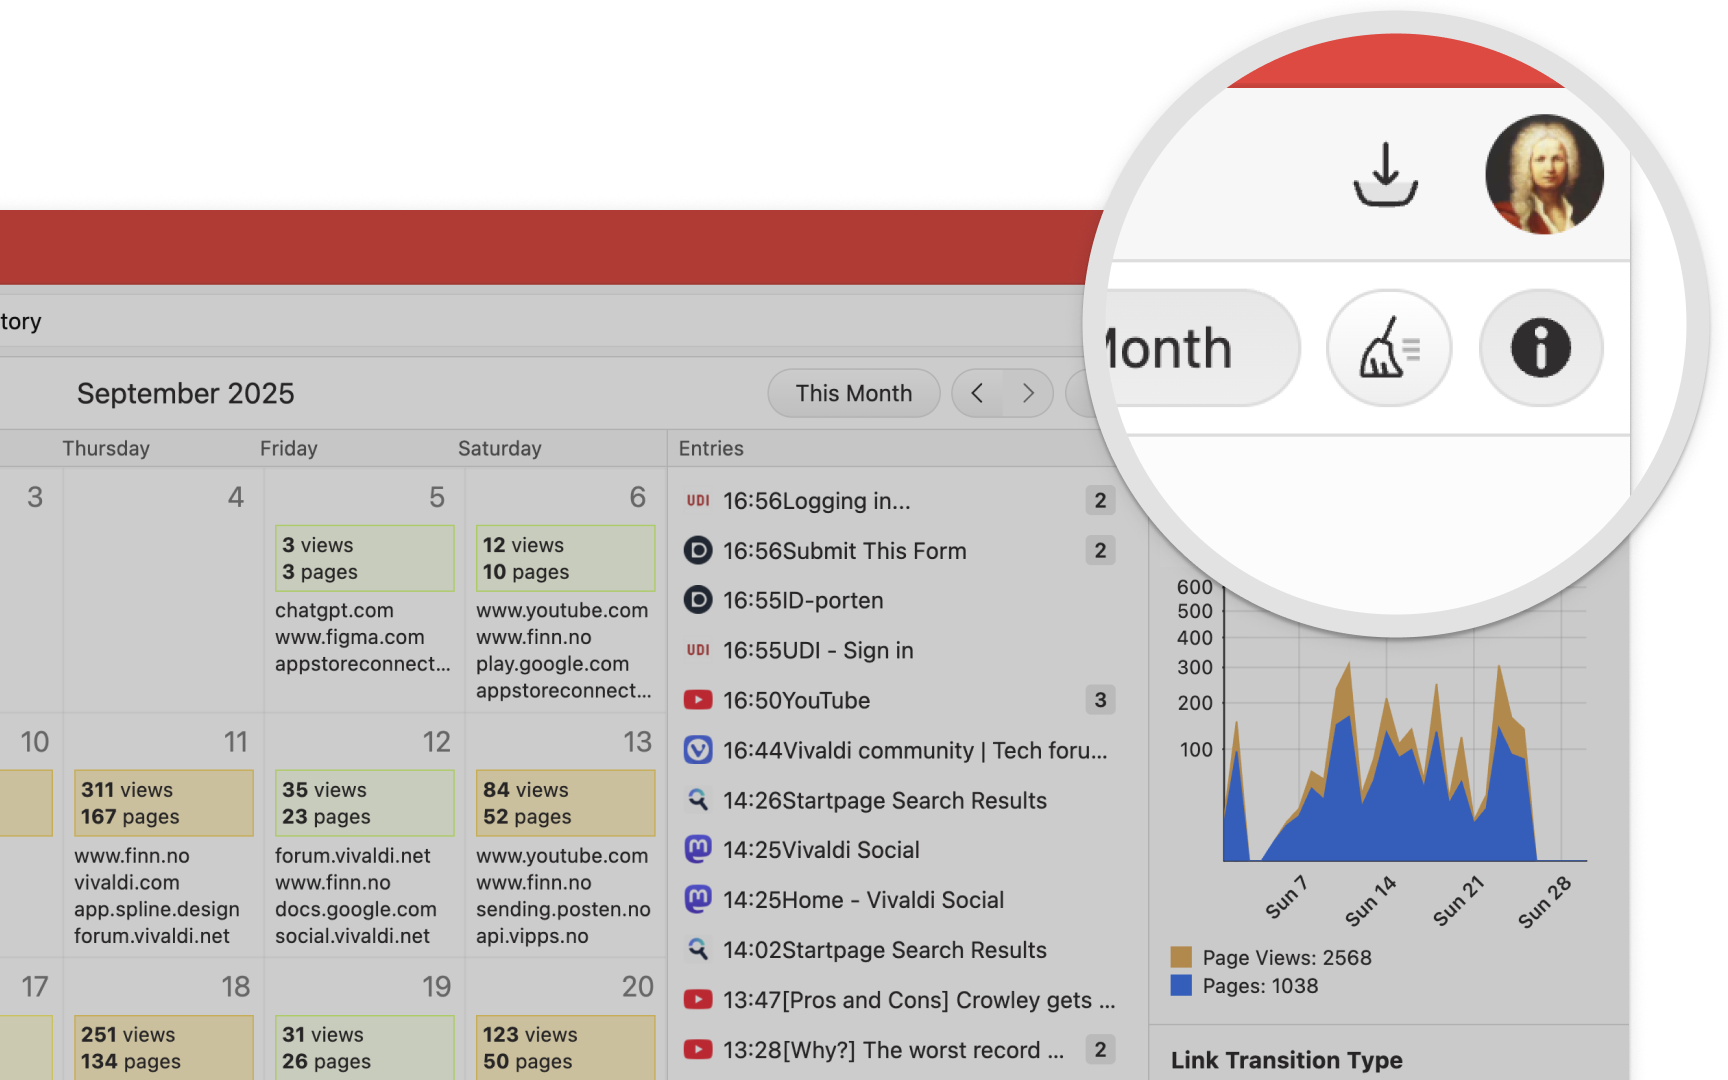
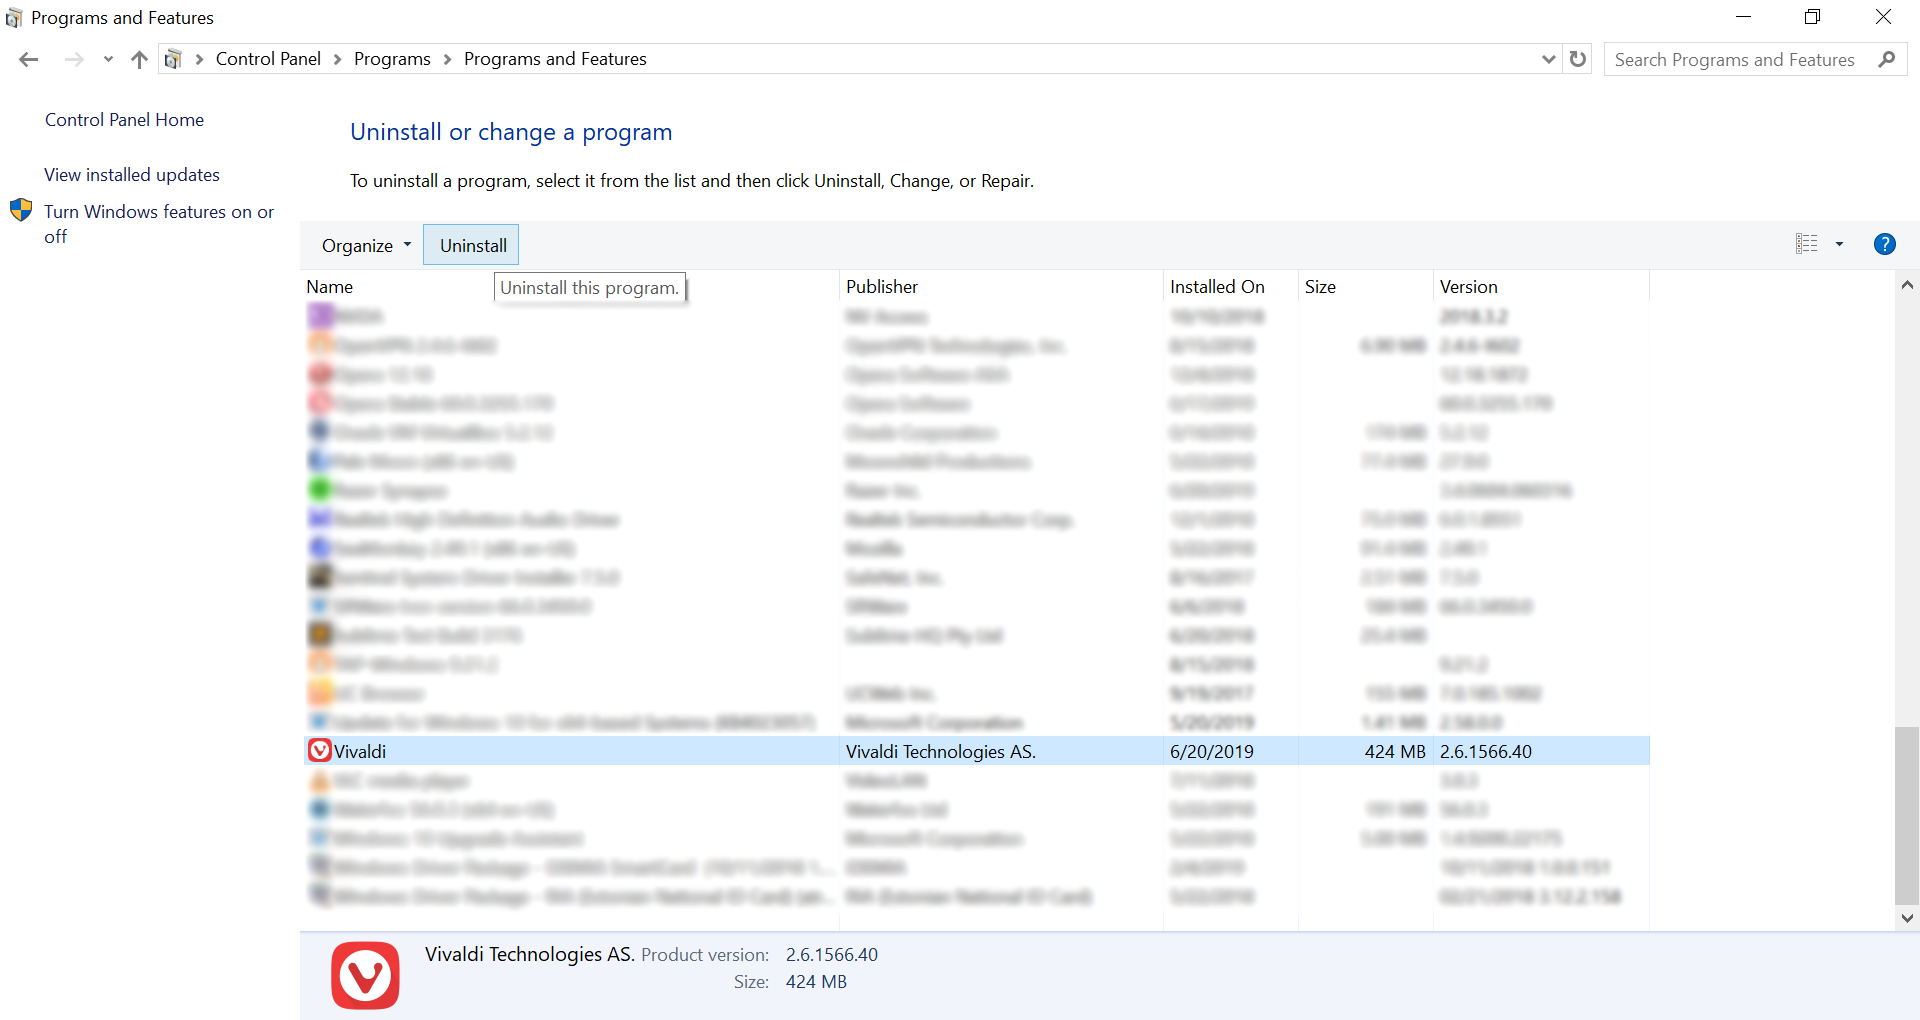 Older add/remove program Windows UI
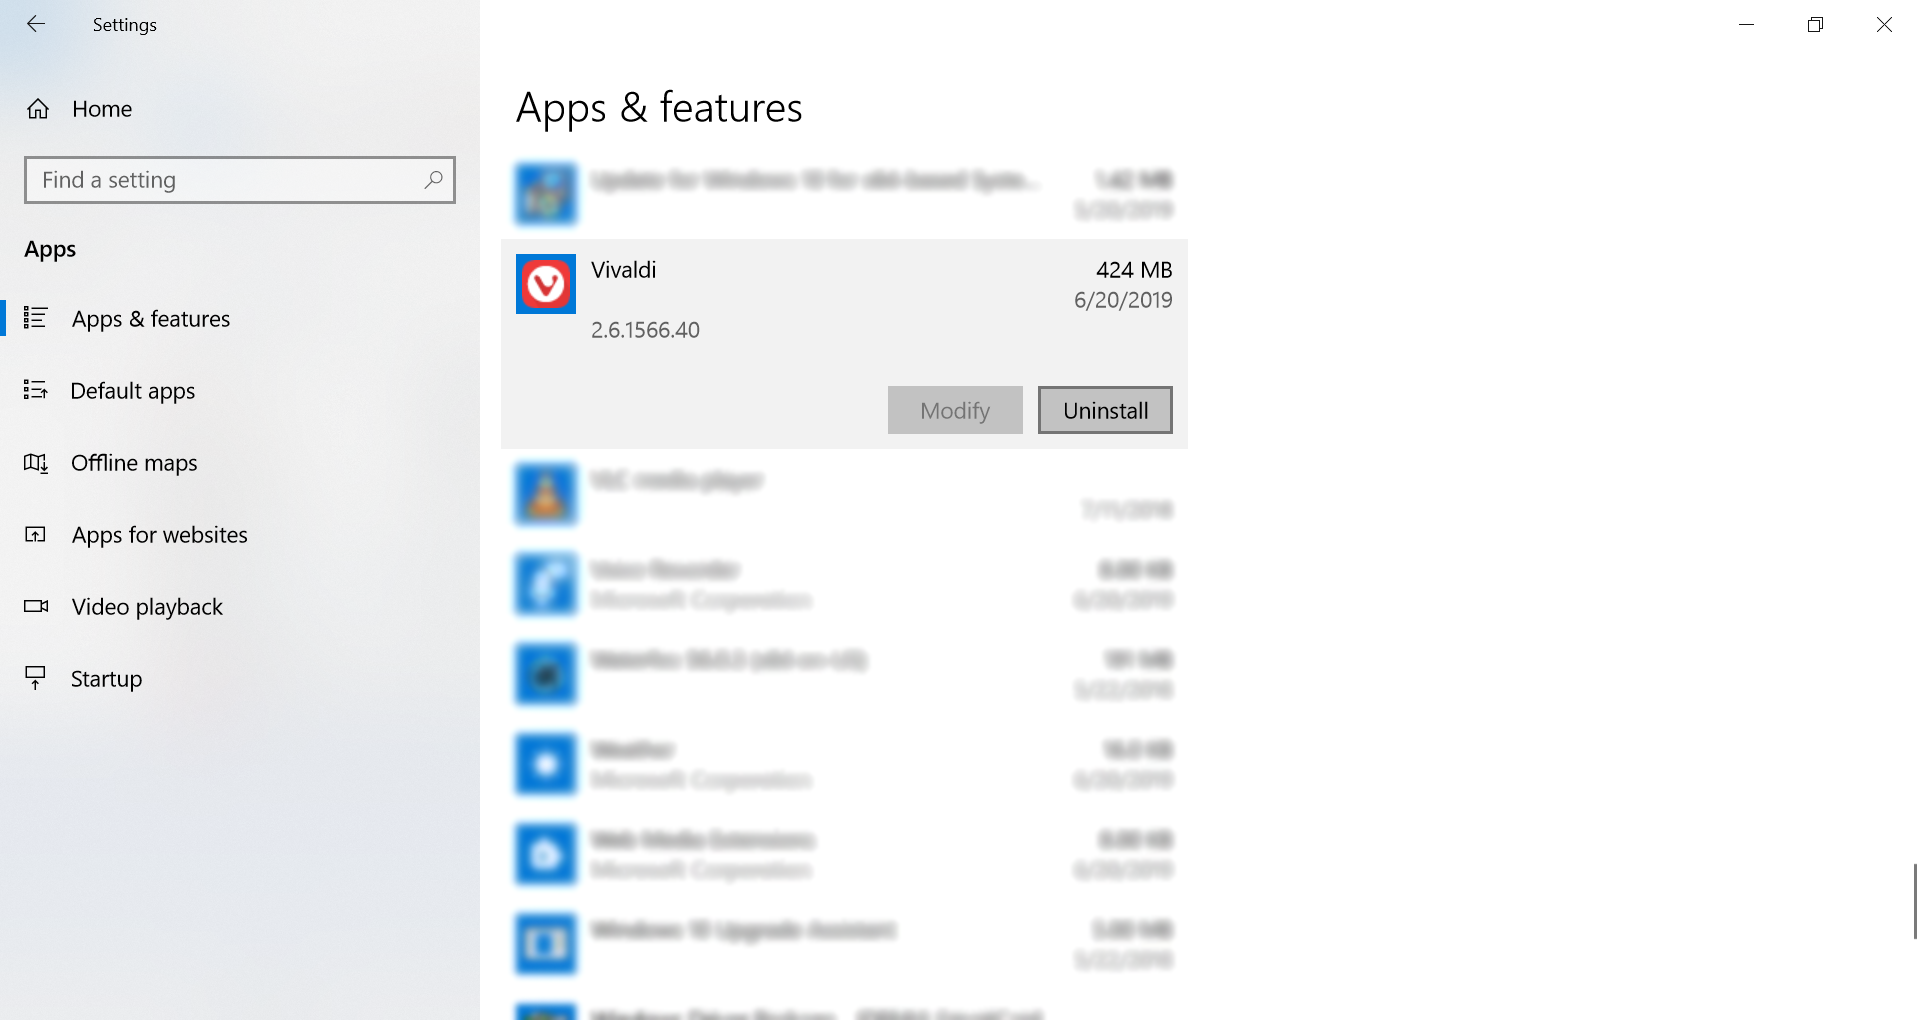 New add/remove programs UI in Windows 10.

 and
and  at the top of the Web Panel to zoom in and out.