Check Mail status for latest messages, accounts connection status’ and logs.
Check Calendar status for upcoming events, accounts’ connection status’ and logs.
See the current status of the web page. For example: “Processing request”, “Waiting for”, “Connecting”, “Establishing secure connection”. If you hover over links on web pages, the URL behind the link will be displayed on the Status Bar.
Take a screenshot of the web page with page Capture.
View multiple tabs side by side in the same window with Tab Tiling.
Choose whether images are to be visible in web pages or not or if only cached images are to be shown. Also, decide whether to loop animations, play them just once or never.
Set the Page Zoom by using the Page zoom slider. Switch to range buttons in Settings > Appearance > Window Appearance > Use Buttons in Range Controls.
Start countdowns, set alarms or just check the time from the Status Bar Clock.
Customise the Status Bar
To move buttons on the Status Bar, hold down the Ctrl / ⌘ key and drag the button to a different location. Alternatively, open the Toolbar Editor and rearrange, add and remove buttons without using the modifier key then.
All buttons on the Status Bar can be removed by right clicking on the button > Edit > Remove From Toolbar.
To reset the changes right click on a button > Edit > Reset Toolbar to Default. In case you’ve removed all of the buttons, go to Settings > Appearance > Window Appearance > Toolbar Customization > Reset Status Bar.
Hide the Status Bar
To hide the Status Bar or display it again:
Go to Settings > Appearance > Status Bar to decide whether to:
The placement and appearance of Toolbars can be customised in Vivaldi. User Interface Zoom allows you to alter the size of Toolbars. The position of the Address Bar and Bookmarks Bar within the UI can also be customised by adjusting settings within their respective sections in Settings.
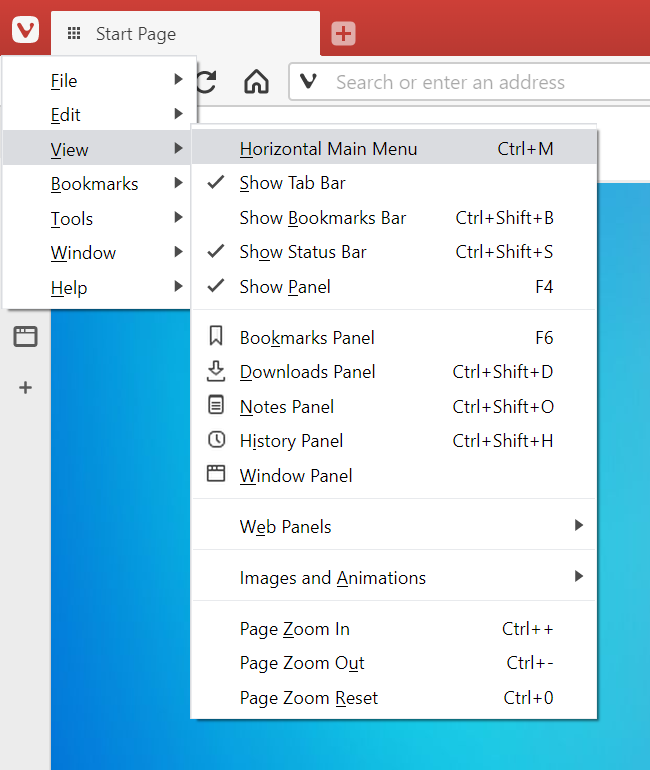
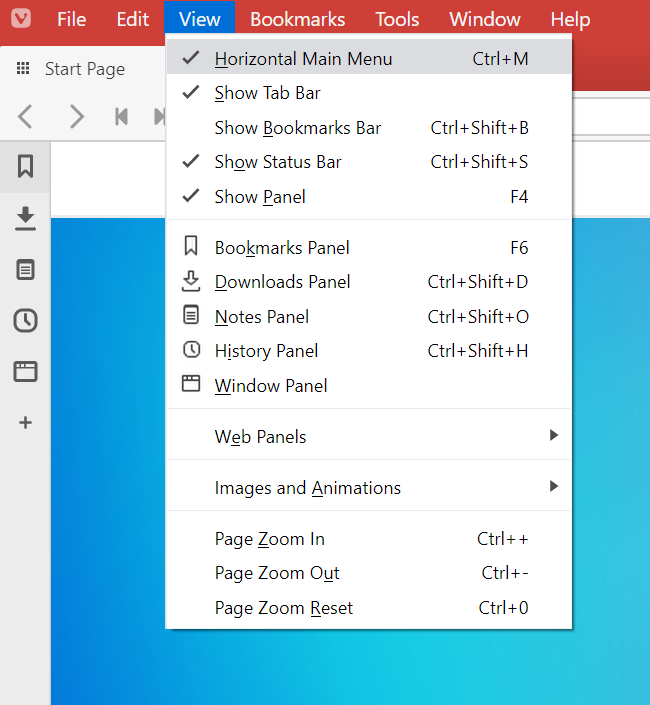
Many important Vivaldi functions are available from the application menu.
Customize the menu appearance
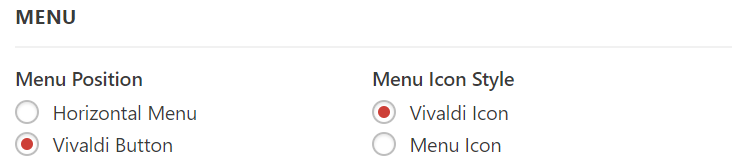
Menu Position
Windows and Linux users can set the menu to either appear as a Vivaldi menu button or as a horizontal menu across the top of the window. Go to Settings > Appearance > Menu > Menu Position. Next to it you can also choose the menu icon style.
Since Vivaldi 6.7 the main menu as well as context and other menus have gotten a design update leaving more space between menu items.
We depend on our community for feedback and like to hear from all our users. One way to let us know what you think is by commenting on blog posts published on vivaldi.com. Here’s what you need to know about that.
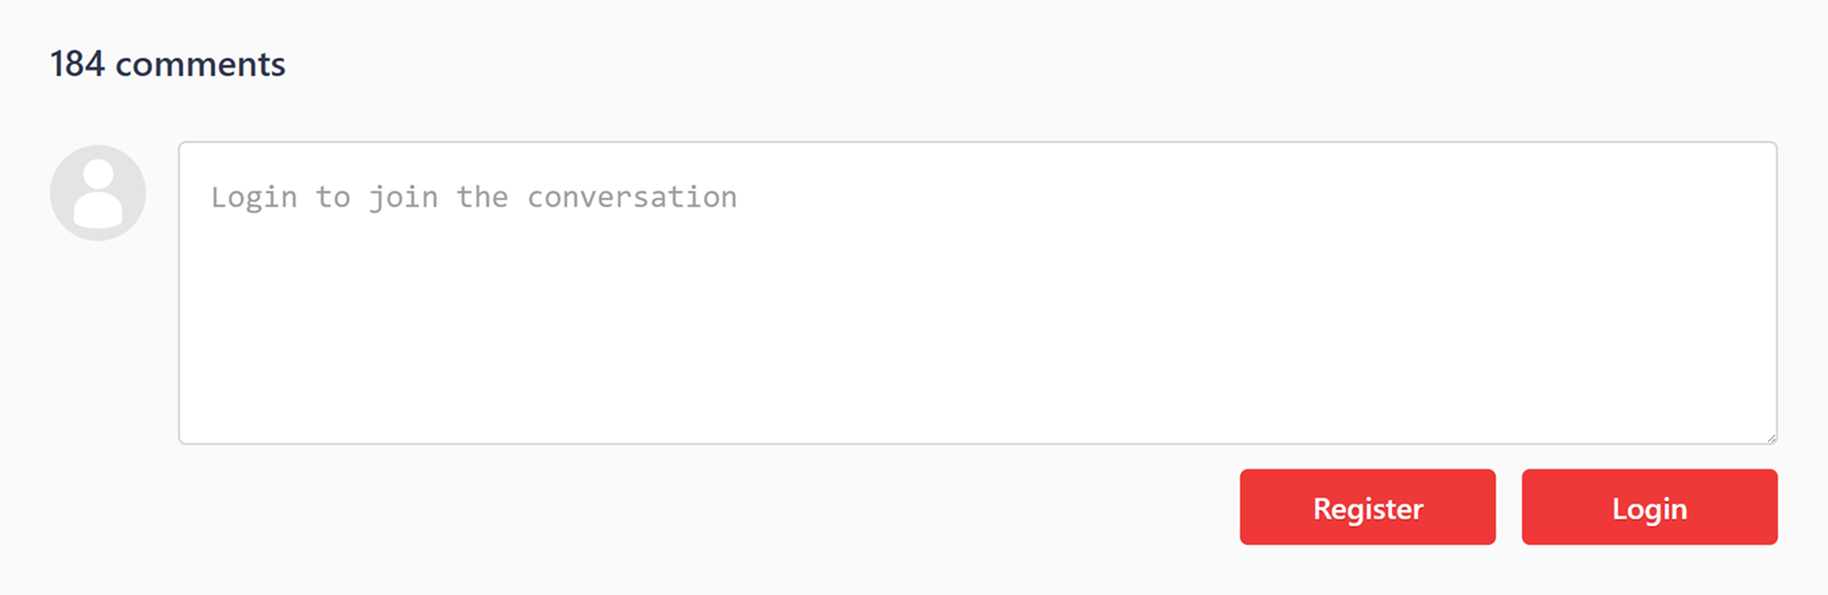
To comment on the blog posts, you first need to have a Vivaldi account.
Scroll down to the end of the post and click on Login if you already have an account, or on Register if you need to sign up for one.
Enable third-party cookies or whitelist specific pages
If it appears that you are still not logged in under the blog post, first try refreshing the page. If this doesn’t help, check if you have third-party cookies blocked. Because comments are stored on vivaldi.net and blog posts on vivaldi.com, you need to enable vivaldi.net’s cookies on vivaldi.com in order to comment.
To enable all third-party cookies, go to Settings > Privacy and Security > Cookiesand opt either for allowing all third-party cookies in all windows or for blocking third-party cookies in the Private Windows.
If you do not wish to do that, you can create an exception for vivaldi.net. While you’re on the blog post page, open the Site Info menu from the left side of the Address Field. Select Cookies and site data and toggle the Third-Party Cookies option to Allowed.
If you’re using an extension to block cookies, whitelist Vivaldi in the extension.
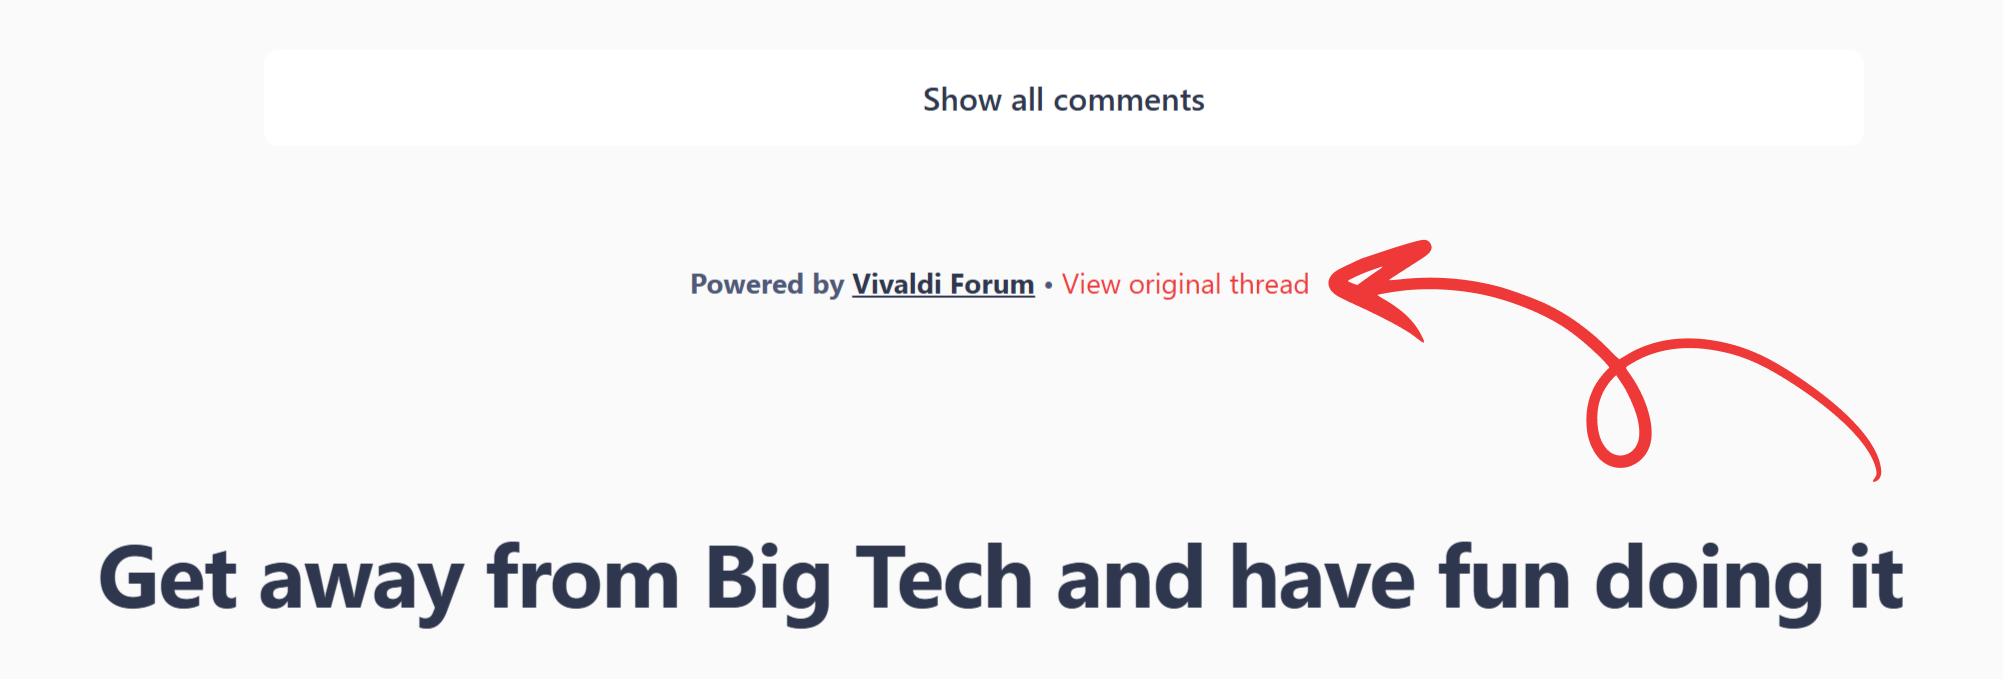
Alternatively, go to the Vivaldi Forum and leave a comment to the blog post there. You can find the shortcut link to the thread below the comments on the blog post’s page.
Direct Match is a feature that gives you faster access to certain websites by suggesting them directly in the Address Field, Search Field, or Speed Dial search. When there’s a match for what you’ve typed, Direct Match saves you the extra step of searching through your search engine, helping you get where you need to go with fewer clicks.
How does Direct Match work?
When you start typing a search term in the Address Field, Search Field, or Speed Dial search, Vivaldi checks a locally stored file to see if there’s a match. If it finds one, an item labeled “Direct Match” will appear in the drop-down, suggesting a website related to what you’ve typed. Clicking on the suggestion takes you straight to the site, skipping the search engine entirely.
What it does: Provides quick suggestions for websites from local data
How it benefits you: Reduces extra steps and gets you to your intended site faster
And like anything else in Vivaldi, you can customize the order in which items appear in the Address Field— so whether it’s Bookmarks, search suggestions, or Direct Match results, you can make it work exactly how you like from Settings > Address Bar > Address Field Suggestions.
Privacy aspects
We take your privacy seriously, and Direct Match is no exception.
No tracking: What you type stays private—it’s not tracked, stored, or sent to anyone, including us. So there’s no need to worry about data being used for profiling or anything like that.
Local data only: All the data used for matching is stored locally on your device, which means that nobody—us included—can track what you’re typing.
On our end, we don’t keep any permanent records of who clicked which link, and we don’t store any IP addresses. In some cases, clicking a suggestion might involve a third-party affiliate network, which could set cookies for correctly attributing revenue to the right party, like how all affiliate links work across the web.
Why should I click on these suggestions?
Direct Match is all about convenience. It helps you reach the websites you’re looking for more quickly, and at the same time, by clicking on these suggestions, you’re supporting Vivaldi’s ongoing development, allowing us to keep offering you a better browsing experience.
Disable Direct Match
If you decide that Direct Match isn’t for you, it’s easy to turn off. Just follow these simple steps:
View a list of websites you’ve visited in Vivaldi’s History Panel.
History Panel
Open the History Panel by tapping on the Panel button on the left side of the bottom toolbar and tap on the History option on the menu.
The websites will be listed chronologically in descending order (most recent first). Tap on the entry to visit the page again.
Searching History
To search for a history item, tap on the Search field and enter the search term.
Deleting History
To delete your browsing history:
Open the History Panel and tap on Clear Browsing Data in the bottom left corner. Alternatively, open Vivaldi menu > Settings > Privacy and security > Clear browsing data.
Pick a time range.
Make sure the option for Browsing History is ticked.
Tap Clear browsing Data.
To delete a single history entry:
Open the History Panel.
Long press on the entry you want to remove.
Select Delete from the context menu.
Use Search to filter out the visited pages you want to delete.
To search bookmarks, tap on the Search field above the list of bookmarks.
To open a bookmark in the active tab, just tap on it. To open a bookmark in a new tab or a private tab:
Long press on the bookmark.
Select Open in new tab or Open in Private from the context menu.
Add Bookmarks
There are multiple ways to add a new bookmark on Vivaldi Mobile.
Option 1
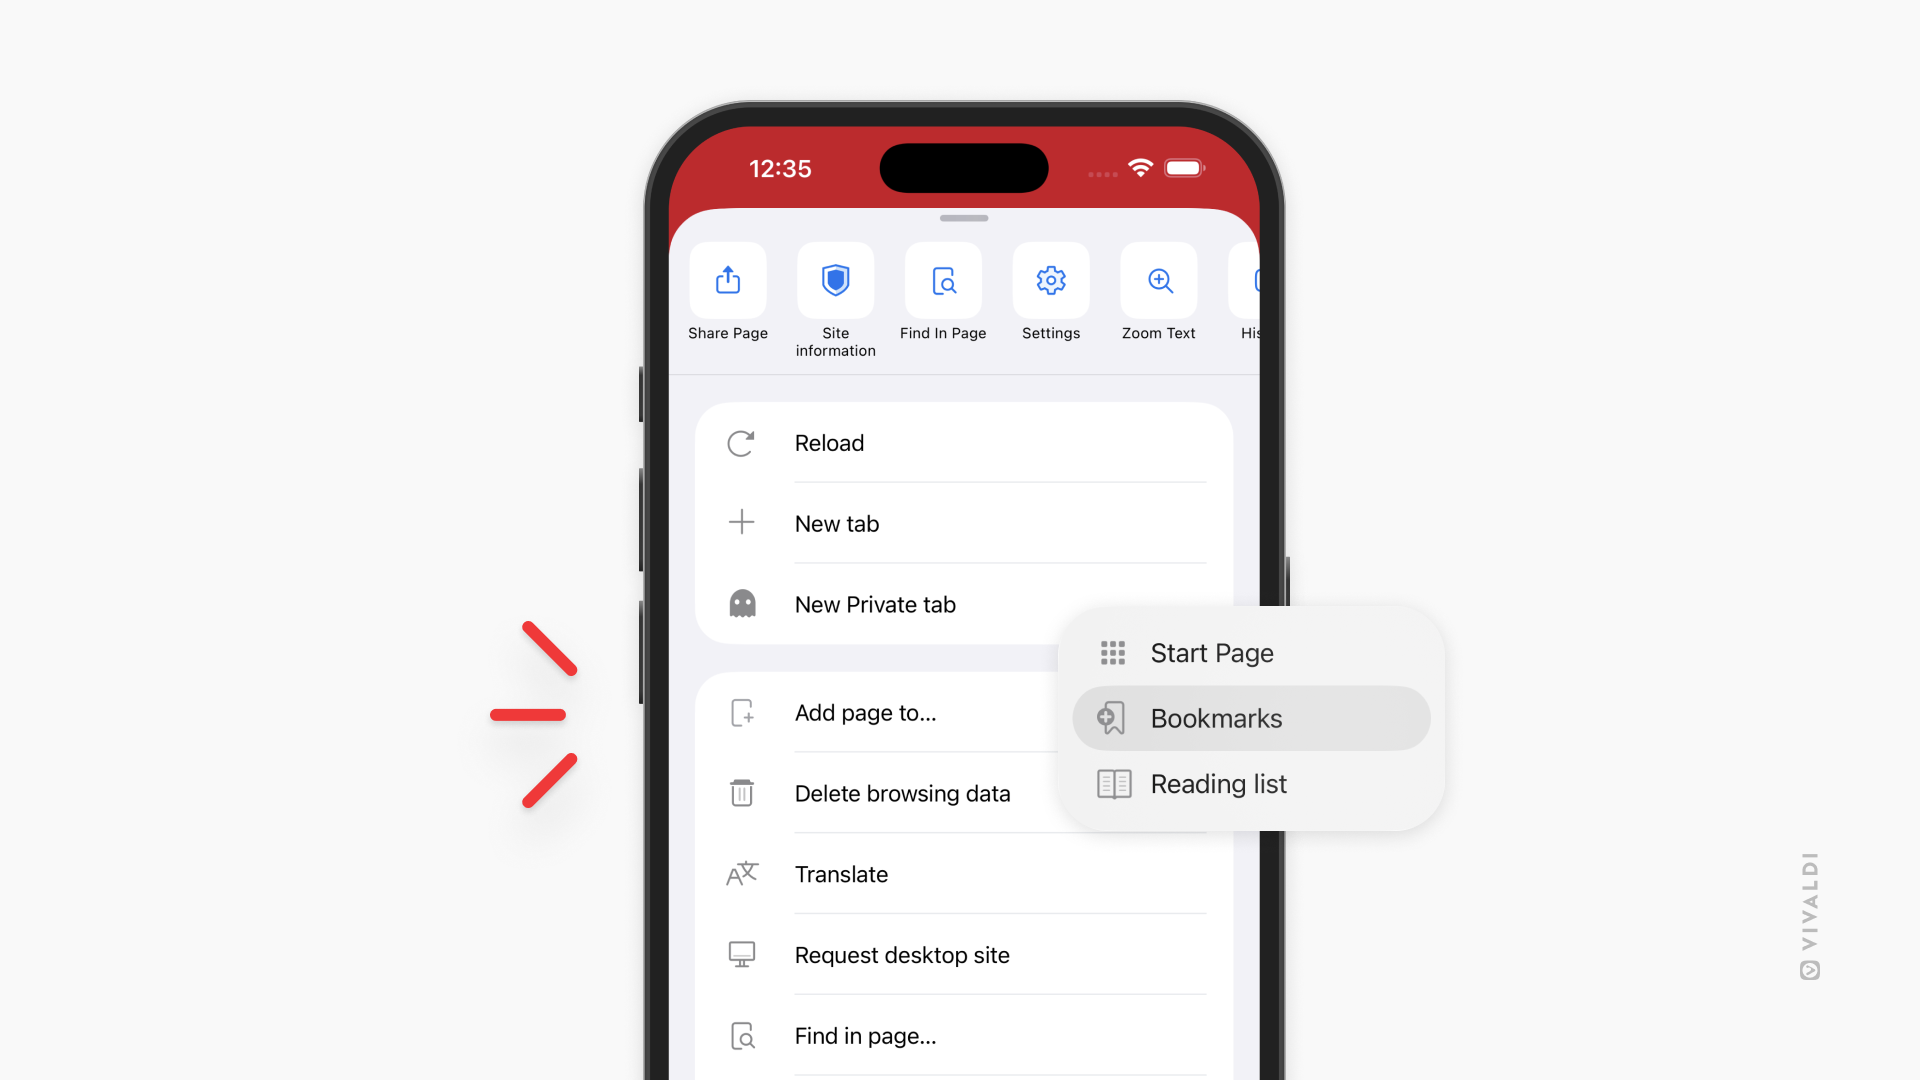
To add an open web page to your bookmarks, tap on the Vivaldi menu > Add Page to > Bookmarks. If you want the bookmark to show up as a Speed Dial on your Start Page, you can also select Add page to > Start Page.
You’ll get a notification at the bottom of the screen, telling you in which folder the bookmark was saved to. If you wish to change the folder, name, description, and/or nickname, tap on Edit.
Tap on the New Speed Dial button after your Speed Dials. Long press on the Add New Speed Dial button and select New Speed Dial Folder to add a new folder to the Speed Dial.
Enter at least the Name and URL of the new bookmark.
The bookmark will be saved to that Speed Dial folder.
Option 3
Open the Bookmarks Panel.
Go to the folder you want to add the new bookmark to.
Tap on Add Bookmark at the bottom of the panel, to add a new bookmark.
The new bookmark will be saved to the folder that’s currently open in the Bookmarks Panel.
Edit Bookmarks
To edit a single bookmark or a bookmark folder through the Bookmarks Panel:
To edit a bookmark that you have open in the active tab:
Go to the Vivaldi menu > Edit bookmark.
Make the changes.
Tap Done.
Sort Bookmarks
To change how bookmarks are sorted in the Bookmarks Panel:
Open the Bookmarks Panel.
Tap on the 3-dot menu in the bottom left corner.
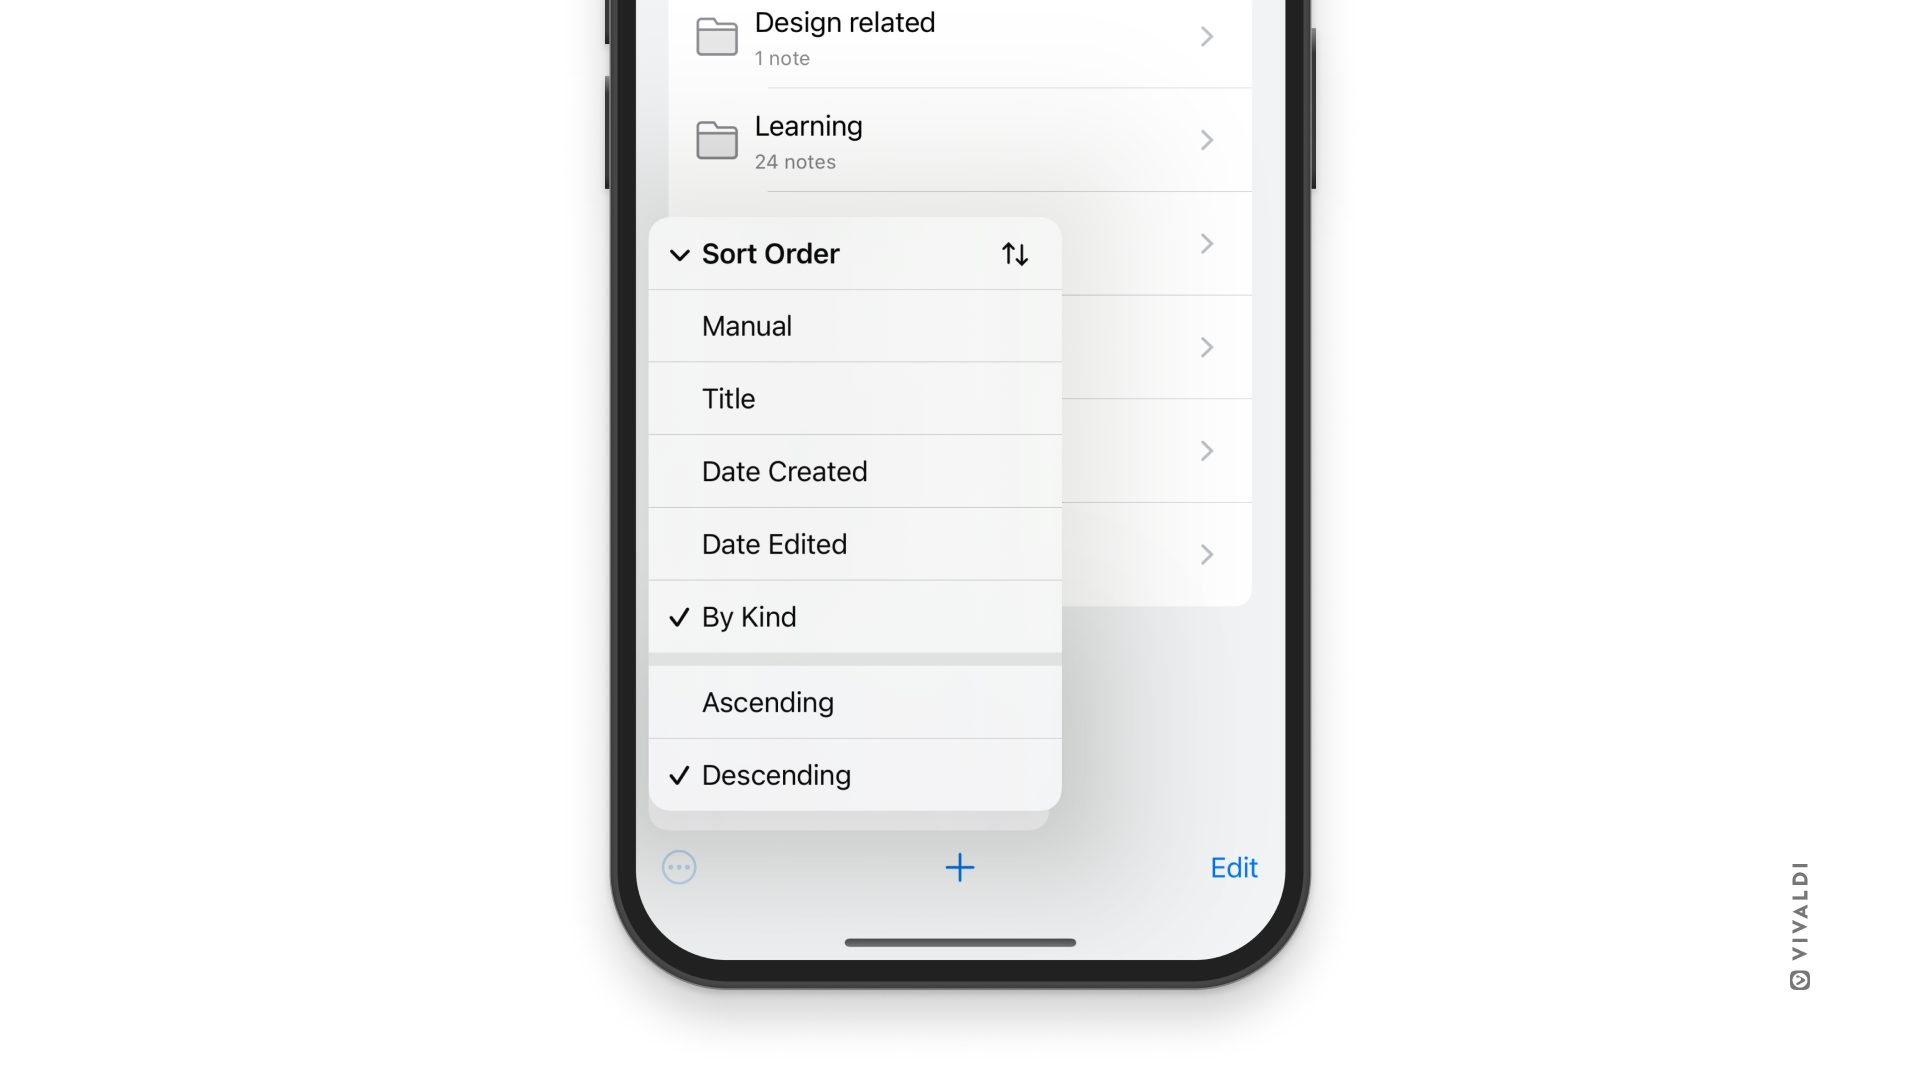
Select “Sort Order”.
Tap on the sorting criteria you want to use.
You can sort your bookmarks:
Manually
By Title
By Address
By Nickname
By Description
By Date
By Kind, which groups folders to the top/bottom and sorts the rest of the notes using the manual order.
In addition, you can choose to sort your bookmarks either in ascending or descending order.
To change how bookmarks are sorted on the Speed Dial:
Open a new tab with the Start Page.
Tap on the sort button in the top right corner.
Tap on the sorting criteria you want to use.
Reorder Bookmarks
To reorder bookmarks:
Open the Bookmarks Panel.
Tap on Edit in the bottom right corner.
Press on the Reorder button and drag the bookmarks one by one to their new location on the list of bookmarks.
Tap Done.
Bookmark folders
Create a folder
To create a new bookmark folder:
Open the Bookmarks Panel.
Tap on New Folder at the bottom left corner.
Give the folder a name.
If you wish, change its location and make the folder into a Speed Dial folder.
Tap Done.
Edit a folder
To update the name or move the folder:
Open the Bookmarks Panel.
Long press on the folder you want to edit.
Select Edit.
Make the changes.
Tap Done.
Bookmark Nicknames
Bookmark Nicknames allow you to open bookmarks faster from the Address Field. Instead of typing the URL you can just enter a short nickname to open the bookmarked web page.
To give a Bookmark a nickname:
Open the Bookmarks Panel.
Open the folder containing the bookmark you want to give a nickname to.
Long-press the bookmark.
Select Edit from the context menu.
Enter the nickname.
Tap Done to save the changes.
Sync Bookmarks
To access your desktop bookmarks on your phone and vice versa, use Sync with the same Vivaldi account both on your phone and desktop browsers.
Delete Bookmarks
To delete a bookmark:
Long press on the bookmark or bookmark folder in the Bookmarks Panel.
Select Delete from the context menu.
To delete multiple bookmarks:
Open the Bookmarks Panel.
Tap on Edit in the bottom right corner.
Tap on all the bookmarks you want to delete.
Tap Delete in the bottom left corner.
Tap Done.
To delete a Speed Dial bookmark:
Long press on the Speed Dial.
Select Delete from the context menu.
Restore deleted Bookmarks
When you delete a bookmark, it will be moved to a special folder, from where you can restore deleted bookmarks should the need arise.
To restore a bookmark:
Open the Bookmarks Panel.
Tap on the Back button in the top left corner to move out of the Bookmarks folder.
Open the Deleted folder.
Long press on the bookmark you want to restore.
Select Edit.
Change the location of the bookmark.
Tap Done.
Remove deleted Bookmarks
To empty the folder of deleted bookmarks, delete all bookmarks from the Deleted folder following the instructions for deleting bookmarks above.
Speed Dials
To learn about Start Page bookmarks, and Speed Dials, on iOS, check out the Help Page here.
Import bookmarks
To import bookmarks from a Vivaldi on another device, such as a desktop computer, use the Sync feature with the same account on both devices.
It’s unfortunately not possible to import bookmarks directly from another browser app on a mobile device. If you use the other browser also on desktop and have synced the data, you can import the bookmarks from the source browser to Vivaldi on desktop and then Sync them with your mobile device.

 Show or hide Panel bar. Ctrl + click to toggle on/off floating panel.
 Turn Break Mode on/off.
 Shortcut to Sync.
 Check Mail status for latest messages, accounts connection status’ and logs.
 Check Calendar status for upcoming events, accounts’ connection status’ and logs.
 Take a screenshot of the web page with page Capture.
 View multiple tabs side by side in the same window with Tab Tiling.
 Choose whether images are to be visible in web pages or not or if only cached images are to be shown. Also, decide whether to loop animations, play them just once or never.
 Page actions provides web-page specific features.
 Vivaldi Menu > View > Show Status Bar.

 3-dot menu in the bottom left corner.