When a website has paginated content, instead of scrolling to the bottom of the page and clicking on the next page button on the web page, you can click on the Fast Forward button on the Address Bar to load the next page.
Fast Forward works, for example, on Search Engines‘ search results pages, forum topic lists pages, online (shopping) catalogues, etc.
Alternatively, you can use the Space key. Pressing Space on your keyboard will move you down the page bit by bit and once you’ve reached the end of the page, it’ll load the next page.
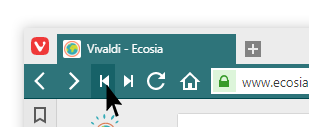
Rewind
Go back in one click to the first page if you’ve browsed several pages on a same website.
For example, if you visit a Search Engine site such as DuckDuckGo or Ecosia and search for something. You look for it on Page 1, then Page 2 and then Page 3, etc. Let’s say you are on Page 5, by hitting Rewind button, you can return straight back to Page 1 in a single click.
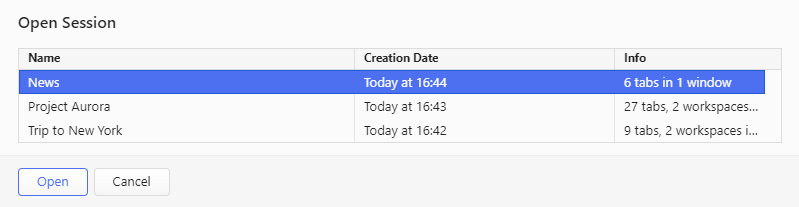
Vivaldi allows you to save your current open tabs as a named “session” and access them again later. This allows you to open the set of tabs included in a session with one click whenever you need or when the browser starts.
Saving a session
To save all open tabs in either one or multiple windows as a session, either:
Open the Vivaldi menu > File > Save Open Tabs as a Session.
Drag the Downloads button to your preferred location on the Address Bar or Status Bar.
Then you can access and manage your downloads from a popup. All features from the Downloads Panel are also available in the Downloads Popup.
Organizing downloaded files
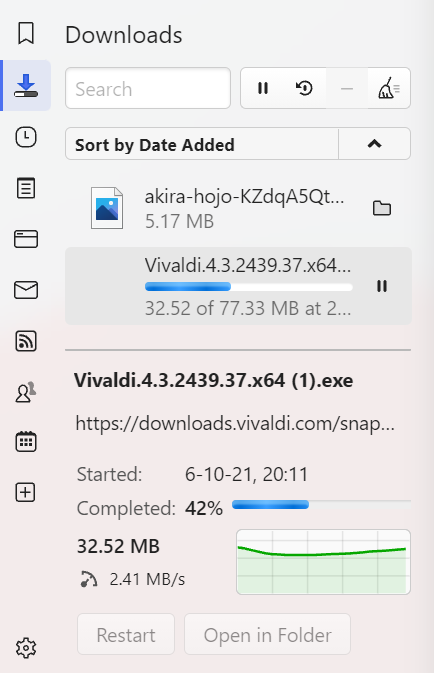
All downloaded files by default are listed chronologically with file name and size.
Find the newest downloaded file at the bottom of the list in the panel.
Search for any previously downloaded file in the search field at the top panel toolbar.
All downloads can be sorted by name, type, size, date added, date finished and by address.
The clickable arrow indicates whether the sorting order is ascending or descending.
Resume a paused download
Select the unfinished downloaded file in the list.
Resume the download using one of these options:
Click on the Resume button located next to the search input field.
Click on the Resume button in the download information section at the bottom of the panel.
Right-click on the download and select Resume download from the context menu.
Restart a download
To download a file again, you can restart the same download you’ve already saved. To do that:
Select the downloaded file.
Restart the download using one of these options:
Click on the Restart button located next to the search input field.
Click on the Restart button in the download information section at the bottom of the panel.
Right-click on the download and select Restart from the context menu.
Managing downloads
Stop a file download in progress
Resume selected download
Remove selected download
Clear list of inactive downloads
Restart the selected download
Accessing downloaded files
You can open the downloaded file by double-clicking on the item in the Downloads Panel or right-clicking on the item and selecting Open File/Open in… .
To open the file’s location, click on Show in File Manager/Show in Finder on the right of the file title or right-click on the file listing and select Show in File Manager/Show in Finder.
If you need to attach a recently downloaded file on a web page, copy it to Desktop, or move it elsewhere on your computer, you don’t need to dig through your file manager to locate the file. Instead, you can just grab it from the Downloads Panel or Popup in Vivaldi.
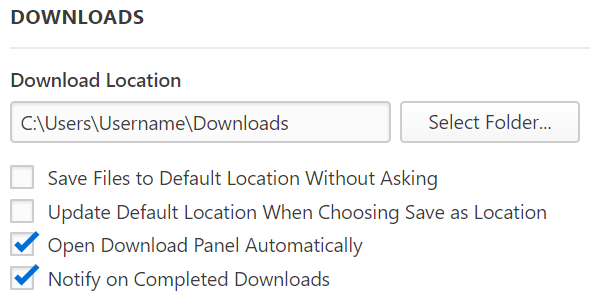
In case you collect all your downloaded files in the same folder, tick the box for Save Files to Default Location Without Asking to save files automatically.
If you tick the box for Update Default Location When Choosing Save as Location, the default location will be updated every time you choose a new folder in the Save As window.
Take notes, adding a description and even screenshots to the notes while surfing the web with the Vivaldi browser. Add your thoughts and ideas to any sites you visit using Vivaldi Notes.
View Notes
Find and edit your notes from the Notes Panel located on the side of the browser window. You can also use Keyboard Shortcuts (Ctrl+Shift+O / ⌥ ⌘ N). For a full window notes editor open the Notes Manager.
Create a new Note
To write a new note, click on the New Note button at the top of the Panel. Everything you type will be saved automatically.
Copy to Note
To create a note with text on a web page:
Select the text on the page.
Right-click on the highlighted text.
Select Add to Note > Add to New Note from the context menu.
The note will be added with the marked text as body, the webpage link, the creation date, and a screenshot of the page with the highlighted text.
Append to Note
While Copy to Note creates a new note with the text you’ve selected on a web page, Append to Note will add the text to an existing note of your choice.
To add text to a note:
Option 1
Select the text.
Right-click on the highlighted text and select Add to Note > Append to Note from the context menu.
Add an image either from a webpage or from a file on your computer.
Add a webpage link to the note.
Organize Notes
Notes can be sorted:
Manually,
by Title,
by Address,
by Content,
by Date Created.
Notes can also be divided into folders. To create a new folder, click on the New Folder button on top of the Panel and give it a title.
Notes can be moved between folders by dragging the note to the new destination folder.
Insert Notes
Instead of opening the Notes Panel or Notes Manager, looking for the note and copying its contents, you can insert notes on web pages, in Vivaldi Mail and other places in the browser directly from the text field’s context menu.
To insert a note:
Right-click on the text input field.
Hover over Insert Note in the context menu.
Select the note you want to use.
Delete Notes
To delete a note or a notes folder, either select the note/folder and click on the Delete button on top of the Panel or right-click the note/folder and select Delete from the context menu.
Restoring deleted Notes
Drag the note out of the Trash and place it anywhere above.
Emptying Notes Trash
Right-click the Trash and select Empty trash.
Export and Import Notes
Exporting Notes
To export your notes:
Go to the Vivaldi menu > File > Export > Export Notes.
An extension is a small software program that can be installed to give added functionality to the Vivaldi browser. Extensions allow you to further customize and enhance your usage of the browser and range from social media tools to privacy-related features such as ad-blocking.
Extensions in Vivaldi
Although Vivaldi aims to provide as much built-in functionality as possible, many users further fine-tune the browsing experience using extensions.
Because Vivaldi is built using the Chromium web browser project, extensions available in the Chrome Web Store can also be installed in Vivaldi. In some instances, extensions built for the Chrome browser will behave differently when installed in Vivaldi, but for the most part, your favorite Chrome extensions will work just fine in Vivaldi.
In case an extension does not work as expected, please discuss the extension on our Forum, to see if the issue can be solved or if our Community members can suggest alternatives. Contacting the extension developers can help as well.
Click Add to Vivaldi to install the extension in Vivaldi.
If you don’t see the button Add to Vivaldi, go to Settings > Privacy and Security > Google Extensions and make sure the option Web Store has been enabled.
In case an extension isn’t available on the Chrome Web Store, you can upload them manually:
Go to the Extensions page from the Vivaldi Menu > Tools > Extensions..
Enable Developer mode from a toggle in the top right corner of the page.
Click Load unpacked on the new menu that appears.
Find the extension folder in your File Manager (if you have it as a .zip file, extract it first).
Click Select Folder to load the extension to Vivaldi.
Import Extensions
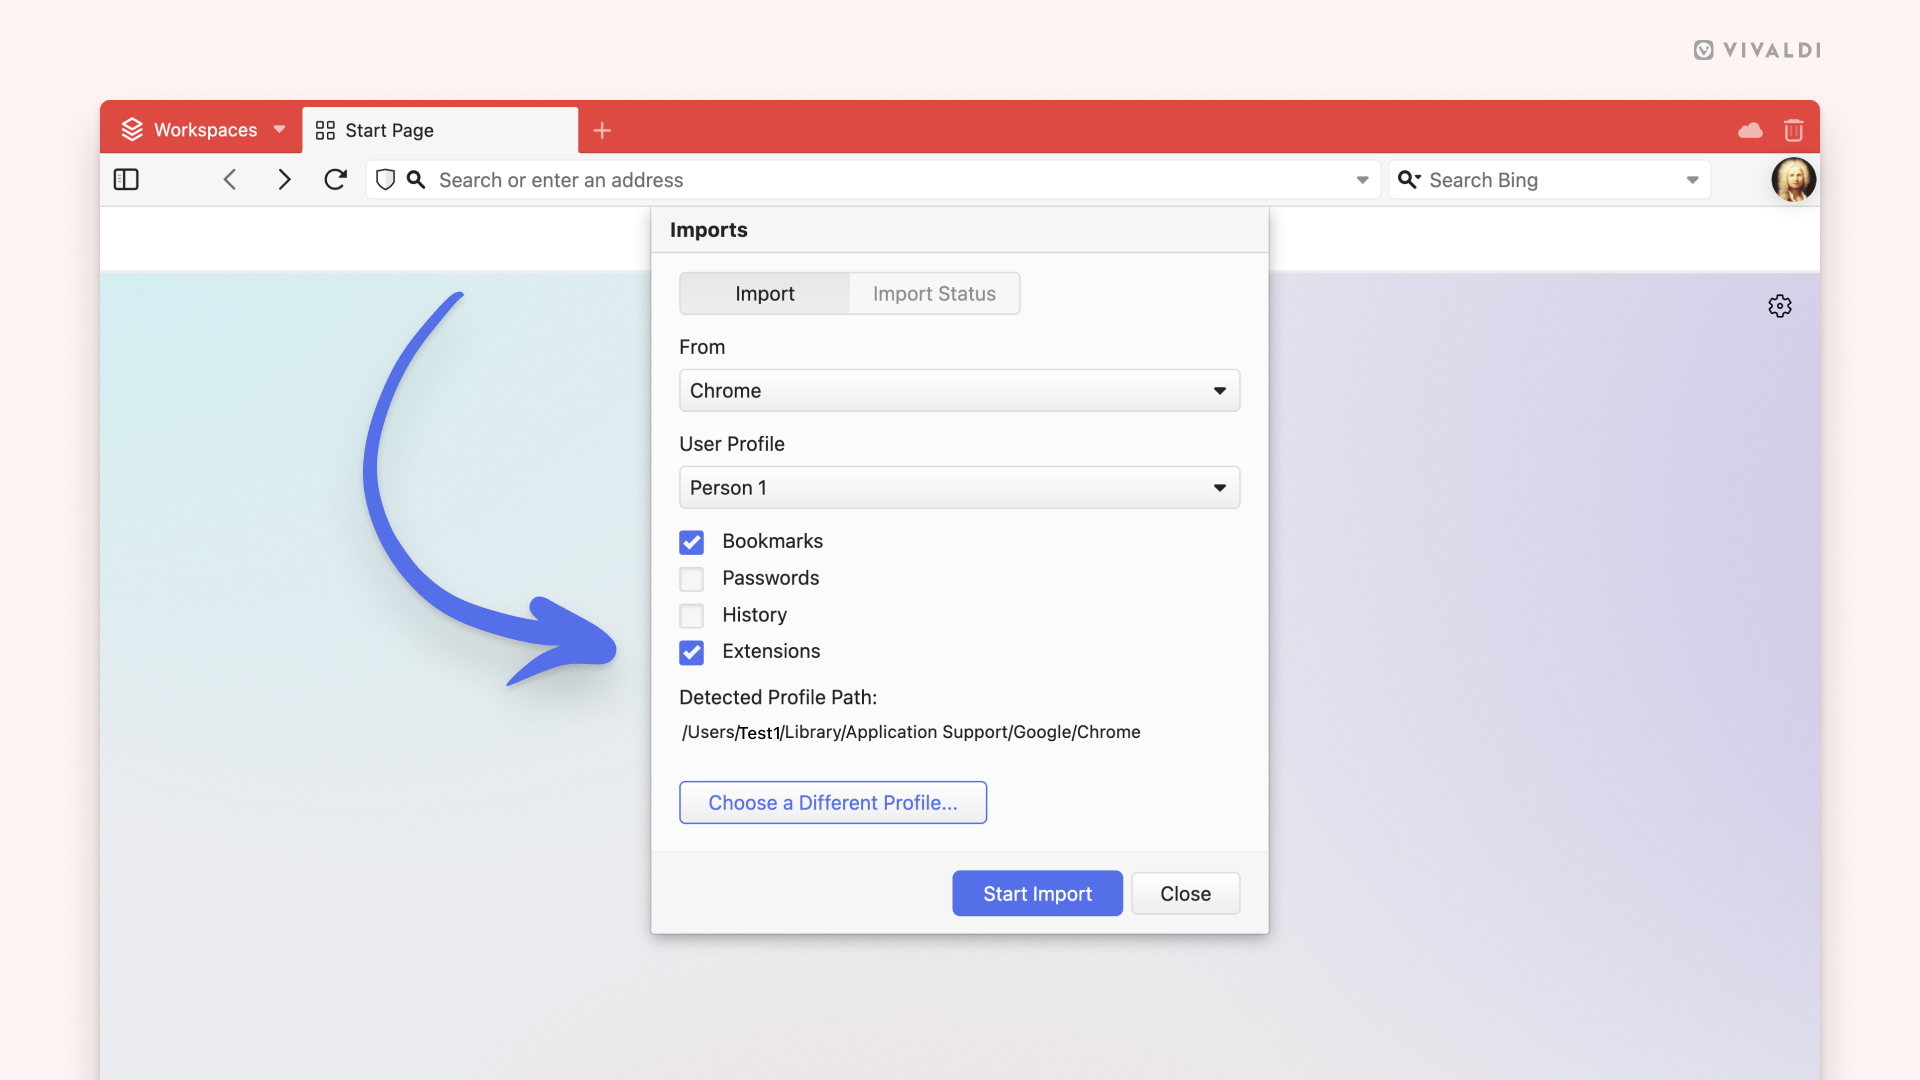
You can import Extensions to Vivaldi from other Chromium-based browsers, for example, Chrome, Edge, Opera, etc.
To import Extensions:
Make sure the browser you want to export from is closed.
Select the Chromium-based browser you want to import data from.
Click “Start Import”.
When the import has finished, click “Close”.
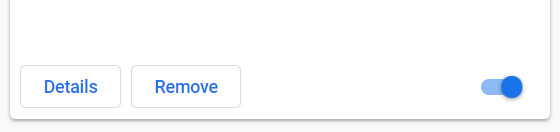
On the Extensions management page that opens, enable the extensions you want to use in Vivaldi by clicking the toggle button at the bottom right corner of each extension card.
Allow third-party extensions to control the Start Page
To have a custom Start Page page using an extension:
The Extensions page gives an overview of the extensions currently installed, the ability to disable or delete extensions and adjust extension-specific settings.
Access the Extensions page
To open the Extensions page, go to the Vivaldi Menu > Tools > Extensions.
Press Enter to open the extension’s popup or Ctrl + Enter / ⌘ Enter to open the extension’s options page (if the extension has one).
Change extension settings
Some Extensions have settings you can change. To check these options:
Right-click on the Extension on the Address Bar and select Options from the context menu.
Alternatively, click on Details > Extension Options on the Extensions page.
Update extensions
Extensions usually update automatically. To manually update extensions:
Go to the Extensions page.
Enable Developer mode from a toggle in the top right corner of the page.
Click Update on the new menu that appears.
Disable extensions
To disable an extension:
Open the Extensions page.
Click on the toggle button in the lower right corner of the extension card.
Disabling extensions is a good way to test whether an issue you’re encountering in the browser is caused by an Extension or not.
Remove extensions
To remove an extension:
Right-click on the Extension on the Address Bar and select Remove Extension from the context menu.
Alternatively, click Remove on the Extension page.
Confirm your decision by clicking Remove again in the confirmation dialog.
Hide extension buttons
To hide or show an extension, right-click on its button and select Hide Button/Show Button. Use the Show/Hide hidden extensions toggle button on the right to view hidden extensions. To view hidden extensions in a drop-down menu instead of expanding the Address Bar (compare the images below), go to Settings > Address Bar > Extension Visibility and tick the box for Expand Hidden Extensions to Drop-Down Menu.
Hidden Extensions on the Address BarHidden Extensions in a drop-down menu
Move extensions
By default, Extensions will be accessible from the right side of the Address Bar. If that location doesn’t suit you, you can move them to the Panels sidebar or Status Bar. Note that all extensions are grouped together and cannot be moved individually to different locations on the browser’s toolbars.
From its current location, drag the Extensions button to your preferred location.
Option 2
If you’ve hidden some extensions and see the Extensions button next to your visible extensions, you can move them without needing to open the Toolbar Editor.
Hold down the Ctrl/⌘* key.
Drag the Extensions button to your preferred location.
*On macOS, release the ⌘ key before you release the mouse button.
Reorder extensions
Enabled extensions often display a button. You can reorder these buttons among themselves by holding down the Ctrl/⌘* key and dragging and dropping them directly on the Address Bar.
*On macOS, release the ⌘ key before you release the mouse button.
Search and control everything in your browser from you keyboard by opening the Quick Commands menu, a command line style interface available in Vivaldi.
Mouse Gestures let you speed up navigation and perform useful actions with quick movements of the mouse. You can edit existing gestures and add your own to match your browsing style. Read on to find out more.
Enabling gestures
To enable and disable Mouse Gestures:
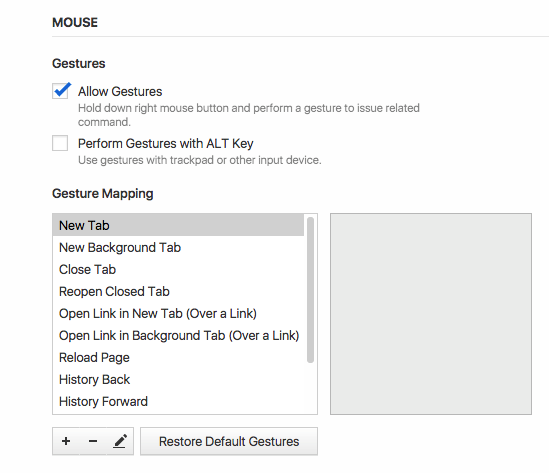
Go to Settings > Mouse > Gestures and tick the box for Allow Gestures;
Click and hold the right mouse button (or press and hold the ALT key).
Move the pointer to perform an action.
You can also perform gestures using other input devices, such as trackpads or touchpads. To enable gestures for these devices, tick the box for Perform Gestures with ALT Key in Settings.
Default gestures
To view default gestures, to Settings > Mouse > Gesture Mapping.
Making your own gesture
Go to Settings > Mouse > Gesture Mapping.
Click on the New Gesture button.
Pick a command from the drop-down menu or search for one by name.
Click Next.
Draw a new gesture in the highlighted area using primary button.
Click Save Gesture.
Editing gestures
Go to Settings > Mouse > Gesture Mapping.
Pick a gesture you want to edit.
Click on the Edit Gesture button.
Draw a new gesture and click Save Gesture.
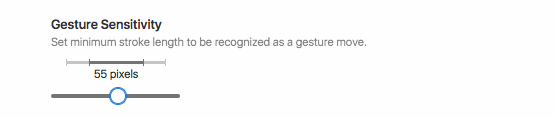
Gesture sensitivity
Go to Settings > Mouse > Gesture Sensitivity.
Move the slider to set a minimum stroke length to be recognised as a gesture.
Rocker gestures
Rocker Gestures are Mouse Gestures used to execute commands with the left and right mouse buttons. Learn more on the Help page about Rocker Gestures.
Most things can be done in Vivaldi with the keyboard alone, such as opening, closing and switching Tabs, toggling the visibility of UI elements and creating Notes.
Keyboard settings
Focus Cycling and UI Focus Control
The Tab key can be used to move from one element to the next on the open web page and browser user interface. In Settings, you can select whether pressing the Tab key should focus only on individual toolbars or web pages, or go through all browser’s toolbars and the web page.
In addition, you can choose whether pressing the Tab key focuses on all controls or only inputs, such as text fields.
Access Keys
Some web pages can be navigated with their own keyboard shortcuts. You can enable/disable the use of these shortcuts from Settings > Keyboard > Access Keys. Learn more about these shortcuts on the Help page about Webpage Access Key Shortcuts.
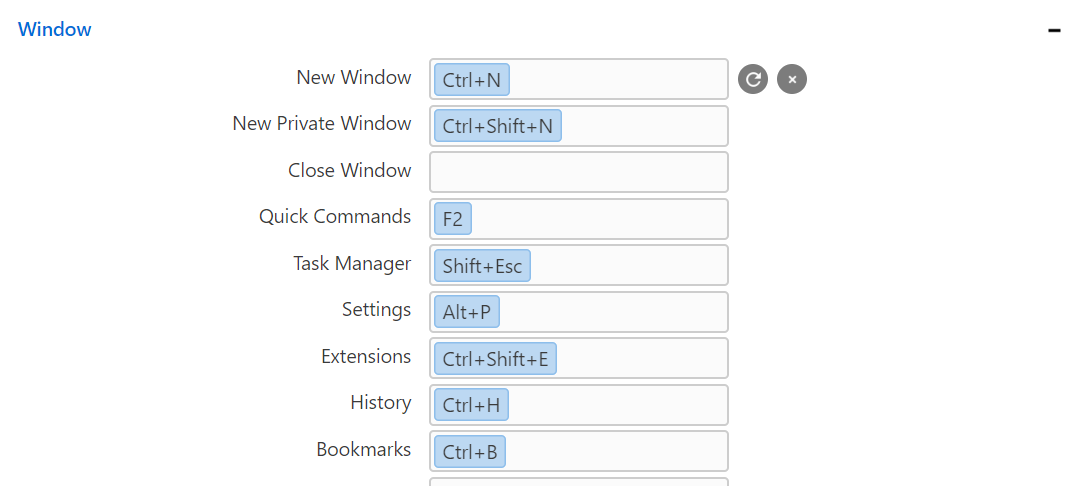
Keyboard Shortcut options
Keyboard Shortcuts are enabled by default. Should you wish to disable them, go to Settings > Keyboard > Keyboard Shortcuts and untick Enable Keyboard Shortcuts. There, you can also enable/disable the use of Single Key Shortcuts, both in general and specifically when using Mail and Calendar.
On websites with paginated content, for example, Search Engine‘s search results or recent posts on the Vivaldi Forum, you can press the Space key to move down on the page and once at the end of the page, load the next page, i.e. Fast Forward. You can disable that behavior in Keyboard Shortcuts settings.
Pressing the Alt key on your keyboard opens the Vivaldi Menu. If you don’t want that to happen, you can disable that behavior from Keyboard Shortcuts settings. Alternatively, you can use the Alt key for drawing Mouse Gestures on trackpads or other input devices. Enable it from Settings > Mouse > Gestures.
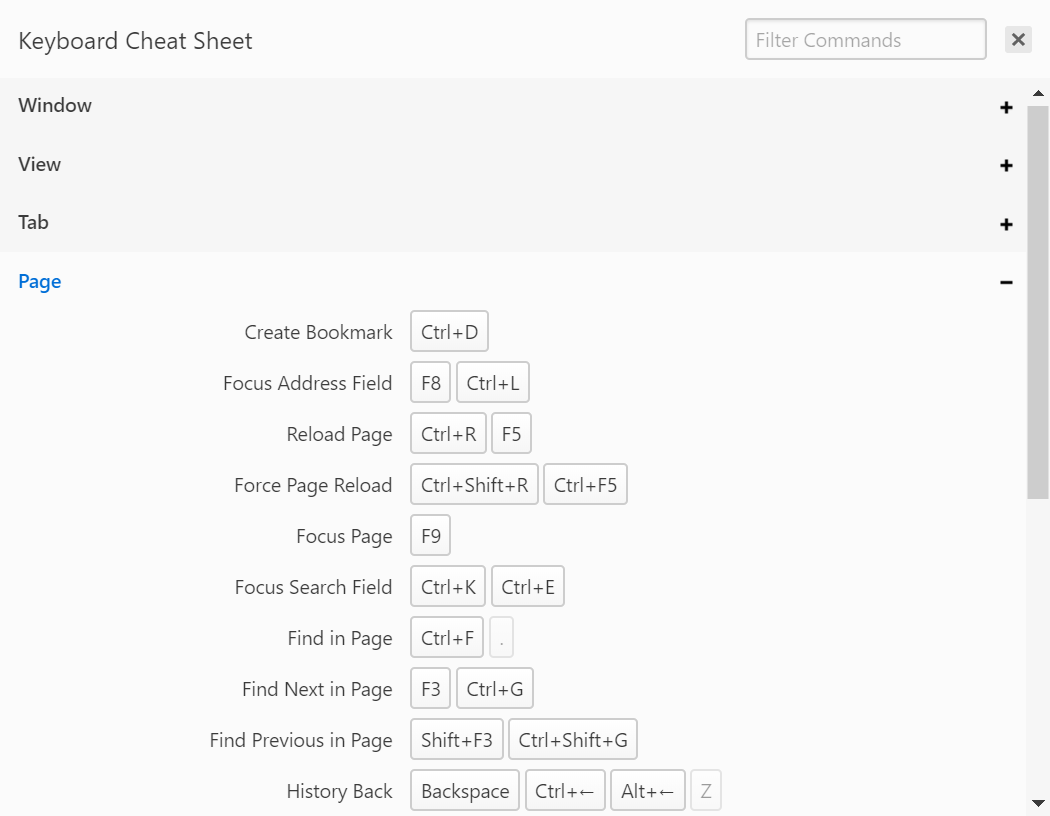
Viewing Keyboard Shortcuts
While browsing, use the keyboard shortcut Ctrl+F1 / ⌘ F1 to view a cheat sheet of all the available keyboard shortcuts.
Hover the mouse cursor over the shortcut and click the Clear Shortcut button to the right of the input field. Alternatively, click on the shortcut in the input field and press either Backspace or Delete.
Reset shortcuts
To reset a single keyboard shortcut, hover over the shortcut and click on Restore Default Shortcut.
To reset all shortcuts, click on Restore Default Keys at the bottom of the list of shortcuts.
Single Key Shortcuts
Learn more about shortcuts that consist of only one key on the Help page about Single Key Shortcuts.
Keyboard modifiers
There are many useful actions that can be done using the keyboard keys together with the mouse. Here’s a few:
Ctrl / ⌘ and a mouse click on a link will open the link in a new background Tab.
Shift and a mouse click will open the link in a new foreground Tab.
Ctrl / ⌘ + Shift and a click will open the link in a new Window.
Ctrl / ⌘ and a mouse scroll can be used to Zoom the page in or out.
Alt with a mouse scroll will display the Tab Cycler.
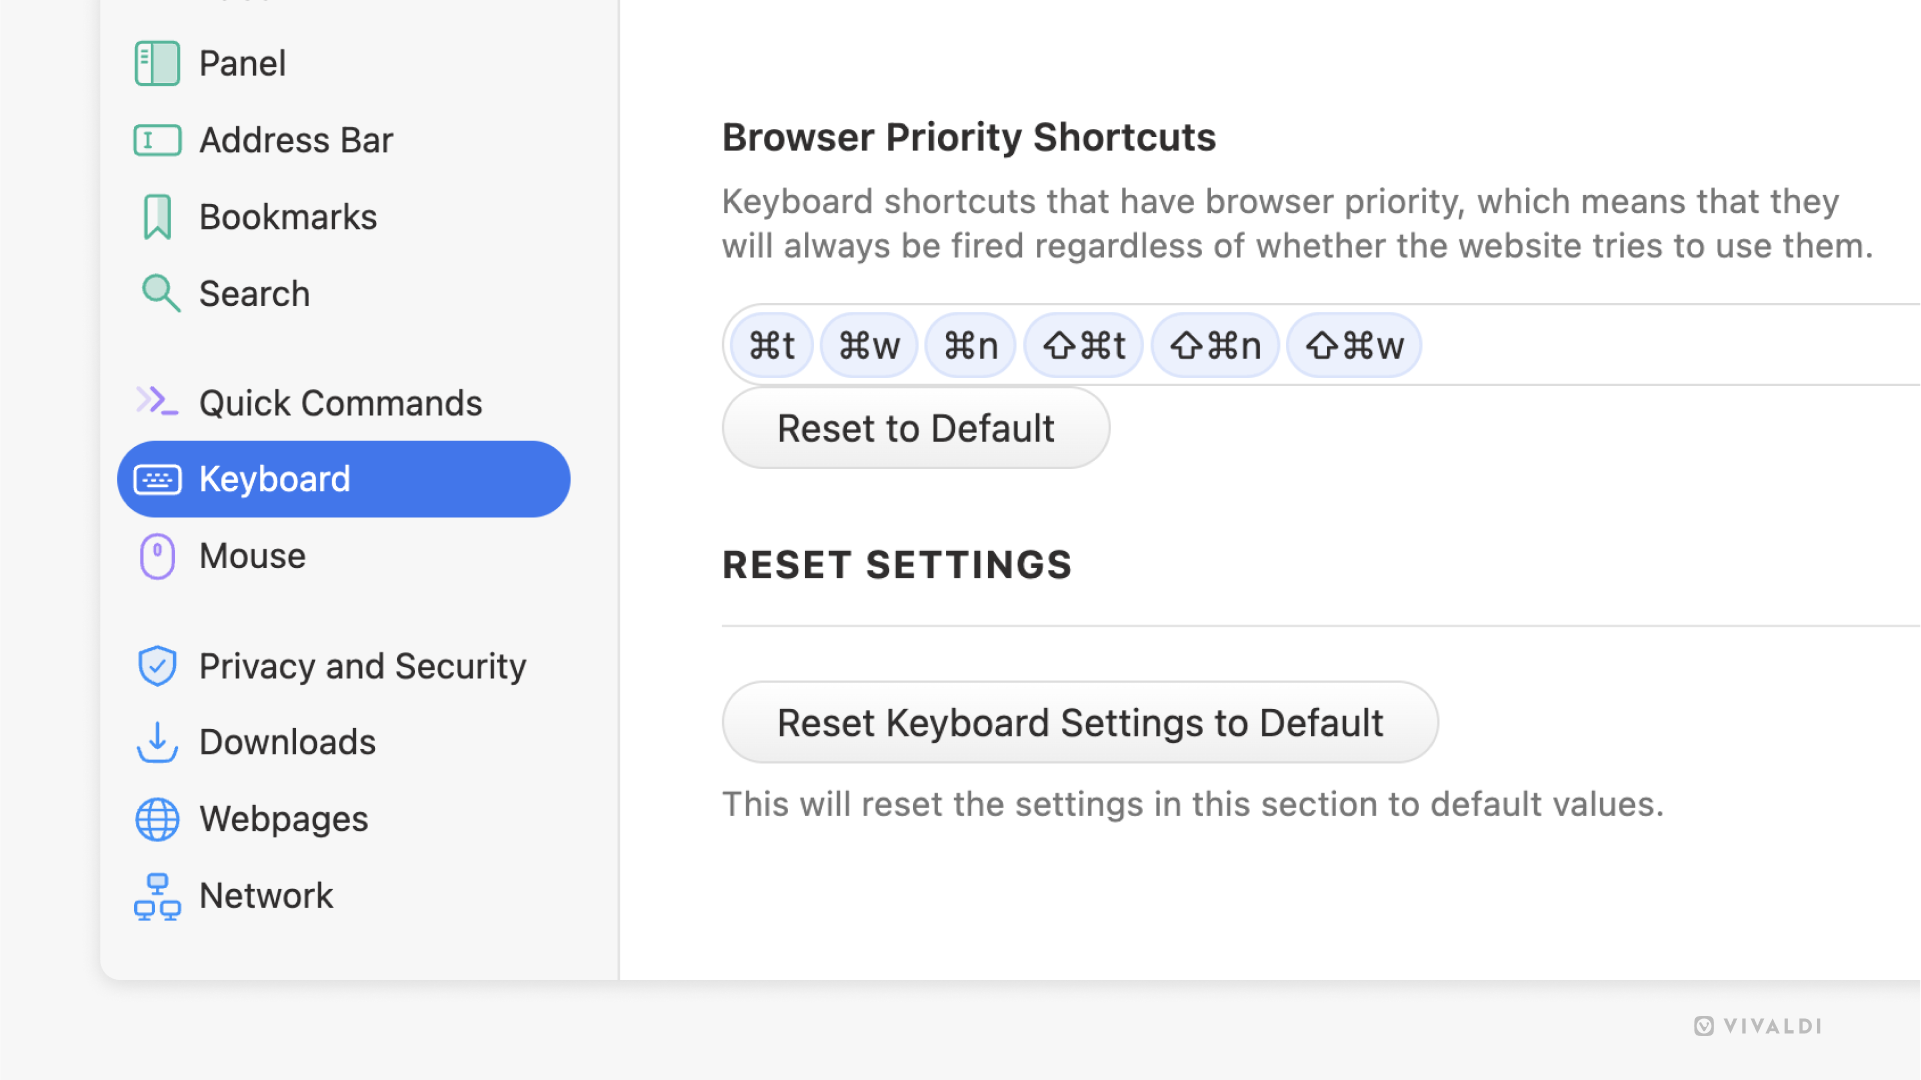
Browser Priority Shortcuts
In addition to the browser being controlled with Keyboard Shortcuts, web pages can have their own set of shortcuts which can sometimes overlap with the browser’s shortcuts. In that case, shortcuts will trigger actions on the web page.
To give browser priority over shortcuts:
Go to Settings > Keyboard > Browser Priority Shortcuts.
Add shortcuts that should trigger actions in the browser, even when the web page uses the same shortcut.
If the website isn’t already on the list of domains, click on Add New Domain at the bottom of the list of domains. Otherwise, select the domain and skip to step 5.
Enter the website’s URL you want to give different permissions from the global ones to.
Click Add Domain.
Change the setting for Prioritize Website Shortcuts.
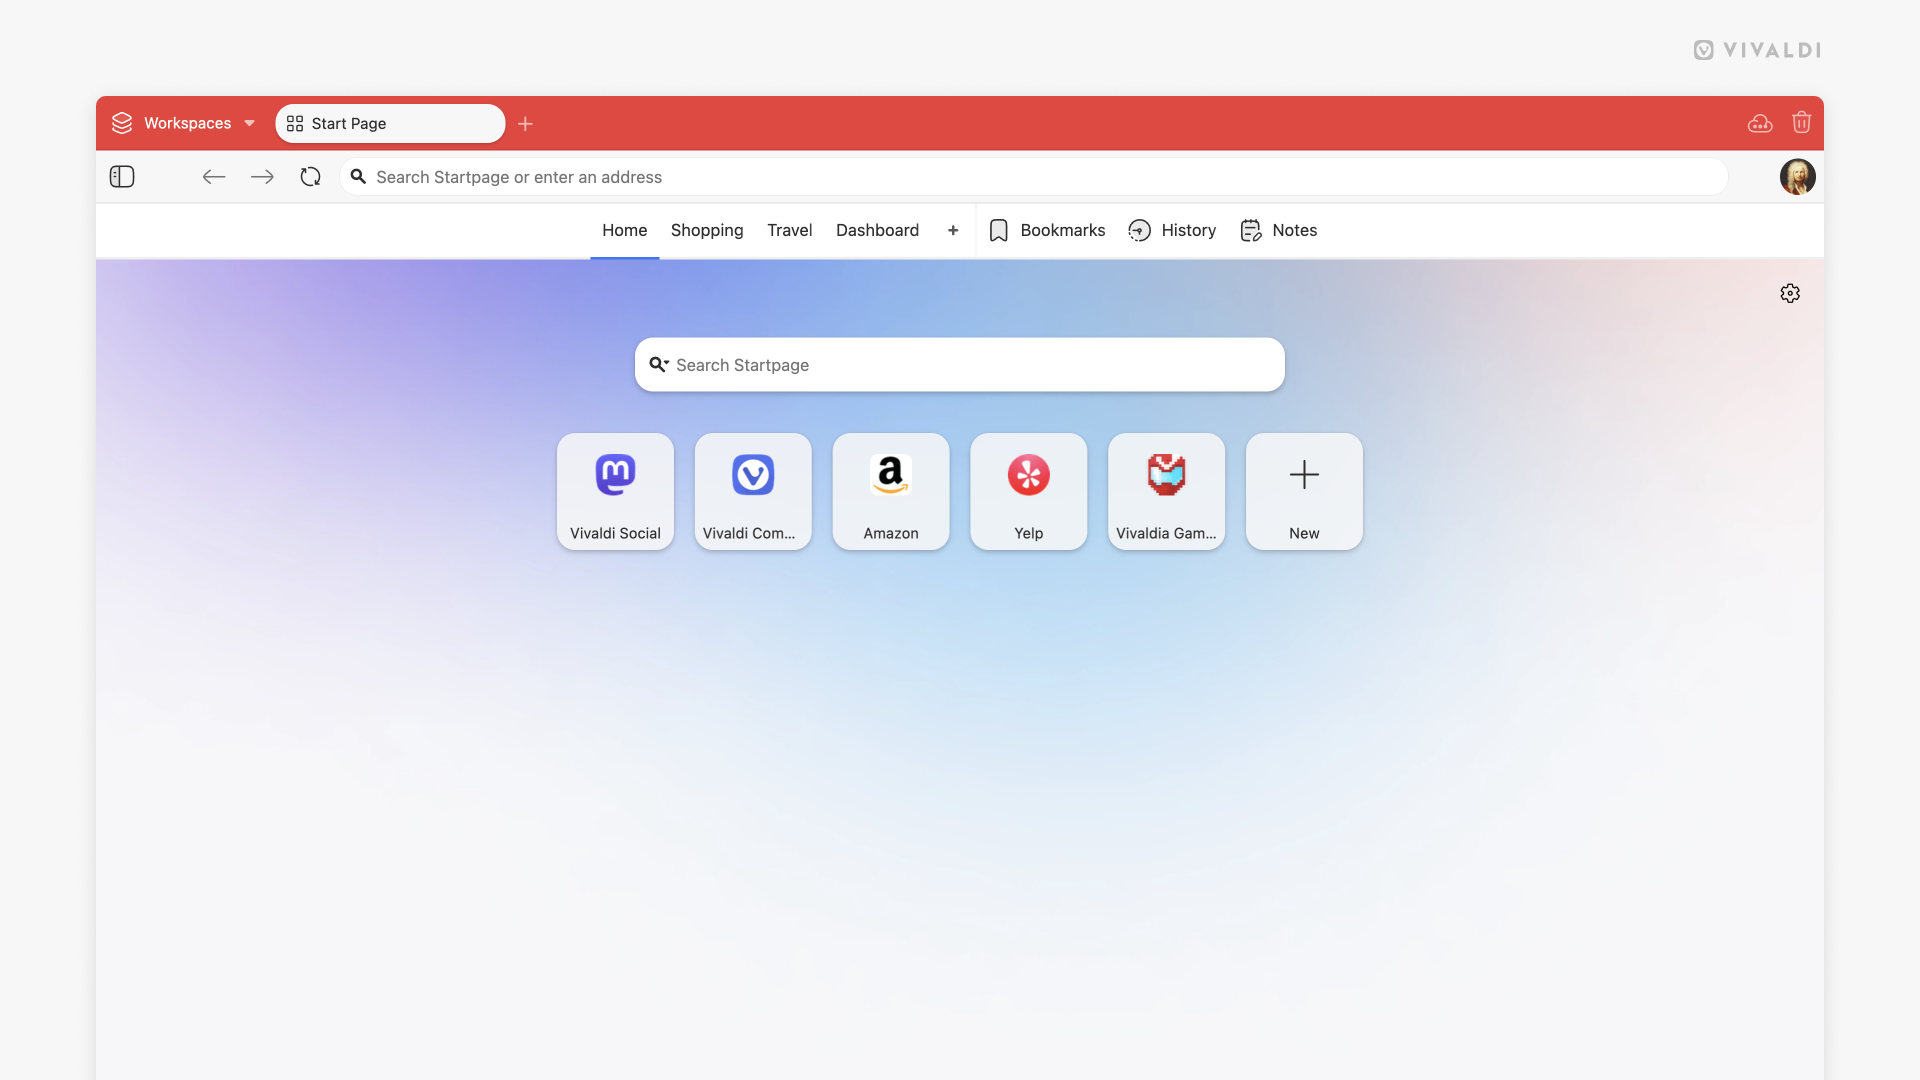
Speed Dials in Vivaldi allow you to quickly access your favourite websites from the Start Page. You can customise the Bookmarks included in your Speed Dial, or add custom Speed Dials and folders to organise your content.
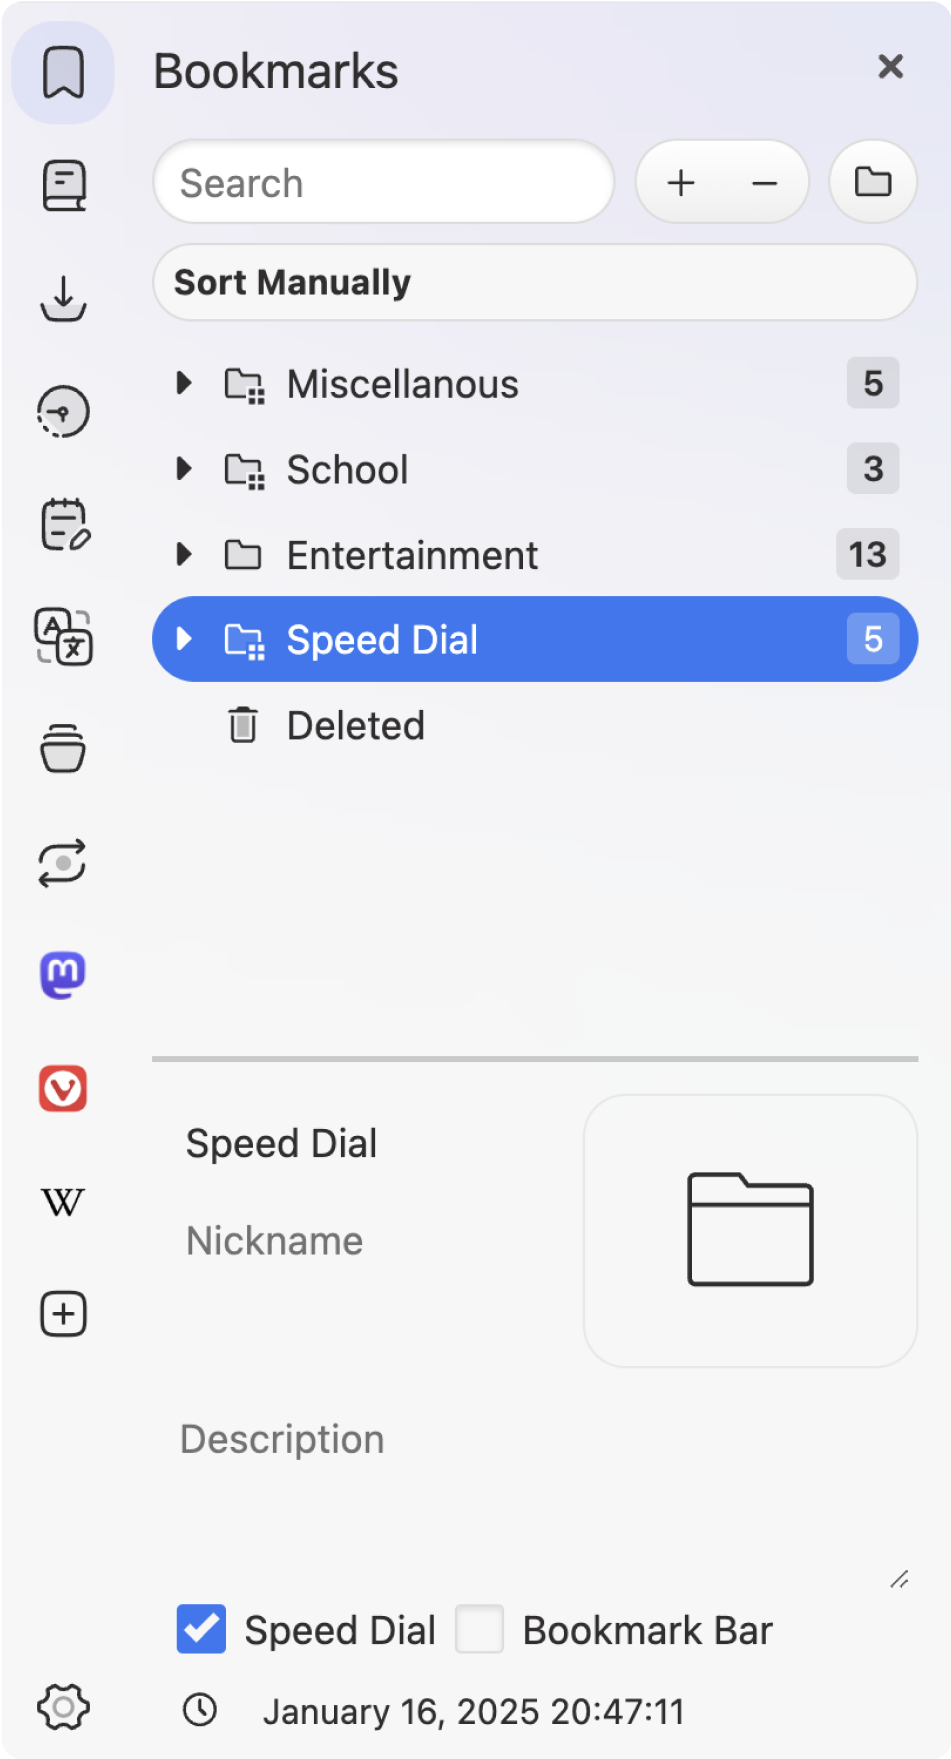
Display a bookmark folder on the Start Page as a Speed Dial
To access bookmarks from a specific bookmarks folder on the Start Page:
Select the folder you want to add as the Speed Dial.
In the bookmark folder information section, tick the box for Speed Dial.
Multiple bookmark folders can be added to the Speed Dial. All Speed Dial folders have a special Speed Dial folder icon in front of the folder name to indicate that they’re Speed Dial folders.
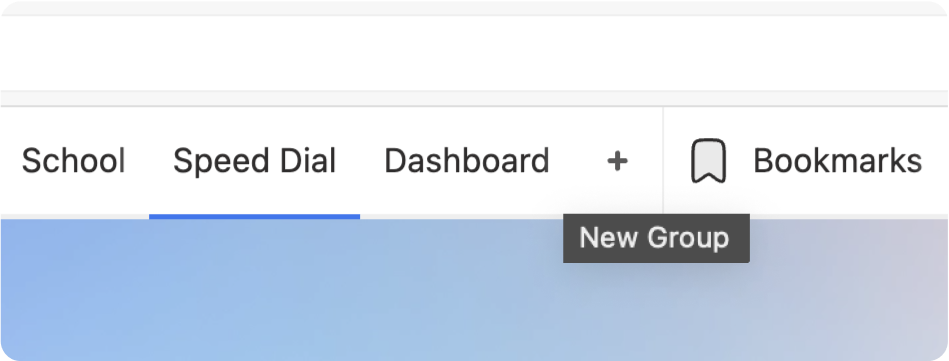
Create a new Speed Dial folder
To create a new Speed Dial group:
Click the New Group button on the Start Page navigation bar (located next to Bookmarks and History entries).
Give the new group a name.
Add or move bookmarks to the new Speed Dial group.
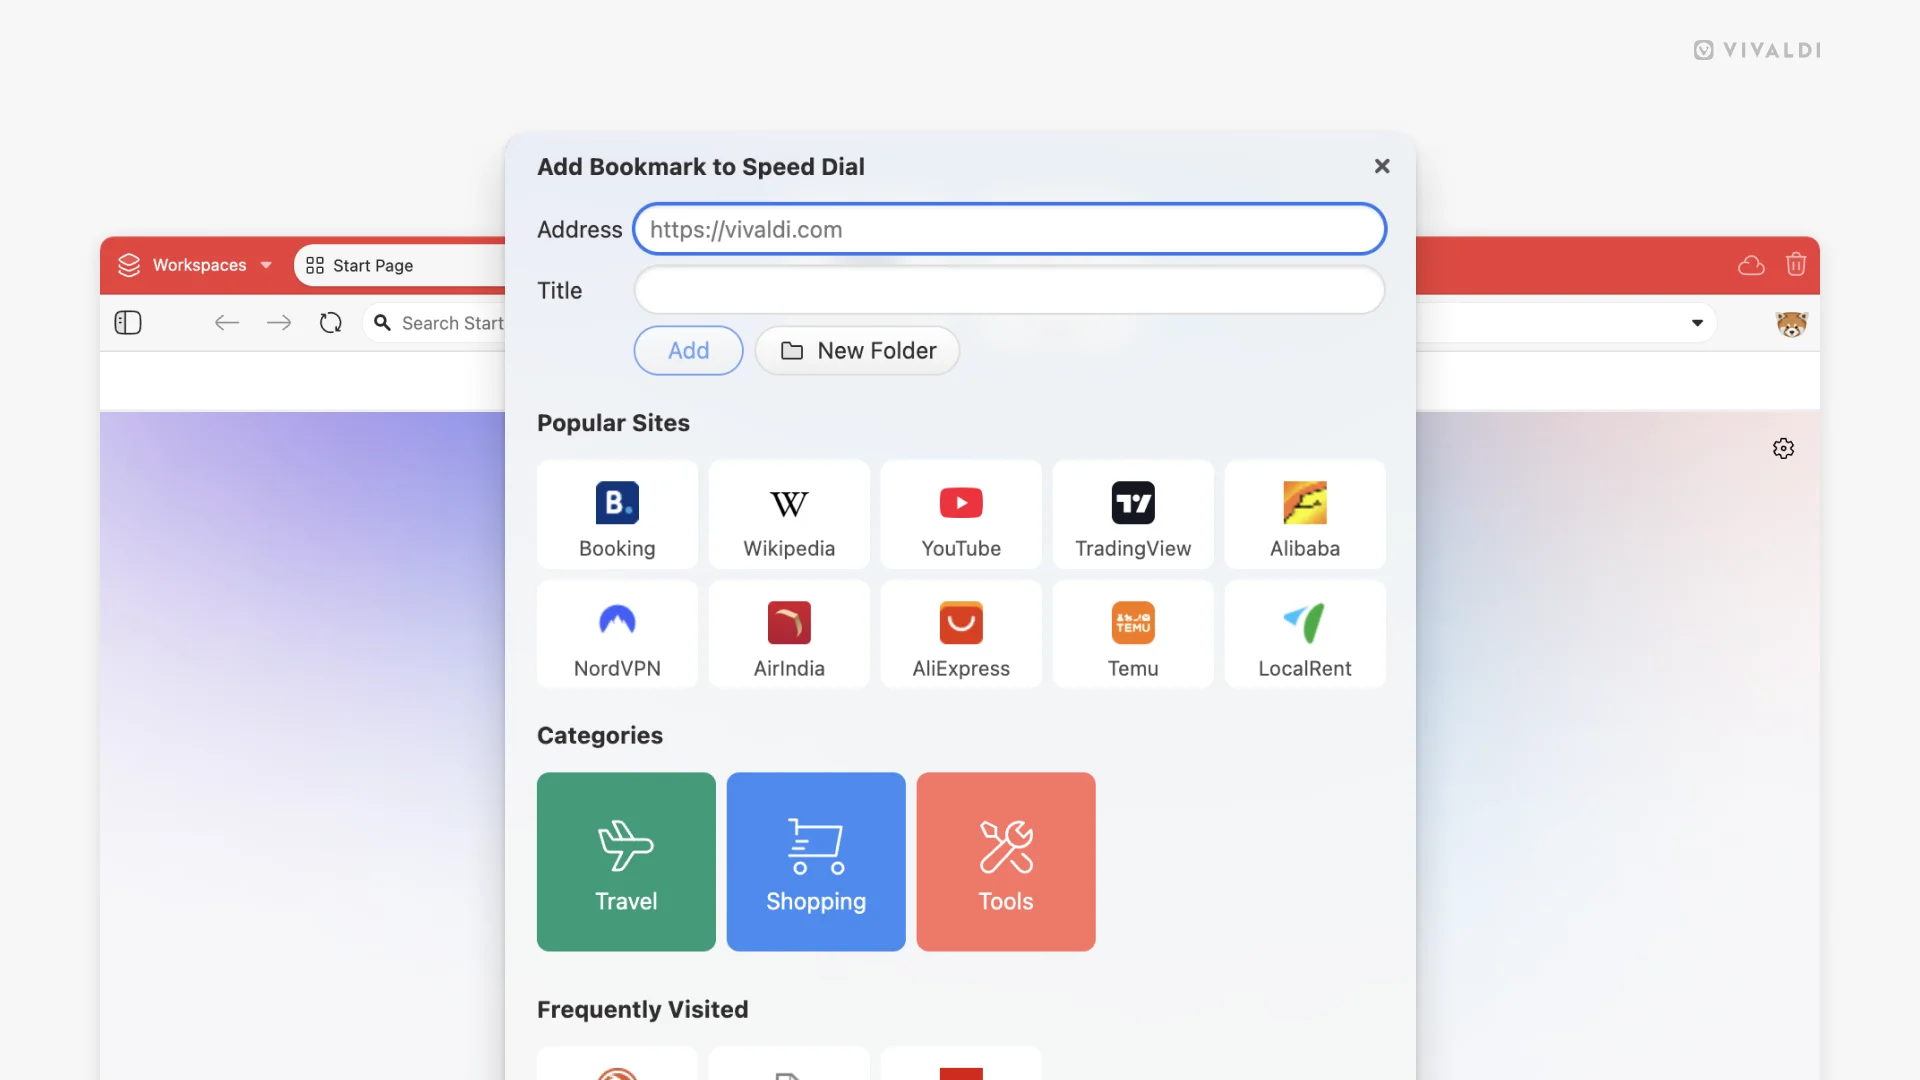
Click on the Add Bookmark to Speed Dial button that’s after the last Speed Dial on the Start Page. Alternatively, right-click on an empty area on the page and select Add Bookmark to Speed Dial from the context menu.
Enter a website address and title or click on the suggestions.
If you entered a link manually, click on Add below the title field, otherwise close the dialog from the close button in the top right corner.
Alternatively, add a bookmark as you prefer doing it, just make sure to add it to the Speed Dial bookmark folder.
To add an existing bookmark, copy or move the bookmark to the bookmark folder that’s set to be displayed on the Speed Dial in the Bookmark Panel or Bookmark Manager.
On the Start Page, Speed Dial bookmarks can only be sorted manually. To reorder the Speed Dials, drag and drop them to place them in the order you prefer.
Hover briefly on the bookmark thumbnail, then click on the in the upper right corner to delete the bookmark from your Speed Dial. Alternatively, delete the bookmark from the Speed Dial folder in the Bookmark Panel or Bookmark Manager.
Add Speed Dial subfolders
To add a new subfolder to the Speed Dial:
Click the big button on the Start Page.
In the section that opens, click New Folder.
Give the new folder a name.
Alternatively, create a new folder or move an existing one to a Speed Dial folder in the Bookmark Panel or Bookmark Manager.
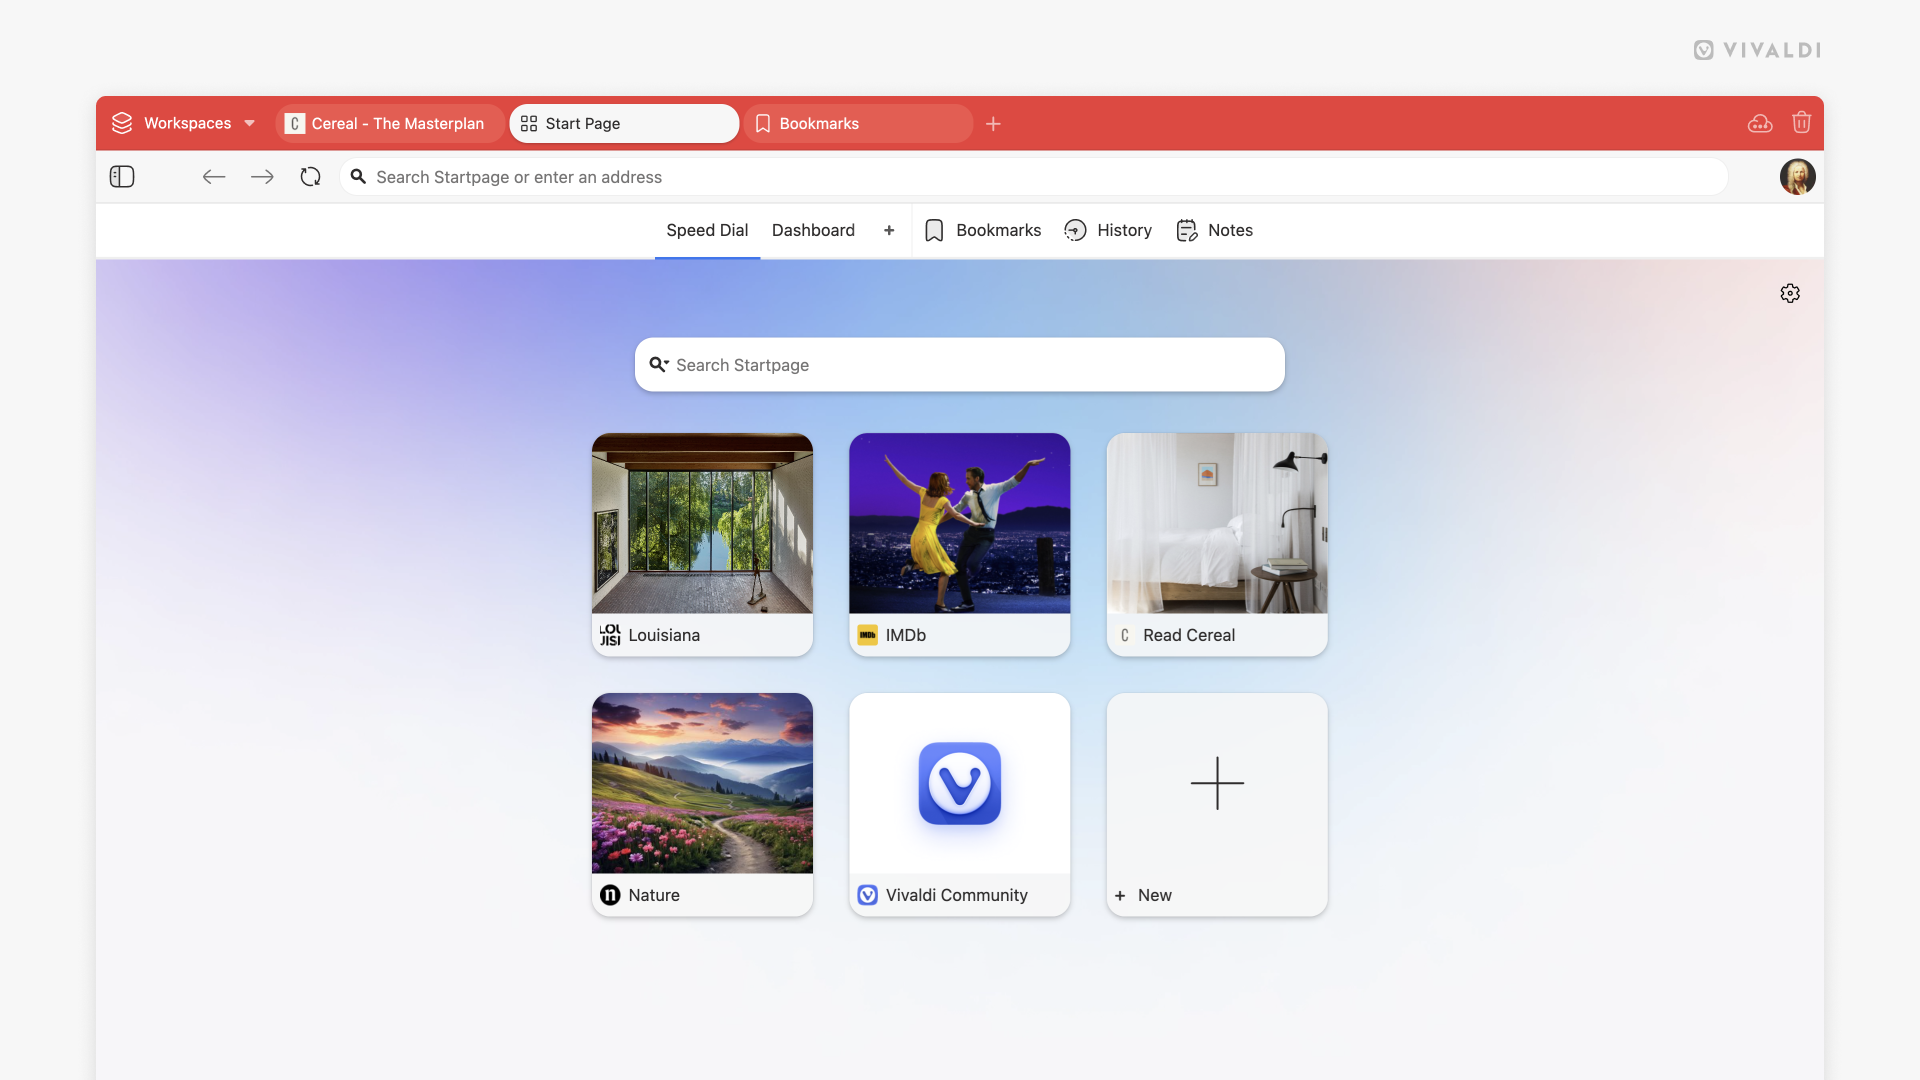
Speed Dial with 3 Speed Dial subfolders (with custom thumbnail images) in the first row and 2 Speed Dial bookmarks in the second row.
Upload a custom thumbnail to a Speed Dial or Speed Dial folder
Hover over the Speed Dial thumbnail and click on the + to select a custom image. Alternatively, right-click a Speed Dial icon or a Speed Dial folder and choose Select Custom Speed Dial Thumbnail option from the context menu.
Select an image to replace the thumbnail. The recommended image size is 440×360 px and most image formats are supported, including animated GIFs.
Note: Vivaldi only stores a reference to an image that is stored locally on your computer. This means that should you either move or delete the image, Vivaldi will no longer have access to it and it will disappear from you Speed Dial. Make sure to store custom speed dial images in a folder that will not be deleted. To remove a thumbnail image from the Speed Dial, right click on the Speed Dial and select Clear Custom Thumbnail.
Choose between the preset backgrounds or add your own background image or colour. To use your own background image, click on Select Image (Background type has to be set to Image).
Reopen Speed Dial with
As you can have multiple Speed Dials and the Dashboard on your Start Page, you might
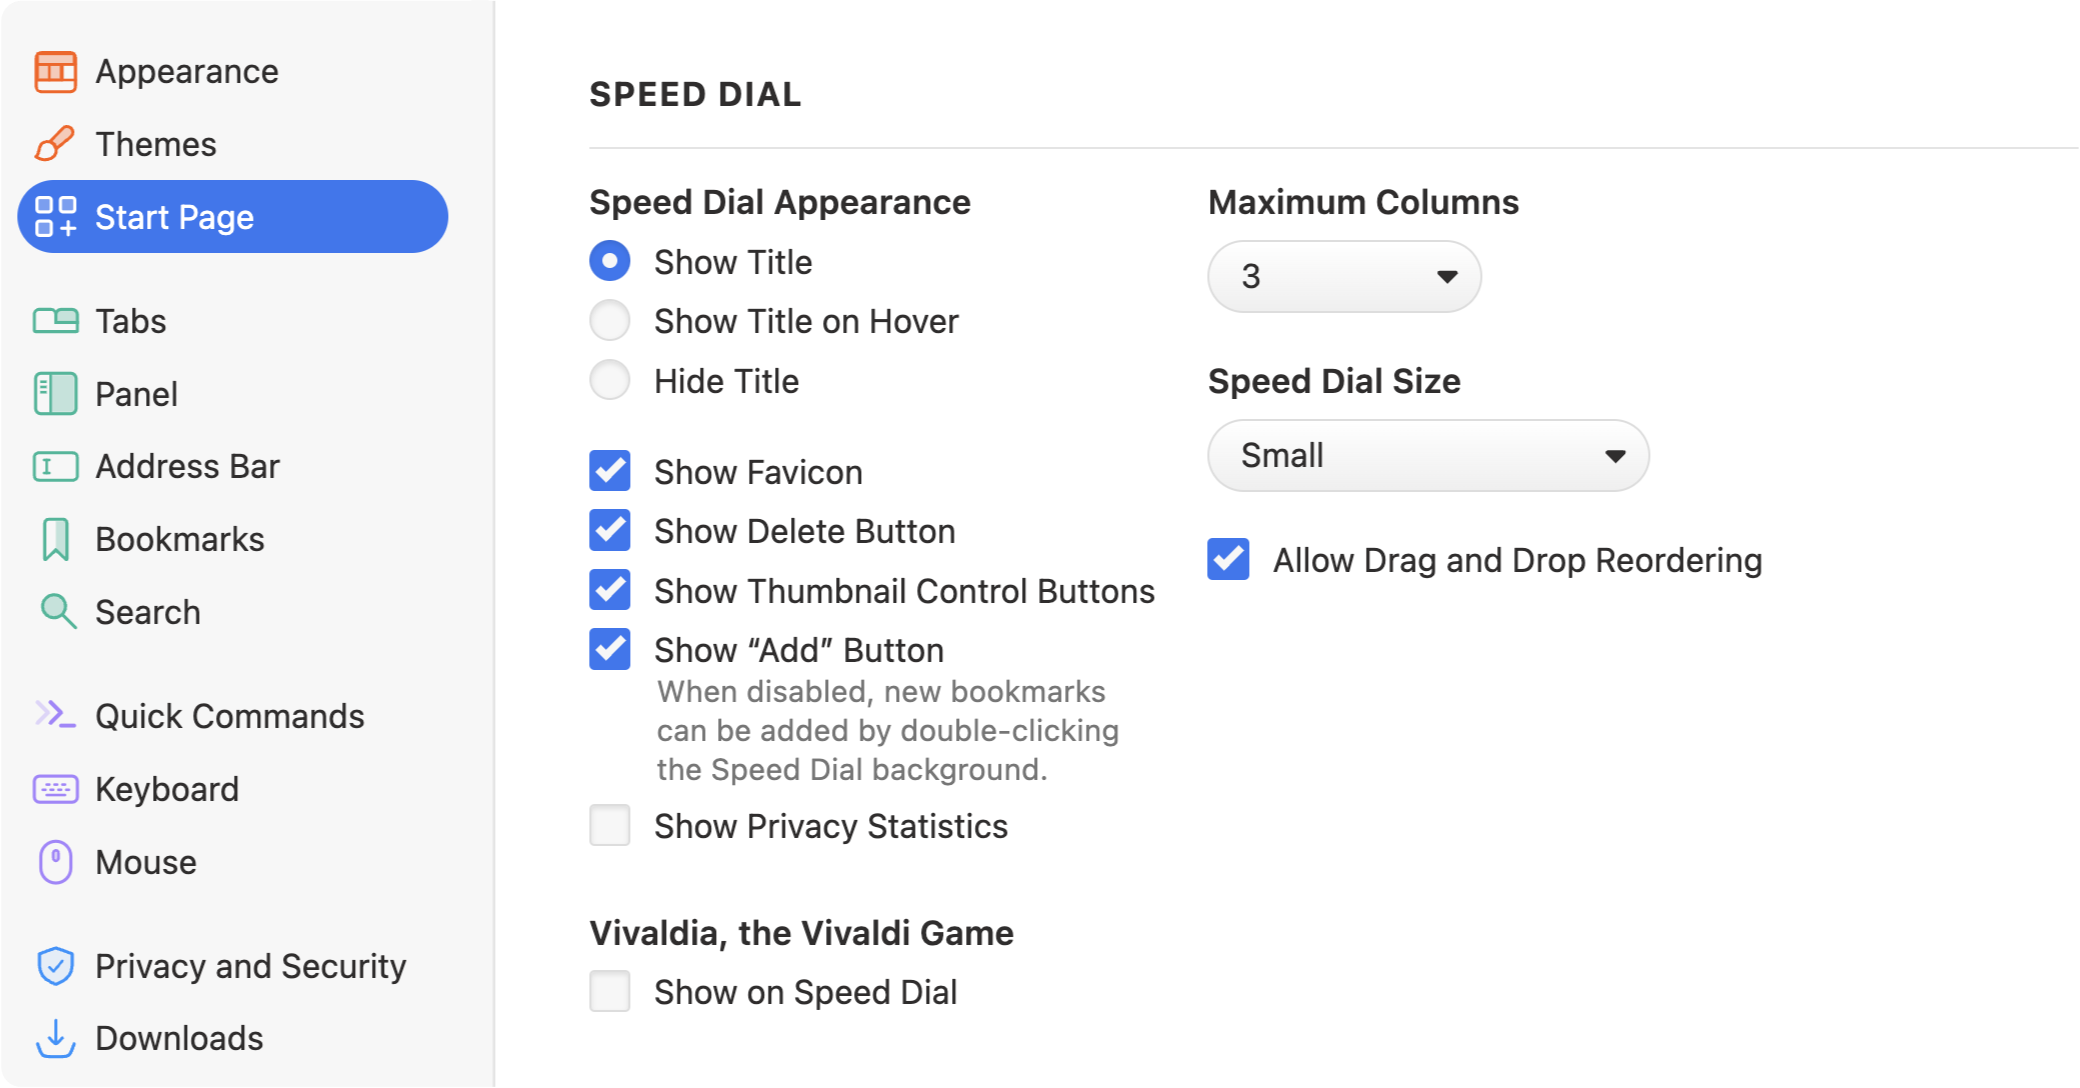
In Settings > Start Page, you can adjust other aspects of Speed Dial behaviour such as:
Toggle display of Speed Dial titles to always show, never show or only show when needed.
Show/Hide the Add button to free up screen real estate.
Change the maximum number of columns that display. The Maximum Columns setting allows you to set the amount columns of thumbnails to be shown per Speed Dial. Select None to let the thumbnails fill in all available space.
Change the Speed Dial thumbnail size. You can pick from 5 different sizes.
Enable/Disable the option to reorder Speed Dials by Drag and Drop.
In case you prefer to access your bookmarks using other options available in the browser and don’t plan on using the Speed Dial, you can change your Homepage, New Tab Page and Startup settings to “disable” the Speed Dial.
Startup options for Vivaldi are configured in Settings > Startup > Startup with section.
Last Session
With this option selected, the browser will open with the Tabs and Windows that were open last time you closed Vivaldi;
When the browser is set to open with the last session, a good option to make it go faster is to Lazy Load the tabs. That way only the active tab is loaded and other Tabs will fully load only when you go to them.
Furthermore, in case you’ve set the browser to open with the Last Session, but for some reason your previous tabs were not restored, click the Closed Tabs button on the far end of the Tab Bar or in the Window Panel to view and reopen recently closed Tabs and Windows.
Homepage
The browser will open with the page you’ve chosen as your homepage in Settings > General > Startup > Homepage.
Start Page
Opens Vivaldi on the Start Page with your Speed Dials;
Specific Pages
Vivaldi can also start by opening a specific web page or multiple pages of your choice.
To open multiple web pages every time you start Vivaldi:
Option 1
Go to Settings > General > Startup > Startup with;
Select Specific Pages as the Startup with option;
Enter a web page’s URL;
Click Add;
Repeat steps 2 and 3 until all the pages you want open on startup are listed.
Option 2
Have only these web pages open, that you want the browser to open with;
Go to Settings > General > Startup > Startup with;
Select Specific Pages as the Startup with option;
Click on Use Current Pages.
To remove a site from the list, click on Remove page next to the URL field.

 Restart button located next to the search input field.